There used to be a tiny bakery tucked behind a vintage bookstore in my old neighborhood that made the most incredible pumpkin bars. When they closed their doors three years ago—just a handwritten sign taped to the window one Tuesday—I honestly felt a little lost. Those bars were my fall ritual, the thing I grabbed on chilly October evenings after work when all I wanted was something sweet that didn’t taste like effort. After twelve tries—twelve, let me tell you, including one batch that turned out more like pumpkin hockey pucks—I finally got it. This recipe is that bakery’s spirit, captured in a single 8×8 pan.
The thing about those original bars was they weren’t fancy. They were simple, spiced just right, and topped with this cloud of maple cream cheese frosting that made you close your eyes on the first bite. I remember standing in my tiny kitchen, the mixer whirring, thinking I’d never get the texture right. But then—batch number eight, I think—it clicked. The batter looked exactly like I remembered: thick, glossy, that perfect pumpkin-orange color. And the frosting? Oh, the frosting. That was the real puzzle, getting the maple flavor to shine without being overwhelming.
Maybe you’ve been there—chasing a recipe from a place that no longer exists. It’s a strange kind of culinary grief, honestly. But here’s the good news: this version is actually better for a weeknight. No complicated steps, no weird ingredients, and it comes together in about 45 minutes flat. That’s the beauty of small-batch baking. You get all the satisfaction without the commitment of a full sheet pan staring at you from the counter.
So whether you’re missing your own favorite bakery or just craving something cozy, these bars deliver. They’re the kind of recipe that makes you wonder why you ever bought them in the first place. Because homemade? It’s always better. And this time, I promise, you won’t need twelve tries.
Why You’ll Love This Recipe
Let’s be real for a second. Weeknight baking can feel like a chore when you’re already tired and hungry. But these pumpkin bars? They’re different. Here’s why this recipe works for real life:
- Quick & Easy: From start to finish, you’re looking at about 45 minutes. That includes cooling time for the frosting. I mean, how often does dessert come together that fast?
- Simple Ingredients: No trips to specialty stores. You probably have most of this in your pantry right now. Canned pumpkin, flour, sugar, eggs, butter—the usual suspects.
- Perfect for Fall Cravings: When that pumpkin spice urge hits, this recipe delivers without making you commit to a full 9×13 pan. Small batch means less temptation, but honestly? It’s still plenty for two people with leftovers.
- Crowd-Pleaser: Every time I’ve brought these to work or shared with neighbors, people ask for the recipe. The maple cream cheese frosting is the secret weapon—it’s not too sweet, just perfectly balanced.
- Unbelievably Delicious: The texture is what gets me every time. Moist, tender, with that slight crumb that holds together perfectly. And the frosting? It’s like autumn in a bowl.
What makes this recipe different from all the others? It’s the ratio, honestly. I tested this until the pumpkin-to-spice balance was exactly right. Not too dense, not too cakey—just that perfect bar texture that melts in your mouth. Plus, the maple cream cheese frosting isn’t an afterthought. It’s the star, whipped until light and fluffy, with real maple syrup giving it that deep, woodsy sweetness.
This recipe is the kind that makes you close your eyes after the first bite. It’s comfort food reimagined—faster, simpler, but with the same soul-soothing satisfaction. Perfect for impressing guests without stress, or turning a simple Tuesday night into something memorable.
What Ingredients You Will Need
This recipe uses simple, wholesome ingredients to deliver that cozy pumpkin flavor without any fuss. Most of these are pantry staples, so you can whip these up whenever the craving hits.
For the Pumpkin Bars
- All-purpose flour, 1 cup (120g) – Spoon and level for best results. Too much flour makes dense bars.
- Granulated sugar, 1/2 cup (100g) – Just enough sweetness without overpowering the pumpkin.
- Light brown sugar, 1/4 cup (50g), packed – Adds moisture and that subtle molasses depth.
- Baking powder, 1 teaspoon – For lift and a tender crumb.
- Baking soda, 1/2 teaspoon – Helps with browning and texture.
- Pumpkin pie spice, 1 1/2 teaspoons – I use McCormick, but any blend works. You can also make your own with cinnamon, ginger, nutmeg, and cloves.
- Ground cinnamon, 1/2 teaspoon – Because you can never have too much cinnamon in pumpkin recipes.
- Salt, 1/4 teaspoon – Balances the sweetness and enhances all the flavors.
- Unsalted butter, 1/4 cup (57g), melted and slightly cooled – Use good butter here; it makes a difference.
- Pure pumpkin puree, 1/2 cup (120g) – Not pumpkin pie filling! Look for 100% pure pumpkin. Libby’s is my go-to.
- Large egg, 1, at room temperature – Cold egg can seize the melted butter; let it sit out for 15 minutes.
- Vanilla extract, 1 teaspoon – Pure vanilla, not imitation, for the best flavor.
- Milk, 2 tablespoons (30ml) – Whole milk works best, but 2% or even oat milk is fine.
For the Maple Cream Cheese Frosting
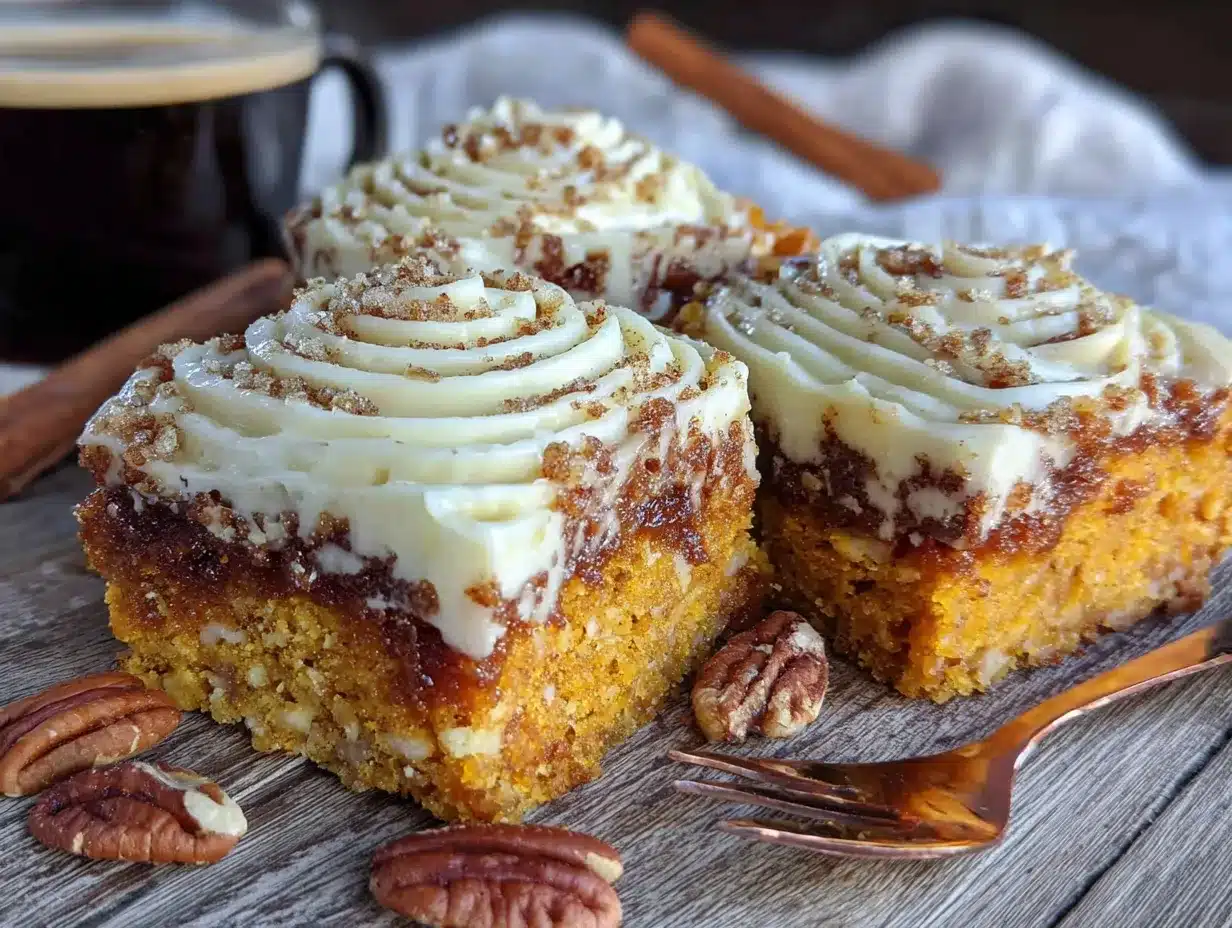
- Cream cheese, 4 oz (113g), softened – Block-style cream cheese, not the spreadable kind. Philadelphia is my trusted brand.
- Unsalted butter, 2 tablespoons (28g), softened – Let it come to room temperature with the cream cheese.
- Pure maple syrup, 2 tablespoons (30ml) – Real maple syrup, not pancake syrup. Grade A dark amber gives the best flavor.
- Powdered sugar, 1 cup (120g), sifted – Sifting prevents lumps and gives a silky smooth frosting.
- Vanilla extract, 1/4 teaspoon – Just a touch to round out the maple.
- Pinch of salt – Optional, but it really makes the maple flavor pop.
Ingredient Selection Tips: For the pumpkin, I always recommend Libby’s because it’s consistently thick and not watery. If you use a different brand, you might need to blot the pumpkin with paper towels to remove excess moisture. For the maple syrup, don’t skip the real stuff. The flavor difference is night and day. And for the cream cheese, make sure it’s softened but not melted. Cold cream cheese creates lumpy frosting, and nobody wants that.
Equipment Needed
You don’t need a fancy kitchen for these bars. Here’s what you’ll need:
- 8×8-inch baking pan – The key to small-batch success. If you only have a 9×9, the bars will be slightly thinner; reduce baking time by 2-3 minutes.
- Parchment paper – Your best friend for easy removal. Leave overhang on two sides for handles.
- Mixing bowls – One medium, one large. I use glass because it’s easy to see when everything’s combined.
- Whisk – For combining dry ingredients without over-mixing.
- Rubber spatula – For folding the batter and scraping every last bit of frosting.
- Hand mixer or stand mixer – For the frosting. You can whisk by hand, but your arm will thank you for the mixer.
- Cooling rack – Essential for even cooling. No cooling rack? Invert a muffin tin and balance the pan on top.
- Measuring cups and spoons – For accuracy. I cannot stress this enough: baking is science.
- Offset spatula – For spreading the frosting evenly. A butter knife works in a pinch.
Budget-Friendly Options: Don’t have an 8×8 pan? Use a 9×5 loaf pan and adjust baking time up by 5-7 minutes. No hand mixer? A sturdy whisk and some elbow grease will do the trick—just make sure your cream cheese is really soft. And if you don’t have parchment paper, grease the pan well with butter and dust with flour.
Preparation Method
- Preheat and Prep: Preheat your oven to 350°F (175°C). Line your 8×8 baking pan with parchment paper, leaving overhang on two opposite sides. This makes lifting the bars out so much easier. Lightly grease the parchment with cooking spray or butter.
- Mix Dry Ingredients: In a medium bowl, whisk together the flour, granulated sugar, brown sugar, baking powder, baking soda, pumpkin pie spice, cinnamon, and salt. Make sure there are no lumps, especially from the brown sugar. Set aside.
- Combine Wet Ingredients: In a large bowl, whisk the melted butter, pumpkin puree, egg, vanilla extract, and milk until smooth. The mixture should be glossy and a beautiful deep orange. If your butter seizes up from cold ingredients, don’t panic. Just whisk vigorously; it will come together.
- Combine Wet and Dry: Pour the dry ingredients into the wet ingredients. Fold gently with a rubber spatula until just combined. Do not overmix! A few streaks of flour are fine; overmixing develops gluten and makes tough bars. The batter will be thick and slightly sticky.
- Bake: Pour the batter into the prepared pan and spread it evenly with the spatula. Bake for 20-25 minutes, or until a toothpick inserted in the center comes out clean or with a few moist crumbs. The edges should be golden and just pulling away from the parchment. Let the bars cool in the pan on a wire rack for 10 minutes, then lift them out using the parchment overhang and cool completely on the rack. This is crucial—warm bars will melt the frosting.
- Make the Frosting: While the bars cool, make the frosting. In a medium bowl, beat the softened cream cheese and butter together with a hand mixer until smooth and creamy, about 2 minutes. Scrape down the sides. Add the maple syrup and vanilla extract, then beat again until combined. Gradually add the sifted powdered sugar, beating on low speed to avoid a sugar cloud, then increase to medium-high and beat for 2-3 minutes until light and fluffy. If the frosting seems too soft, refrigerate for 10 minutes to firm up.
- Frost and Serve: Once the bars are completely cool, spread the frosting evenly over the top using an offset spatula. For clean slices, refrigerate the frosted bars for 20 minutes before cutting. Use a sharp knife, wiping it clean between cuts. Serve chilled or at room temperature.
Sensory Cues: When you fold the batter, it should feel thick and slightly resistant, like a dense muffin batter. The pumpkin aroma should fill your kitchen as it bakes. The frosting should be pillowy and hold a peak when you lift the beaters. And when you take that first bite? The bar should be moist, tender, and perfectly spiced, with the frosting melting slightly against your tongue.
Cooking Tips & Techniques
Let me save you from my own mistakes. Here are the things I learned the hard way:
Don’t Overmix the Batter: This is the number one rookie mistake. Overmixing develops gluten, which makes bars tough and rubbery. Fold until you don’t see dry flour, then stop. A few lumps are fine. Trust me, I ruined batch number three this way.
Room Temperature Ingredients Matter: I know, I know, it’s annoying. But cold egg and cold milk can make your melted butter seize up, creating a lumpy batter. Set your egg and milk on the counter 15 minutes before you start. For the frosting, cold cream cheese creates a lumpy mess. Let it sit out for at least 30 minutes.
Real Maple Syrup is Non-Negotiable: Please don’t use pancake syrup. It’s mostly corn syrup with artificial flavoring. Real maple syrup has that complex, woodsy sweetness that makes the frosting sing. Grade A dark amber is my preference—it has a stronger maple flavor that stands up to the cream cheese.
Cool Completely Before Frosting: I know you’re impatient. I am too. But warm bars will turn your beautiful frosting into a melty puddle. Let them cool completely on a wire rack. If you’re in a hurry, pop them in the fridge for 15 minutes after they’ve cooled to room temperature.
Use Parchment Paper: This isn’t just for easy removal. Parchment paper also helps the bars bake evenly and prevents sticking. Plus, cleanup is a breeze. Worth every penny.
Check for Doneness Early: Ovens vary wildly. Start checking at 20 minutes. A toothpick inserted in the center should come out with a few moist crumbs, not wet batter. If it’s still wet, give it 2-3 more minutes and check again.
Variations & Adaptations
One of the best things about this recipe is how flexible it is. Here are some ways to make it your own:
Gluten-Free Version: Substitute the all-purpose flour with a 1:1 gluten-free baking blend. I’ve used Bob’s Red Mill with great results. Add 1/4 teaspoon xanthan gum if your blend doesn’t already include it. The texture will be slightly more tender, but still delicious.
Dairy-Free Adaptation: Use vegan butter (like Miyoko’s) and dairy-free cream cheese (like Kite Hill). For the milk, oat or almond milk works perfectly. The frosting will be slightly softer, so refrigerate the bars for 30 minutes before serving.
Spice It Up: Add 1/4 teaspoon of ground ginger or a pinch of cardamom to the dry ingredients for a more complex spice profile. I tried this last fall and it was a game-changer. The cardamom adds this unexpected floral note that pairs beautifully with the maple.
Nutty Crunch: Fold 1/4 cup of chopped pecans or walnuts into the batter before baking. Toast them first for extra flavor. Or sprinkle them on top of the frosting for a pretty presentation.
Chocolate Lover’s Twist: Add 1/4 cup of mini chocolate chips to the batter. The combination of pumpkin, maple, and chocolate is surprisingly amazing. I was skeptical, but after trying it, I’m a convert.
Lower Sugar Option: Reduce the granulated sugar to 1/3 cup and skip the brown sugar. The bars will be less sweet, but the frosting adds enough sweetness to compensate. Use a sugar-free maple syrup in the frosting if you’re watching your sugar intake.
Serving & Storage Suggestions
These pumpkin bars are versatile enough for any occasion. Here’s how to serve and store them:
Serving Temperature: I prefer them chilled straight from the fridge. The frosting firms up beautifully, and the bars have a denser, fudgier texture. At room temperature, the frosting softens and the bars become more cake-like. Both are delicious—it just depends on your mood.
Presentation Ideas: Cut into 9 squares for standard servings, or 16 smaller squares for a dessert table. Dust with a little cinnamon or nutmeg before serving. A drizzle of extra maple syrup on the plate looks gorgeous. For a fall party, serve on a wooden board with apple slices and a cup of hot cider.
Complementary Dishes: These bars pair beautifully with a hot cup of coffee or chai tea. For a dessert spread, serve alongside vanilla ice cream or a dollop of whipped cream. They also work well as a sweet addition to a brunch table—think pumpkin bars with scrambled eggs and bacon.
Storage Instructions: Store the frosted bars in an airtight container in the refrigerator for up to 5 days. The flavors actually deepen and meld together after a day or two. For longer storage, freeze the unfrosted bars for up to 3 months. Wrap them tightly in plastic wrap, then foil. Thaw overnight in the refrigerator, then frost before serving.
Reheating Tips: If you prefer warm bars, microwave a single serving for 10-15 seconds. The frosting will soften, and the bar will become warm and gooey. For a crispier edge, reheat in a 350°F oven for 5 minutes.
Flavor Development: Honestly, these bars taste even better on day two. The pumpkin and spice flavors have time to marry, and the frosting sets into a perfect creamy layer. So don’t be afraid to make them a day ahead.
Nutritional Information & Benefits
Here’s the estimated nutritional breakdown per bar (based on 9 servings):
| Nutrient | Amount Per Serving |
|---|---|
| Calories | |
| Total Fat | 14g |
| Saturated Fat | 8g |
| Cholesterol | 55mg |
| Sodium | 210mg |
| Total Carbohydrates | 38g |
| Dietary Fiber | 1g |
| Sugars | 27g |
| Protein | 3g |
Health Benefits: Pumpkin is packed with vitamin A, which supports eye health and immune function. It’s also a good source of fiber and antioxidants. The cream cheese provides calcium and protein, while the maple syrup offers trace minerals like zinc and manganese. Of course, this is still a treat, but it’s one with some redeeming qualities.
Dietary Considerations: This recipe is vegetarian. For gluten-free or dairy-free options, see the variations section. It contains wheat, dairy, and eggs. Not suitable for vegans without substitutions.
Personal Wellness Perspective: I believe in balance. These bars are a celebration of fall flavors, not a daily health food. But using real ingredients—real pumpkin, real maple syrup, real butter—means you’re nourishing your body with whole foods while enjoying something delicious. That’s a win in my book.
Conclusion
So there it is—the recipe I chased for three years, finally captured in a single 8×8 pan. These easy small-batch pumpkin bars with maple cream cheese frosting are everything I loved about that little bakery, minus the nostalgia and plus the satisfaction of making them myself. They’re simple enough for a Tuesday night, special enough for a holiday gathering, and just the right size for when you want dessert without a week’s worth of leftovers.
I hope you give these a try. Don’t be afraid to make them your own—swap in different spices, add nuts, or double the frosting (I won’t judge). The beauty of baking at home is that you’re in control. And honestly? That first bite, when the pumpkin and maple hit your tongue and you close your eyes for just a second? That’s what it’s all about.
I’d love to hear how yours turn out. Drop a comment below and let me know if you added any twists, or just share how many you ate in one sitting (no judgment here). If you loved this recipe, share it with a friend who needs a little fall comfort in their life. Happy baking, friends!
Frequently Asked Questions
Can I use fresh pumpkin instead of canned?
Yes, you can! Just make sure to roast and puree the pumpkin until smooth, then drain any excess liquid using a cheesecloth or paper towels. Fresh pumpkin tends to have more water than canned, which can make the bars soggy. I recommend canned for consistency, but fresh works beautifully if you have the time.
Can I make these bars ahead of time?
Absolutely. You can bake the bars up to two days ahead and store them unfrosted in the fridge. Make the frosting and frost them the day you plan to serve. Or frost them fully and store in the fridge for up to five days. The flavors actually get better after a day or two.
Can I freeze these pumpkin bars?
Yes, but freeze them unfrosted for best results. Wrap the cooled bars tightly in plastic wrap, then foil, and freeze for up to three months. Thaw overnight in the refrigerator, then make fresh frosting and spread it on before serving. Frozen frosted bars can get a bit watery when thawed.
Why did my frosting turn out runny?
Runny frosting usually means your cream cheese or butter was too soft, or you added too much maple syrup. Make sure both are softened but not melted. If your frosting is too thin, refrigerate it for 15-20 minutes to firm up, or add a tablespoon more powdered sugar. If it’s still runny, pop the frosted bars in the fridge for 30 minutes before serving.
Can I double this recipe?
Sure! Double all the ingredients and bake in a 9×13 pan. Increase the baking time to 30-35 minutes, checking for doneness with a toothpick. The frosting recipe doubles perfectly too. Just make sure your pan is large enough—an 8×8 pan won’t hold double the batter without overflowing.
Pin This Recipe!
Best Small-Batch Pumpkin Bars with Maple Frosting
These easy small-batch pumpkin bars with maple cream cheese frosting are everything you love about fall baking—simple, spiced just right, and topped with a cloud of maple cream cheese frosting. Perfect for a weeknight treat without the commitment of a full sheet pan.
- Prep Time: 15 minutes
- Cook Time: 25 minutes
- Total Time: 45 minutes
- Yield: 9 servings 1x
- Category: Dessert
- Cuisine: American
Ingredients
- 1 cup (120g) all-purpose flour
- 1/2 cup (100g) granulated sugar
- 1/4 cup (50g) light brown sugar, packed
- 1 teaspoon baking powder
- 1/2 teaspoon baking soda
- 1 1/2 teaspoons pumpkin pie spice
- 1/2 teaspoon ground cinnamon
- 1/4 teaspoon salt
- 1/4 cup (57g) unsalted butter, melted and slightly cooled
- 1/2 cup (120g) pure pumpkin puree
- 1 large egg, at room temperature
- 1 teaspoon vanilla extract
- 2 tablespoons (30ml) milk
- 4 oz (113g) cream cheese, softened
- 2 tablespoons (28g) unsalted butter, softened
- 2 tablespoons (30ml) pure maple syrup
- 1 cup (120g) powdered sugar, sifted
- 1/4 teaspoon vanilla extract
- Pinch of salt (optional)
Instructions
- Preheat your oven to 350°F (175°C). Line an 8×8-inch baking pan with parchment paper, leaving overhang on two opposite sides. Lightly grease the parchment with cooking spray or butter.
- In a medium bowl, whisk together the flour, granulated sugar, brown sugar, baking powder, baking soda, pumpkin pie spice, cinnamon, and salt until no lumps remain. Set aside.
- In a large bowl, whisk the melted butter, pumpkin puree, egg, vanilla extract, and milk until smooth and glossy.
- Pour the dry ingredients into the wet ingredients. Fold gently with a rubber spatula until just combined. Do not overmix; a few streaks of flour are fine.
- Pour the batter into the prepared pan and spread evenly. Bake for 20-25 minutes, or until a toothpick inserted in the center comes out clean or with a few moist crumbs. Cool in the pan on a wire rack for 10 minutes, then lift out using the parchment overhang and cool completely.
- While the bars cool, make the frosting: In a medium bowl, beat the softened cream cheese and butter together with a hand mixer until smooth and creamy, about 2 minutes. Add the maple syrup and vanilla extract, then beat until combined. Gradually add the sifted powdered sugar, beating on low speed, then increase to medium-high and beat for 2-3 minutes until light and fluffy. If too soft, refrigerate for 10 minutes.
- Once the bars are completely cool, spread the frosting evenly over the top using an offset spatula. For clean slices, refrigerate the frosted bars for 20 minutes before cutting. Serve chilled or at room temperature.
Notes
Don’t overmix the batter to avoid tough bars. Use room temperature ingredients for best results. Real maple syrup is essential for the frosting. Cool bars completely before frosting to prevent melting. For clean slices, refrigerate frosted bars for 20 minutes before cutting.
Nutrition
- Serving Size: 1 bar
- Calories: 285
- Sugar: 27
- Sodium: 210
- Fat: 14
- Saturated Fat: 8
- Carbohydrates: 38
- Fiber: 1
- Protein: 3
Keywords: pumpkin bars, small batch, maple frosting, fall dessert, easy pumpkin recipe, cream cheese frosting


