My neighbor wasn’t throwing a Halloween party. She was just sitting on her porch, watching the rain, with a plate of these cookies balanced on her knee. I’d stopped by to drop off a package that got delivered to my house by mistake, and the smell of butter and vanilla hit me before I even reached the top step. She looked up, shrugged, and said, “Oh, those? Just something I threw together.” And honestly? That casual dismissal made them even more magical. The cookies were perfect—crisp edges, soft centers, and this glossy, smooth icing that looked like stained glass. She didn’t even offer me one until I practically begged, and when I finally bit into one, I understood why she was so nonchalant. When something is this good, you don’t need to make a big deal out of it. It just speaks for itself.
I’ve been making these cozy Halloween sugar cookies every October since that rainy afternoon. There’s something about the process—rolling out the dough, cutting out the little ghosts and pumpkins, piping the icing into neat little lines—that feels like a ritual. Maybe you’ve been there, where a recipe becomes less about the food and more about the feeling it gives you. That’s what these cookies are for me. They’re not about being perfect or Instagram-worthy (though they do look pretty). They’re about slowing down on a chilly evening, with the kettle on and the rain tapping at the window, and making something that tastes like childhood and comfort all at once.
I’ll be honest—the first batch I made after that day was a disaster. I forgot to chill the dough, and my cookies spread into weird, blobby shapes that looked more like sad potatoes than Halloween decorations. But I kept at it, because that first cookie at my neighbor’s house had ruined me for store-bought everything. Now, after years of tweaking and testing, I’ve got a version that’s foolproof, forgiving, and genuinely cozy. No fancy techniques, no stress. Just good cookies and a warm kitchen.
Why You’ll Love This Recipe
Let me tell you why these cookies have earned a permanent spot in my fall rotation. I’ve tested this recipe at least a dozen times—sometimes with friends who’d never baked before, sometimes on a Tuesday night when I needed something to do with my hands. Every single time, they come out exactly right.
- Quick & Easy: The dough comes together in under 15 minutes, and the chilling time does the hard work for you. Perfect for a lazy Sunday or a last-minute Halloween craving.
- Simple Ingredients: You probably have everything in your pantry right now. Butter, sugar, flour, eggs, vanilla—nothing weird or hard to find.
- Perfect for Cozy Evenings: This isn’t a stressful, time-sucking project. It’s the kind of baking you do while listening to a podcast or watching the rain. The icing part is almost meditative.
- Crowd-Pleaser: I’ve brought these to potlucks, to work, to family gatherings. Kids love the shapes, and adults love that they taste like real butter cookies, not the dry, crumbly kind.
- Unbelievably Delicious: The texture is the star here—crisp on the outside, soft and tender on the inside. The royal icing sets up firm enough to stack but stays smooth and glossy.
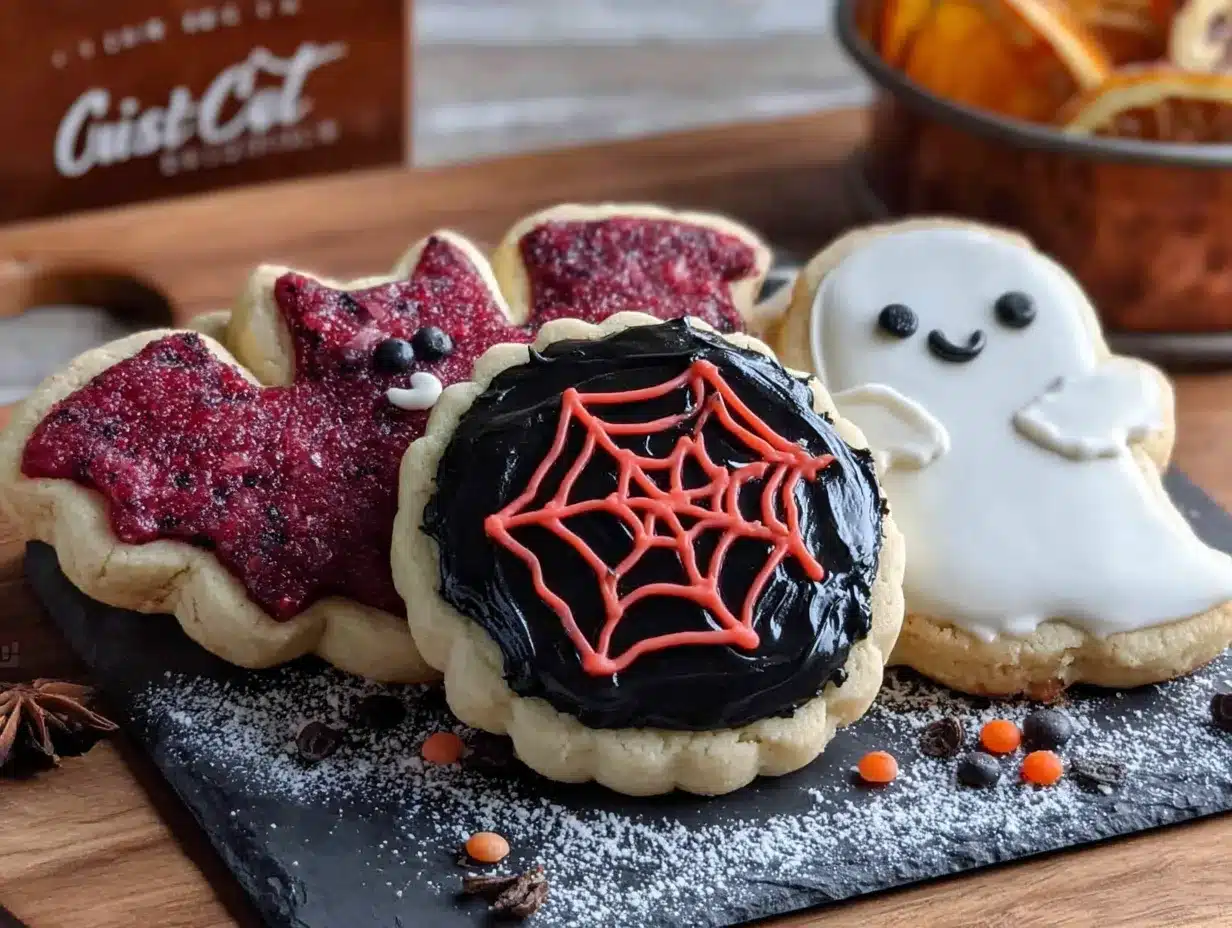
What makes this recipe different from all the other sugar cookie recipes out there? It’s the balance of almond and vanilla extract. Most recipes go heavy on the vanilla, but that little hint of almond in the background gives the cookies a warm, almost nutty depth that makes people say, “What’s in these?” It’s subtle, but it’s the secret weapon. Plus, the royal icing uses meringue powder instead of raw egg whites, so it’s safer, more stable, and dries with a gorgeous matte finish.
This recipe isn’t just good—it’s the kind that makes you close your eyes after the first bite. It’s comfort food reimagined for a cozy Halloween night, without the stress of complicated decorating. Perfect for impressing guests or just treating yourself to something special.
What Ingredients You Will Need
This recipe uses simple, wholesome ingredients to deliver bold flavor and satisfying texture without the fuss. Most of these are pantry staples, so you can probably start baking right now without a trip to the store.
For the Sugar Cookies
- Unsalted butter, softened (1 cup / 226g) — I always use unsalted so I can control the salt level. Let it sit out for about an hour before you start; it should be soft but not melty.
- Granulated sugar (1 cup / 200g) — Regular white sugar gives the cookies that classic crisp edge.
- Large egg (1, room temperature) — Cold eggs can seize the butter mixture, so let yours sit out with the butter.
- Vanilla extract (2 teaspoons) — Pure vanilla is worth the splurge here. Imitation works in a pinch, but the flavor won’t be as warm.
- Almond extract (1/2 teaspoon) — This is my secret ingredient. It adds a subtle, cozy depth that makes these cookies taste homemade in the best way.
- All-purpose flour (2 1/2 cups / 312g) — Spoon and level your flour for the most accurate measurement. Scooping directly from the bag can pack in too much flour and make the cookies dry.
- Baking powder (1 teaspoon) — Helps the cookies puff up just slightly without spreading too much.
- Salt (1/2 teaspoon) — Balances the sweetness and enhances the butter flavor.
For the Royal Icing
- Meringue powder (3 tablespoons) — This is the stable, safe alternative to raw egg whites. I recommend the Wilton brand for consistent results.
- Powdered sugar (4 cups / 480g) — Sift it if you can; lumps in the icing are a pain to pipe around.
- Warm water (5-6 tablespoons) — Start with less and add more as needed. The consistency should be thick but flowy, like honey.
- Vanilla extract (1/2 teaspoon) — Optional, but it gives the icing a little extra flavor.
- Gel food coloring (orange, black, purple, green) — Gel colors are concentrated and don’t thin out the icing like liquid drops do.
Ingredient Tips: For the best texture, use a high-quality butter like Kerrygold or Plugrà. If you don’t have almond extract, you can omit it, but you’ll lose that little something special. For a dairy-free version, swap the butter with a plant-based stick butter (not the spreadable kind in a tub).
Equipment Needed
- Stand mixer or hand mixer — A stand mixer with the paddle attachment makes creaming butter and sugar effortless, but a hand mixer works just fine.
- Rolling pin — A standard rolling pin is great. If you have a French-style pin (without handles), it gives you more control over even pressure.
- Halloween cookie cutters — Ghost, pumpkin, bat, and cat shapes are my favorites. You can find sets at any craft store or online.
- Baking sheets (2-3) — Light-colored, rimmed baking sheets are best. Dark sheets can cause the bottoms to brown too quickly.
- Parchment paper or silicone baking mats — Non-negotiable for easy cleanup and even baking.
- Piping bags and tips — Small round tips (#2 or #3) work best for outlining and flooding. If you don’t have piping bags, a zip-top bag with a tiny corner snipped off works in a pinch.
- Offset spatula — Helps smooth the icing for a clean finish. A butter knife can substitute if you’re in a hurry.
- Cooling rack — Essential for letting cookies cool completely before icing. I’ve made the mistake of icing warm cookies, and it’s a mess.
Budget-Friendly Alternatives: Don’t have a rolling pin? A wine bottle works surprisingly well. No piping bags? Use a sturdy zip-top bag. The cookies will still taste amazing.
Preparation Method
Step 1: Make the Dough
In a large bowl (or the bowl of your stand mixer), beat the softened butter and granulated sugar together on medium speed for about 2-3 minutes, until it’s light and fluffy. Scrape down the sides once or twice. Add the egg, vanilla extract, and almond extract, and beat until well combined. The mixture might look a little curdled at this point—don’t worry, that’s normal.
Step 2: Combine the Dry Ingredients
In a separate bowl, whisk together the flour, baking powder, and salt. Gradually add the dry mixture to the wet mixture, mixing on low speed just until the dough comes together. Don’t overmix, or the cookies will be tough. The dough should be soft but not sticky. If it feels too sticky, add a tablespoon more flour.
Step 3: Chill the Dough
Divide the dough into two disks, wrap each tightly in plastic wrap, and refrigerate for at least 1 hour (or up to 3 days). This step is non-negotiable—chilled dough spreads less and holds its shape better. I once skipped this step and ended up with ghost-shaped blobs that looked more like clouds.
Step 4: Roll and Cut
Preheat your oven to 350°F (175°C). Line your baking sheets with parchment paper. On a lightly floured surface, roll out one disk of dough to about 1/4-inch thickness. Dust your rolling pin with flour if it sticks. Cut out your Halloween shapes and transfer them to the prepared baking sheets, spacing them about 2 inches apart. Gather the scraps, re-roll, and cut again until you’ve used all the dough.
Step 5: Bake
Bake for 8-10 minutes, or until the edges are just barely golden. The centers should still look pale. Let the cookies cool on the baking sheet for 5 minutes, then transfer them to a cooling rack to cool completely. Important: Don’t skip the cooling step—warm cookies will melt your royal icing into a puddle.
Step 6: Make the Royal Icing
In a large bowl, combine the meringue powder and powdered sugar. Add 5 tablespoons of warm water and the vanilla extract (if using). Beat on low speed until combined, then increase to medium-high and beat for 5-7 minutes, until the icing is thick, glossy, and forms stiff peaks. Add more water, one teaspoon at a time, if it’s too thick. The consistency should be like honey—thick enough to hold its shape but fluid enough to spread.
Step 7: Color and Pipe
Divide the icing into small bowls and tint each with gel food coloring. For a cozy Halloween palette, I use a deep orange, a muted purple, a forest green, and black. Transfer each color to a piping bag fitted with a #2 or #3 round tip. Outline each cookie first, then “flood” the inside by piping more icing and spreading it gently with a toothpick or the tip of the piping bag. Let the icing set for at least 2 hours (or overnight) before stacking or storing.
Cooking Tips & Techniques
I’ve learned a few things the hard way so you don’t have to. Here are my best tips for perfect Halloween sugar cookies every time.
Chill the dough thoroughly. I cannot stress this enough. Warm dough spreads like crazy. If your kitchen is warm, pop the cut-out cookies back in the fridge for 10 minutes before baking. It makes a huge difference.
Don’t overbake. Sugar cookies continue to bake on the hot sheet after you pull them out of the oven. The second you see the edges turn golden, they’re done. Slightly underbaked cookies are softer and more tender.
Get the icing consistency right. The biggest mistake I made early on was making the icing too thin. It ran right off the cookies and pooled on the parchment. Aim for a consistency where the icing holds a ribbon on the surface for about 5 seconds before disappearing. If it disappears immediately, add more powdered sugar. If it doesn’t move at all, add a drop of water.
Use a toothpick for details. For tiny details like ghost eyes or pumpkin stems, dip a toothpick in black icing and dot it on. It’s way easier than trying to pipe tiny dots with a bag.
Multitask like a pro. While the dough is chilling, clean up your workspace and get your decorating supplies ready. While the cookies are cooling, make the icing. This keeps the process flowing smoothly and prevents that frantic “where’s my piping tip?” moment.
I once left a batch of iced cookies out on the counter overnight, and the icing got tacky and soft. Now I always let them dry in a cool, dry place—not near the stove or in direct sunlight. A little patience goes a long way.
Variations & Adaptations
One of the best things about this recipe is how flexible it is. Here are a few ways to make it your own.
Gluten-Free Version: Swap the all-purpose flour with a 1:1 gluten-free baking flour blend. I’ve used King Arthur’s Measure for Measure blend with great results. Add an extra tablespoon of milk to the dough if it seems dry.
Vegan Option: Use a plant-based butter stick (like Earth Balance) and a flax egg (1 tablespoon ground flaxseed mixed with 3 tablespoons water, let sit for 5 minutes). The texture will be slightly less tender, but still delicious.
Spiced Variation: Add 1 teaspoon of pumpkin pie spice or cinnamon to the dry ingredients for a warm, autumnal twist. These are perfect for Thanksgiving, too.
No-Icing Option: If royal icing feels like too much work, skip it. Sprinkle the cookies with coarse sanding sugar or colored sugar before baking. They’ll still look festive and taste amazing.
Different Shapes: Don’t limit yourself to Halloween. Use these same cookies for Christmas (snowflakes, trees), Valentine’s Day (hearts), or just everyday snacking (circles, stars). The recipe is a year-round staple.
My personal favorite variation? I add a pinch of cayenne pepper to the dough and use a dark chocolate royal icing. It sounds weird, but the spicy-sweet combo is addictive. I call them “Witch’s Brew” cookies, and they’re always a hit at Halloween parties.
Serving & Storage Suggestions
These cookies are best served at room temperature, with a cup of hot apple cider or a mug of spiced chai. The contrast between the crisp cookie and the smooth icing is pure comfort.
For a Halloween party: Arrange the cookies on a wooden board or a platter lined with a black or orange napkin. Mix different shapes and colors for a festive look. I like to add a few candy corn or chocolate spiders for extra flair.
Storage: Store the cookies in an airtight container at room temperature for up to 1 week. Separate layers with parchment paper to prevent the icing from sticking. Do not refrigerate—the cold can cause the icing to sweat and become sticky.
Freezing: You can freeze the baked, un-iced cookies for up to 3 months. Wrap them tightly in plastic wrap and place them in a freezer bag. When you’re ready to decorate, thaw them at room temperature and make the icing fresh. I do this every year—bake a big batch in September, then decorate throughout October as the mood strikes.
Reheating: These cookies don’t really need reheating, but if you want that just-baked warmth, pop them in a 300°F (150°C) oven for 2-3 minutes. Let them cool slightly before eating—the icing gets a little soft, but it sets back up as they cool.
One thing I’ve noticed: the flavors actually deepen after a day or two. The almond and vanilla meld together, and the cookie softens just slightly. They’re good on day one, but they’re magical on day three.
Nutritional Information & Benefits
Let’s be real—these are cookies, not health food. But that doesn’t mean they can’t be part of a balanced, joyful life. Here’s the estimated nutritional breakdown per cookie (based on 24 cookies with royal icing):
| Nutrient | Amount per Cookie |
|---|---|
| Calories | 185 |
| Total Fat | 8g |
| Saturated Fat | 5g |
| Carbohydrates | 27g |
| Sugar | 18g |
| Protein | 2g |
| Sodium | 85mg |
Health Highlights: Butter contains fat-soluble vitamins A, D, E, and K, which support immune function and bone health. Almond extract adds a touch of antioxidant properties. And honestly? The biggest benefit here is the joy of baking—a proven mood booster that reduces stress and fosters creativity.
Dietary Considerations: This recipe contains dairy, eggs, and gluten. For a dairy-free version, use plant-based butter. For a gluten-free version, use a 1:1 gluten-free flour blend. The royal icing is egg-free thanks to meringue powder, making it safe for those with egg allergies.
My personal take: I believe in treating yourself. A cookie or two with your afternoon tea isn’t going to derail your health goals. It’s the connection, the comfort, and the ritual that matter. So bake these cookies, share them with someone you love, and don’t feel guilty about the sugar. Life is too short for guilt cookies.
Conclusion
These cozy Halloween sugar cookies with royal icing are more than just a recipe—they’re a little moment of peace in a busy season. They’re the smell of butter and vanilla filling your kitchen on a rainy October evening. They’re the quiet satisfaction of piping a perfect little ghost face. They’re the joy of handing a plate of homemade cookies to a friend and watching their face light up.
I’ve made these cookies in every possible state—rushed, distracted, tired, happy—and they’ve never let me down. They’re forgiving, flexible, and genuinely delicious. Whether you’re a seasoned baker or someone who’s never made royal icing before, I promise you can do this. Start simple. Use just one or two colors. Don’t stress about perfection. The cookies will taste amazing no matter what they look like.
So go ahead—preheat your oven, put on your favorite cozy sweater, and make a batch. And when you do, I’d love to hear about it. Leave a comment below and tell me how they turned out, what shapes you used, or if you came up with a fun variation. Share a photo if you’re feeling brave. Let’s make this Halloween a little sweeter, together.
Happy baking, friend. You’ve got this.
Frequently Asked Questions
Can I make the dough ahead of time?
Absolutely. The dough can be refrigerated for up to 3 days or frozen for up to 3 months. Just wrap it tightly in plastic wrap and thaw it in the fridge overnight before rolling.
My royal icing is too runny. What do I do?
Add more powdered sugar, one tablespoon at a time, until it thickens up. If it’s too thick, add water one teaspoon at a time. The right consistency should hold a ribbon on the surface for about 5 seconds.
Can I use liquid food coloring instead of gel?
You can, but liquid coloring will thin out your icing and make it harder to work with. Gel colors are more concentrated and won’t affect the consistency. I recommend AmeriColor or Wilton gel colors.
How do I get clean, sharp edges on my iced cookies?
Outline the cookie first with a slightly thicker icing, let it set for 5-10 minutes, then flood the inside with a thinner icing. The outline acts as a dam, keeping the flood icing from spilling over the edges.
Why did my cookies spread in the oven?
Most likely, the dough wasn’t chilled enough. Pop your cut-out cookies back in the fridge for 10-15 minutes before baking. Also, make sure your butter was softened but not melted, and that you measured your flour correctly.
Pin This Recipe!

Cozy Halloween Sugar Cookies with Royal Icing: Best Easy Recipe

These cozy Halloween sugar cookies have crisp edges, soft centers, and glossy royal icing that looks like stained glass. The perfect balance of vanilla and almond extract makes them unbelievably delicious and a crowd-pleaser for any fall gathering.
- Prep Time: 15 minutes
- Cook Time: 10 minutes
- Total Time: 1 hour 25 minutes (includes 1 hour chilling)
- Yield: 24 servings 1x
- Category: Dessert
- Cuisine: American
Ingredients
- 1 cup (226g) unsalted butter, softened
- 1 cup (200g) granulated sugar
- 1 large egg, room temperature
- 2 teaspoons vanilla extract
- 1/2 teaspoon almond extract
- 2 1/2 cups (312g) all-purpose flour
- 1 teaspoon baking powder
- 1/2 teaspoon salt
- 3 tablespoons meringue powder
- 4 cups (480g) powdered sugar
- 5–6 tablespoons warm water
- 1/2 teaspoon vanilla extract (optional, for icing)
- Gel food coloring (orange, black, purple, green)
Instructions
- Make the dough: In a large bowl, beat softened butter and granulated sugar together on medium speed for 2-3 minutes until light and fluffy. Add egg, vanilla extract, and almond extract; beat until well combined.
- Combine dry ingredients: In a separate bowl, whisk together flour, baking powder, and salt. Gradually add to wet mixture, mixing on low just until dough comes together. Do not overmix.
- Chill the dough: Divide dough into two disks, wrap in plastic wrap, and refrigerate for at least 1 hour (or up to 3 days).
- Roll and cut: Preheat oven to 350°F (175°C). Line baking sheets with parchment paper. On a lightly floured surface, roll out one disk to 1/4-inch thickness. Cut into Halloween shapes and transfer to prepared sheets, spacing 2 inches apart. Re-roll scraps and repeat.
- Bake: Bake for 8-10 minutes until edges are just barely golden. Cool on baking sheet for 5 minutes, then transfer to a cooling rack to cool completely.
- Make royal icing: In a large bowl, combine meringue powder and powdered sugar. Add 5 tablespoons warm water and vanilla extract (if using). Beat on low until combined, then on medium-high for 5-7 minutes until thick, glossy, and forms stiff peaks. Add more water if needed (consistency should be like honey).
- Color and pipe: Divide icing into small bowls and tint with gel food coloring. Transfer to piping bags fitted with #2 or #3 round tips. Outline each cookie, then flood the inside. Let set for at least 2 hours (or overnight) before stacking or storing.
Notes
Chill the dough thoroughly to prevent spreading. Do not overbake; cookies continue to bake on the hot sheet. For icing consistency, aim for honey-like thickness. Use gel food coloring to avoid thinning the icing. Let iced cookies dry in a cool, dry place. Store in an airtight container at room temperature for up to 1 week.
Nutrition
- Serving Size: 1 cookie
- Calories: 185
- Sugar: 18
- Sodium: 85
- Fat: 8
- Saturated Fat: 5
- Carbohydrates: 27
- Protein: 2
Keywords: Halloween sugar cookies, royal icing, easy sugar cookies, Halloween baking, ghost cookies, pumpkin cookies, fall cookies


