There used to be a tiny, no-sign place off Highway 290 in Driftwood, Texas, that made a chili bowl so good it rearranged my understanding of what chili could be. When they closed—just vanished one day, no warning, no farewell sign—I honestly felt a little hollow. That deep, smoky, beef-forward bowl of pure comfort was just… gone.
After twelve tries—and I mean twelve, with some truly sad, watery batches in the beginning—I finally got it. This is that chili. The one that makes you close your eyes on the first spoonful. The one that proves you don’t need beans to make a chili that feels like a hug in a bowl.
Let me tell you, I chased that memory hard. I tried every cut of beef, every combination of dried chiles, every simmer time from thirty minutes to three hours. My neighbors started getting suspicious about the amount of meat I was buying. But honestly, when you know a flavor is out there, waiting to be recreated, you don’t give up. You keep stirring.
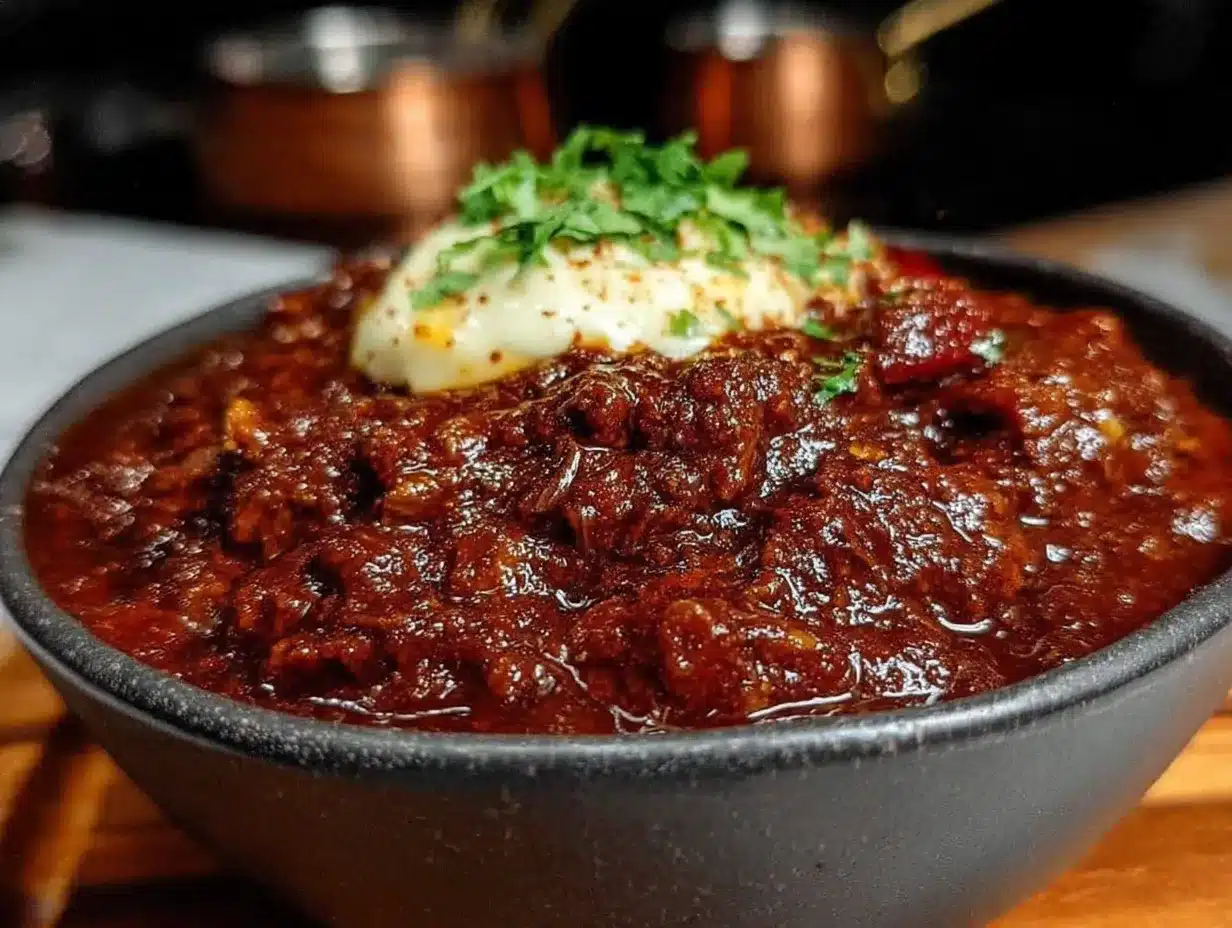
This Wholesome No-Bean Texas Chili Bowl is the result of that obsession. It’s thick, it’s rich, and it’s packed with tender chunks of beef that melt in your mouth. No beans, no fillers, just pure, honest chili that tastes like it’s been simmering all day—even though it comes together in about thirty minutes. Maybe you’ve been there, chasing a ghost recipe from a favorite spot that disappeared. If so, this one’s for you.
Why You’ll Love This Recipe
This isn’t just another chili recipe. It’s the one I’ve tested, tweaked, and perfected until I couldn’t make it any better. Here’s why it’s become my go-to for weeknight dinners and game-day gatherings alike.
- Quick & Easy: Comes together in under 30 minutes, perfect for busy weeknights when you need something hearty fast.
- Simple Ingredients: No fancy grocery trips needed. Ground beef, canned tomatoes, onions, garlic, and a few spices are all it takes.
- Perfect for Meal Prep: This chili actually gets better the next day, making it ideal for Sunday prep or leftovers.
- Crowd-Pleaser: Always gets rave reviews from kids and adults alike. Even bean-lovers won’t miss them.
- Unbelievably Delicious: The texture and flavor combo is next-level comfort food. It’s thick, meaty, and deeply satisfying.
What makes this chili different from the rest? It’s the technique of browning the beef in batches to get that deep, caramelized crust, then letting it simmer just long enough for the flavors to meld without turning the meat mushy. It’s also the perfect balance of smoky, spicy, and savory—no single flavor dominates. This isn’t just another version; it’s my best version, and I’m so excited to share it with you.
This recipe is the kind that makes you close your eyes after the first bite. It’s comfort food reimagined—healthier, faster, but with the same soul-soothing satisfaction. Perfect for impressing guests without stress, or turning a simple Tuesday into something memorable.
What Ingredients You Will Need
This recipe uses simple, wholesome ingredients to deliver bold flavor and satisfying texture without the fuss. Most of these are pantry staples, but I’ve included notes on what to look for at the store.
- 2 pounds ground beef (80/20 blend recommended for best flavor; avoid extra lean as it can be dry)
- 1 large yellow onion, diced (about 1½ cups)
- 4 cloves garlic, minced (fresh is best, but jarred works in a pinch)
- 1 can (14.5 ounces) fire-roasted diced tomatoes (I prefer Muir Glen for their smoky flavor)
- 1 can (8 ounces) tomato sauce (no salt added gives you more control)
- 2 tablespoons tomato paste (double-concentrated from a tube is a game-changer)
- 1 cup beef broth (low sodium; use bone broth for extra richness)
- 2 tablespoons chili powder (I use a blend from Penzeys, but any good brand works)
- 1 tablespoon ground cumin (toast whole cumin and grind it yourself for a flavor boost)
- 1 teaspoon smoked paprika (this is key for that campfire taste)
- 1 teaspoon dried oregano (Mexican oregano if you can find it)
- ½ teaspoon cayenne pepper (adjust to your heat preference; start with ¼ teaspoon if sensitive)
- 1 teaspoon salt (plus more to taste)
- ½ teaspoon black pepper (freshly ground preferred)
- 2 tablespoons olive oil (for browning the beef)
- Optional toppings: shredded cheddar cheese, diced white onion, sour cream, fresh cilantro, sliced jalapeños
When shopping for ground beef, look for a bright red color and avoid packages with excess liquid. For the tomatoes, fire-roasted adds a subtle smokiness that you can’t get from regular diced tomatoes. If you’re sensitive to heat, start with less cayenne and chili powder—you can always add more later.
One ingredient tip I’ve learned: don’t skip the tomato paste. It adds depth and helps thicken the chili naturally. I keep a tube in my fridge at all times for recipes like this.
Equipment Needed
You don’t need a lot of fancy gear for this chili, which is part of its charm. Here’s what I use every time.
- Large Dutch oven or heavy-bottomed pot (5-6 quart capacity; a Le Creuset or Lodge works beautifully)
- Wooden spoon or silicone spatula (for stirring and scraping up browned bits)
- Sharp chef’s knife (for dicing onions and mincing garlic)
- Cutting board (I prefer wood, but plastic is fine)
- Measuring spoons and cups (for accurate seasoning)
- Can opener (a good one saves frustration)
- Slotted spoon (for serving, optional but helpful)
If you don’t have a Dutch oven, a large skillet or heavy-bottomed stockpot will work. Just make sure it’s wide enough to brown the beef in batches without overcrowding. I’ve made this in a stainless steel pot before, and while it worked, the fond (those browned bits on the bottom) didn’t develop as nicely. A heavier pot really makes a difference.
For budget-friendly options, check thrift stores for cast iron Dutch ovens. They last forever and conduct heat beautifully. I found my first one for fifteen dollars, and it’s still going strong.
Preparation Method
This chili comes together fast, so having everything prepped before you start makes the process smooth. Here’s how I do it.
- Prep your ingredients: Dice the onion, mince the garlic, and measure out your spices into a small bowl. Open the cans of tomatoes and tomato sauce. This makes the cooking process seamless.
- Brown the beef: Heat 1 tablespoon of olive oil in your Dutch oven over medium-high heat. Add half the ground beef, breaking it into large chunks with your spoon. Let it cook undisturbed for 3-4 minutes until deeply browned on one side. Stir and continue cooking until no longer pink, about 3 more minutes. Use a slotted spoon to transfer the beef to a bowl, leaving the fat in the pot. Repeat with the remaining oil and beef.
- Sauté the aromatics: Reduce heat to medium. Add the diced onion to the pot with the remaining fat and cook, stirring occasionally, until soft and translucent, about 4 minutes. Add the minced garlic and cook for 30 seconds until fragrant. Scrape up any browned bits from the bottom of the pot—that’s flavor.
- Bloom the spices: Add the chili powder, cumin, smoked paprika, oregano, cayenne, salt, and pepper to the onions. Stir constantly for 30-60 seconds until the spices become fragrant. This step wakes up their flavors and makes the chili more complex.
- Build the chili base: Add the tomato paste and stir for 1 minute, letting it caramelize slightly. Pour in the fire-roasted diced tomatoes (with their juices), tomato sauce, and beef broth. Stir to combine, scraping up any remaining browned bits.
- Simmer the chili: Return the browned beef to the pot, along with any accumulated juices. Bring the chili to a gentle boil, then reduce heat to low. Let it simmer uncovered for 15-20 minutes, stirring occasionally. The chili should thicken slightly and the flavors will meld together. If it seems too thick, add a splash more broth.
- Taste and adjust: After simmering, taste the chili and adjust seasoning. Need more heat? Add a pinch of cayenne. More depth? Another sprinkle of cumin. This is where you make it your own.
- Serve: Ladle into bowls and top with your favorite garnishes. Shredded cheddar, diced onion, a dollop of sour cream, and fresh cilantro are my go-tos. Serve with cornbread or tortilla chips for dipping.
One thing I learned the hard way: don’t rush the browning step. If you crowd the pan, the beef steams instead of browns, and you lose that deep, savory flavor. Take the time to do it in batches—it’s worth it.
Cooking Tips & Techniques
Over the years, I’ve made every mistake in the book with chili. Here are the lessons I learned so you don’t have to repeat them.
Don’t skip the browning. I know it’s tempting to just dump everything in the pot and let it simmer, but that deep, caramelized crust on the beef is the foundation of this chili’s flavor. Let the meat sit undisturbed for a few minutes before stirring. You want a proper sear, not just pale meat.
Toast your spices. Blooming the spices in the hot fat for 30 seconds before adding liquid transforms their flavor. It takes the raw edge off and makes them taste warmer, more rounded. I forgot to do this once, and the chili tasted flat no matter how much I seasoned it later.
Use fire-roasted tomatoes. Regular diced tomatoes work, but fire-roasted adds a subtle smokiness that mimics hours of slow cooking. It’s a shortcut that actually makes the chili taste like it’s been simmering all day.
Let it rest. Chili always tastes better the next day. The flavors continue to meld and deepen as it sits. If you have time, make it a day ahead and reheat gently. But honestly, it’s still fantastic fresh off the stove.
Control the heat. Start with less cayenne than you think you need. You can always add more at the end, but you can’t take it out. I once went overboard and ended up with chili that made my eyes water. Lesson learned.
Don’t overseason at the beginning. As the chili reduces, the flavors concentrate. If it tastes perfectly seasoned after 10 minutes of simmering, it might be too salty or spicy by the time it’s done. Season lightly at first, then adjust at the end.
Variations & Adaptations
This chili is a fantastic base for experimentation. Here are some variations I’ve tried and loved.
Smoky Chipotle Version: Add 1-2 minced chipotle peppers in adobo sauce along with the spices. This gives the chili a deeper, smokier heat that’s incredible with the beef. I tried this after a trip to Austin where every chili had that distinctive smoky kick.
Turkey Chili: Substitute ground turkey for the beef. Use dark meat turkey for best results, and add an extra tablespoon of olive oil since turkey is leaner. The flavor is lighter but still satisfying. My sister makes this version and swears by it.
Slow Cooker Adaptation: Brown the beef and sauté the aromatics on the stovetop, then transfer everything to a slow cooker. Cook on low for 6-8 hours or high for 3-4 hours. The chili will be even more tender and the flavors will meld beautifully. Just be aware that slow cookers don’t reduce liquid as much, so you might need to thicken it with a cornstarch slurry at the end.
Keto-Friendly Option: This recipe is naturally low-carb since it has no beans. Serve it over cauliflower rice or with a side of avocado for a satisfying keto meal. I’ve done this many times and never missed the carbs.
Extra Veggie Version: Add diced bell peppers, zucchini, or mushrooms along with the onions. They’ll cook down and add nutrients without overpowering the beef. My kids actually love this version because they can’t pick out the veggies.
Serving & Storage Suggestions
This chili is versatile enough for casual weeknights or game-day spreads. Here’s how I like to serve and store it.
Serving Temperature: Serve hot, straight from the pot. Ladle into deep bowls and let everyone customize their toppings. The contrast of hot chili with cool sour cream and fresh cilantro is perfection.
Classic Pairings: Cornbread is my number one side—it soaks up the chili juices beautifully. A simple green salad with lime vinaigrette cuts through the richness. For drinks, an ice-cold beer or a tall glass of iced tea is ideal.
Topping Bar: Set out bowls of shredded cheddar, diced white onion, sour cream, fresh cilantro, sliced jalapeños, and pickled red onions. Let everyone build their own bowl. It’s interactive and fun for guests.
Storage: Let the chili cool completely, then transfer to an airtight container. It will keep in the refrigerator for up to 5 days. The flavors actually deepen over time, so leftovers are a treat.
Freezing: This chili freezes beautifully. Portion it into freezer-safe bags or containers, leaving a little room for expansion. It will keep for up to 3 months. Thaw overnight in the refrigerator and reheat gently on the stovetop or in the microwave.
Reheating: Reheat in a pot over medium-low heat, stirring occasionally. Add a splash of broth or water if it’s too thick. You can also microwave individual portions in 30-second bursts, stirring between each.
One thing I love about this chili: it tastes even better the next day. The spices have time to settle, and the beef absorbs all that savory goodness. I often make a double batch just for the leftovers.
Nutritional Information & Benefits
This chili is packed with protein and flavor, making it a satisfying meal that fits into a balanced diet. Here’s a rough breakdown per serving (based on 6 servings, without toppings).
- Calories: 380
- Protein: 32g
- Fat: 22g
- Carbohydrates: 12g
- Fiber: 3g
- Sugar: 6g
- Sodium: 780mg
This recipe is naturally gluten-free and low-carb, making it suitable for a variety of dietary needs. The ground beef provides high-quality protein and essential nutrients like iron, zinc, and B vitamins. The tomatoes are rich in lycopene, an antioxidant that supports heart health.
If you’re watching your sodium, use no-salt-added canned tomatoes and broth, and adjust the salt at the end. You can also use leaner ground beef to reduce the fat content, though I find 80/20 gives the best flavor and texture.
From a wellness perspective, this chili is the kind of meal that makes you feel good without feeling deprived. It’s hearty and satisfying, but it won’t weigh you down. I love that I can serve it to my family knowing it’s packed with real, wholesome ingredients.
Frequently Asked Questions
Can I make this chili with a different type of meat?
Absolutely. Ground turkey, chicken, or even bison work well. Just adjust the cooking time and add a little extra oil if using lean meat. For a chunkier texture, you can use cubed chuck roast instead of ground beef—just simmer it for 45 minutes to an hour until tender.
How can I make this chili spicier?
Add more cayenne pepper, or stir in a minced chipotle pepper in adobo sauce. You can also use a spicier chili powder blend or add a dash of hot sauce at the end. Start small and taste as you go—you can always add more heat.
Can I add beans to this recipe?
Technically, yes, but then it wouldn’t be a Texas chili. If you want beans, stir in a can of drained and rinsed kidney or pinto beans during the last 10 minutes of simmering. It will still be delicious, just not authentic Texas style.
How do I thicken the chili if it’s too thin?
Let it simmer uncovered for an additional 5-10 minutes to reduce the liquid. You can also mash a few tablespoons of the chili against the side of the pot to release the starches, or stir in a cornstarch slurry (1 tablespoon cornstarch mixed with 2 tablespoons cold water).
Can I make this in an Instant Pot?
Yes! Use the sauté function to brown the beef and cook the aromatics, then add the remaining ingredients. Pressure cook on high for 10 minutes, then do a natural release for 10 minutes. The flavor won’t be quite as deep as the stovetop version, but it’s still fantastic for busy nights.
Conclusion
This Wholesome No-Bean Texas Chili Bowl is more than just a recipe—it’s a piece of my culinary history, recreated with love and a whole lot of trial and error. It’s the chili I turn to when I need comfort, when I want to impress, and when I just want something honest and good on the table.
I hope you’ll make it your own. Add your favorite toppings, adjust the heat to your liking, and don’t be afraid to experiment. That’s what cooking is all about, right? Taking something good and making it yours.
If you try this recipe, I’d love to hear how it turned out. Drop a comment below, share your topping combinations, or tag me in your chili photos. And if you’re craving more hearty, wholesome meals, check out my hearty beef stew recipe or this smoky sweet potato soup for more cozy bowl inspiration.
Until next time, keep stirring, keep tasting, and never stop chasing those flavors that make you close your eyes and smile.
PrintWholesome No-Bean Texas Chili Bowl: Easy 30-Minute Recipe

A thick, rich, and smoky no-bean Texas chili packed with tender chunks of beef that comes together in about 30 minutes. Perfect for weeknight dinners and game-day gatherings.
- Prep Time: 10 minutes
- Cook Time: 20 minutes
- Total Time: 30 minutes
- Yield: 6 servings 1x
- Category: Main Course
- Cuisine: Tex-Mex
Ingredients
- 2 pounds ground beef (80/20 blend recommended)
- 1 large yellow onion, diced (about 1½ cups)
- 4 cloves garlic, minced
- 1 can (14.5 ounces) fire-roasted diced tomatoes
- 1 can (8 ounces) tomato sauce (no salt added)
- 2 tablespoons tomato paste (double-concentrated)
- 1 cup beef broth (low sodium)
- 2 tablespoons chili powder
- 1 tablespoon ground cumin
- 1 teaspoon smoked paprika
- 1 teaspoon dried oregano (Mexican oregano preferred)
- ½ teaspoon cayenne pepper (adjust to taste)
- 1 teaspoon salt (plus more to taste)
- ½ teaspoon black pepper (freshly ground)
- 2 tablespoons olive oil
- Optional toppings: shredded cheddar cheese, diced white onion, sour cream, fresh cilantro, sliced jalapeños
Instructions
- Prep your ingredients: Dice the onion, mince the garlic, and measure out your spices into a small bowl. Open the cans of tomatoes and tomato sauce.
- Brown the beef: Heat 1 tablespoon of olive oil in your Dutch oven over medium-high heat. Add half the ground beef, breaking it into large chunks. Let it cook undisturbed for 3-4 minutes until deeply browned on one side. Stir and continue cooking until no longer pink, about 3 more minutes. Use a slotted spoon to transfer the beef to a bowl, leaving the fat in the pot. Repeat with the remaining oil and beef.
- Sauté the aromatics: Reduce heat to medium. Add the diced onion to the pot with the remaining fat and cook, stirring occasionally, until soft and translucent, about 4 minutes. Add the minced garlic and cook for 30 seconds until fragrant. Scrape up any browned bits from the bottom of the pot.
- Bloom the spices: Add the chili powder, cumin, smoked paprika, oregano, cayenne, salt, and pepper to the onions. Stir constantly for 30-60 seconds until the spices become fragrant.
- Build the chili base: Add the tomato paste and stir for 1 minute, letting it caramelize slightly. Pour in the fire-roasted diced tomatoes (with their juices), tomato sauce, and beef broth. Stir to combine, scraping up any remaining browned bits.
- Simmer the chili: Return the browned beef to the pot, along with any accumulated juices. Bring the chili to a gentle boil, then reduce heat to low. Let it simmer uncovered for 15-20 minutes, stirring occasionally. If it seems too thick, add a splash more broth.
- Taste and adjust: After simmering, taste the chili and adjust seasoning. Add more cayenne for heat or cumin for depth as desired.
- Serve: Ladle into bowls and top with your favorite garnishes. Serve with cornbread or tortilla chips for dipping.
Notes
Don’t rush the browning step; do it in batches for deep flavor. Toast spices in hot fat for 30 seconds before adding liquid. Chili tastes even better the next day. For a smoky chipotle version, add 1-2 minced chipotle peppers in adobo sauce. For a slow cooker adaptation, brown beef and sauté aromatics on stovetop, then transfer to slow cooker and cook on low for 6-8 hours or high for 3-4 hours.
Nutrition
- Serving Size: 1 serving (about 1½
- Calories: 380
- Sugar: 6
- Sodium: 780
- Fat: 22
- Saturated Fat: 8
- Carbohydrates: 12
- Fiber: 3
- Protein: 32
Keywords: Texas chili, no-bean chili, easy chili recipe, 30-minute chili, ground beef chili, gluten-free chili, low-carb chili


