This was supposed to be a simple custard pie. I had the crust chilling, the milk heating on the stove, and a dozen egg yolks waiting to be tempered. But somewhere between answering a question about homework and wiping down the counter, I grabbed the carton of heavy cream instead of the whole milk. The whole thing went into the saucepan before I even realized what I’d done. And honestly, I was already running late, the kids were hungry, and I just stood there staring at this overly rich, creamy mess thinking, well, that pie is ruined.
But I wasn’t about to throw away a dozen eggs and a pint of cream, you know? So I kept stirring, added a little extra sugar, a pinch of nutmeg, and a splash of vanilla I had stashed in the back of the cabinet. The mixture thickened into something that smelled incredible, like the holidays in a pot. I poured it into a pitcher, stuck it in the fridge, and figured I’d deal with it later. The next day, my family gathered around the table, and I poured everyone a small glass of this accidental creation. My husband took one sip and said, “This is the best eggnog we’ve ever had.” I didn’t even correct him. I just smiled and poured myself another cup.
That happy accident turned into my go-to recipe for feeding a crowd without breaking the bank. It’s rich, creamy, and tastes like you spent all day fussing, but honestly, it comes together in about twenty minutes. I’ve made it for holiday parties, New Year’s Eve gatherings, and even a few cozy Sunday dinners when we just needed something special. Maybe you’ve been there, staring at a kitchen mishap and wondering if you should just order pizza. Let me tell you, this eggnog is proof that sometimes the best recipes come from the moments we think we’ve messed up. It’s the recipe I keep coming back to, year after year.
Why You’ll Love This Recipe
This isn’t just another eggnog recipe. It’s the one that saves you money, time, and a whole lot of stress when you’ve got a crowd to feed. I’ve tested it in my own kitchen more times than I can count, and it always delivers that rich, velvety texture without the need for expensive ingredients or fancy equipment.
- Budget-Friendly: Uses simple pantry staples like eggs, milk, and sugar, so you don’t have to hunt down pricey specialty items.
- Quick & Easy: Ready in under 30 minutes, most of which is hands-off simmering time. Perfect for busy holiday prep.
- Crowd-Pleaser: Kids and adults both love it. The creamy sweetness and warm spices hit that nostalgic spot every single time.
- Make-Ahead Friendly: Tastes even better after a day in the fridge, so you can prep it the night before your party.
- Customizable: Easy to adjust for dietary needs, whether you want it lighter, dairy-free, or spiked with a splash of bourbon.
What makes this recipe different from the rest? It’s the technique. Instead of fussing with a double boiler or worrying about curdled eggs, you temper the yolks slowly with warm milk and cream, then let the mixture thicken gently over low heat. No stress, no scrambling, just a foolproof method that works every time. It’s the kind of recipe that makes you look like a pro, even if you’re multitasking with a toddler on your hip.
This eggnog isn’t just good. It’s the kind that makes you close your eyes after the first sip and remember every holiday you’ve ever loved. It’s comfort in a cup, reimagined to be faster, cheaper, and just as soul-soothing as the fancy stuff.
What Ingredients You Will Need
This recipe uses simple, wholesome ingredients to deliver bold flavor and satisfying texture without the fuss. Most of these are already in your kitchen, which is exactly what you want when feeding a crowd on a budget.
- 6 large eggs, separated (room temperature helps them blend smoothly)
- 3/4 cup granulated sugar (divided, half goes into the yolks, half into the whites)
- 4 cups whole milk (adds richness without the cost of extra cream)
- 1 cup heavy cream (for that luxurious texture, use a store brand to save money)
- 1 teaspoon vanilla extract (pure vanilla is best, but imitation works fine)
- 1/2 teaspoon ground nutmeg (freshly grated if you have it, but pre-ground is perfectly fine)
- 1/4 teaspoon ground cinnamon (optional, but adds a lovely warmth)
- Pinch of salt (balances the sweetness and enhances flavors)
For the egg whites, you’ll whip them into soft peaks and fold them in at the end. This gives the eggnog that light, frothy top that feels so special. I recommend using a brand like Land O’Lakes for the butter and cream if you can, but honestly, any store brand works just as well. The key is whole milk, not skim, because you need that fat for the creamy texture.
If you’re looking for substitutions, you can swap the heavy cream with half-and-half for a lighter version, or use oat milk and coconut cream for a dairy-free alternative. For a lower-sugar option, reduce the sugar to 1/2 cup, though it will be less sweet. And if you want to make it boozy, add 1 cup of bourbon, rum, or brandy after cooking, stirring it in once the mixture has cooled slightly.
One tip I’ve learned the hard way: use fresh eggs. Older eggs can have a stronger smell and won’t whip up as nicely. Look for eggs with a firm yolk and clear white for the best results.
Equipment Needed
You don’t need a fancy kitchen to make this eggnog. A few basic tools will do the job perfectly.
- Large saucepan (heavy-bottomed is best to prevent scorching)
- Mixing bowls (one for yolks, one for whites)
- Whisk (a sturdy one, not a flimsy wire whisk)
- Hand mixer or stand mixer (for whipping the egg whites, but a strong arm and a whisk work too)
- Fine-mesh strainer (optional, but helps catch any cooked egg bits for a silky texture)
- Pitcher or large jar (for storing the finished eggnog)
- Measuring cups and spoons
If you don’t have a hand mixer, you can whip the egg whites with a whisk, but it’ll take about 5-7 minutes of steady arm work. I’ve done it, and honestly, it’s a good arm workout! For the strainer, a regular colander lined with cheesecloth works in a pinch. And if you don’t have a heavy-bottomed saucepan, just keep the heat low and stir constantly to avoid burning the milk.
Preparation Method
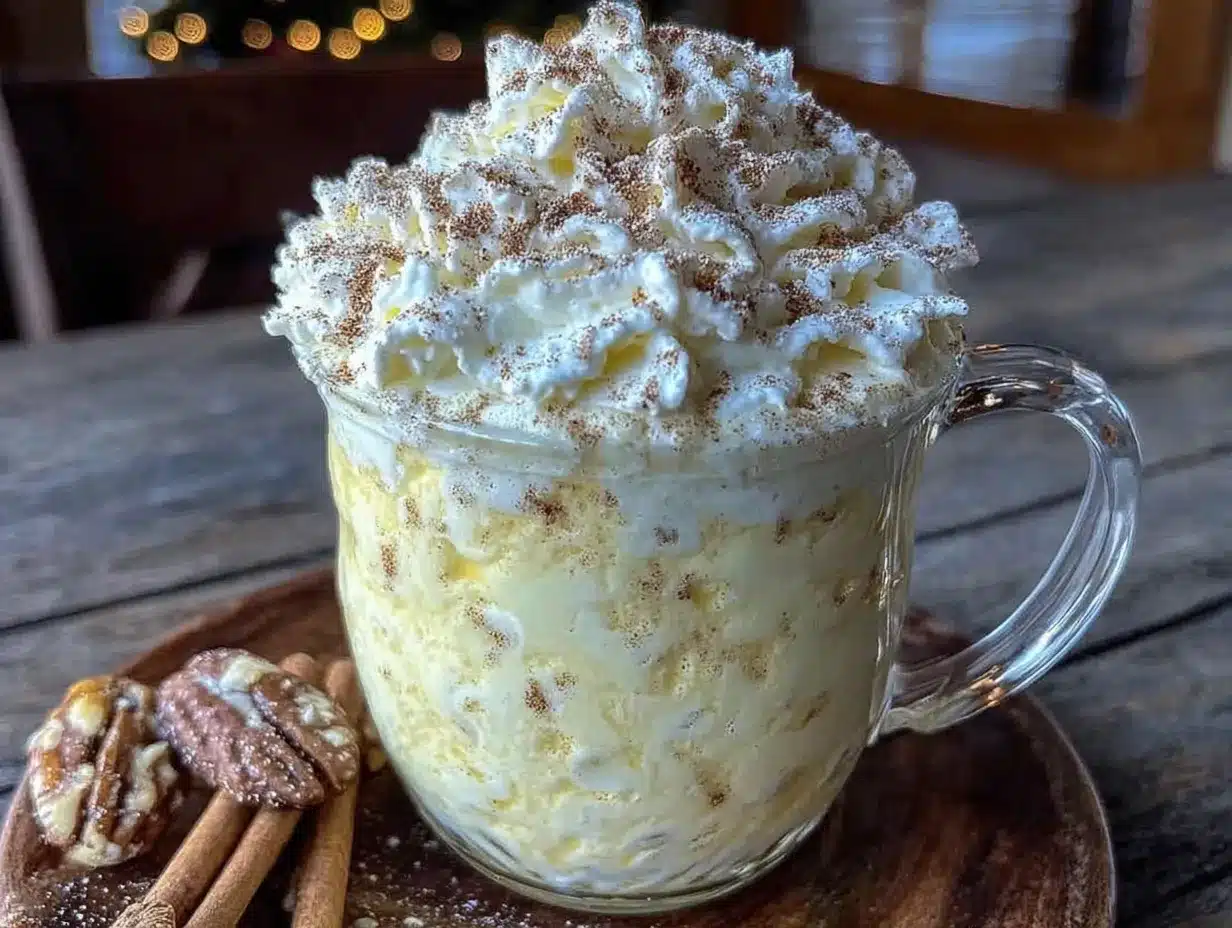
Let’s get into the step-by-step. This method is simple, but each step matters for that perfect creamy texture.
- Separate the eggs. Crack the eggs carefully, placing the yolks in a large mixing bowl and the whites in another clean bowl. Make sure no yolk gets into the whites, or they won’t whip properly. Set the whites aside for later.
- Whisk the yolks with sugar. Add 1/2 cup of the granulated sugar to the egg yolks. Whisk vigorously until the mixture turns pale yellow and thickens slightly, about 2 minutes. This is called a ribbon stage, where the mixture falls off the whisk in a smooth, thick ribbon. It’s your cue that the sugar is fully dissolved.
- Heat the milk and cream. In a large saucepan, combine the whole milk and heavy cream. Place over medium heat and warm until it’s steaming but not boiling. You should see small bubbles around the edges, but no rolling boil. Stir occasionally to prevent a skin from forming. This takes about 5-7 minutes.
- Temper the egg yolks. Slowly pour about 1 cup of the hot milk mixture into the egg yolk mixture while whisking constantly. This raises the temperature of the yolks gradually, so they don’t scramble. Then, pour the yolk mixture back into the saucepan with the remaining milk, whisking continuously.
- Cook the custard. Reduce the heat to low and cook, stirring constantly with a wooden spoon or heatproof spatula, until the mixture thickens enough to coat the back of the spoon. This usually takes 8-10 minutes. Don’t let it boil, or the eggs will curdle. The mixture should reach about 160°F (71°C) on a thermometer.
- Strain and cool. Remove the saucepan from the heat. Pour the custard through a fine-mesh strainer into a clean pitcher or bowl to catch any cooked egg bits. Stir in the vanilla extract, ground nutmeg, cinnamon, and a pinch of salt. Let it cool to room temperature, about 30 minutes, then cover and refrigerate until chilled, at least 2 hours or overnight.
- Whip the egg whites. Just before serving, take the reserved egg whites and add the remaining 1/4 cup of sugar. Using a hand mixer or stand mixer, whip on medium-high speed until soft peaks form. The whites should be glossy and hold a gentle peak when you lift the beaters. This takes about 3-4 minutes.
- Fold in the whites. Gently fold the whipped egg whites into the chilled custard using a rubber spatula. Be careful not to overmix, you want to keep the airy texture. Fold until just combined, with a few white streaks remaining.
- Serve immediately. Pour the eggnog into cups or a punch bowl. Garnish with a sprinkle of nutmeg or a cinnamon stick, if desired. Serve cold.
One thing I always do: taste the custard before adding the egg whites. If it’s not sweet enough, add a little more sugar. If you want more spice, add another pinch of nutmeg. Trust your taste buds!
Cooking Tips & Techniques
I’ve made this eggnog more times than I can count, and I’ve definitely had my share of mishaps. Here’s what I’ve learned so you don’t have to make the same mistakes.
The biggest mistake? Not whisking constantly while the custard cooks. I once walked away to answer the phone, and within two minutes, the bottom of the pan had a thin layer of cooked egg. It wasn’t ruined, but I had to strain it extra carefully. So, stay at the stove, keep that whisk moving, and you’ll be fine.
Another tip: Use a thermometer if you have one. The ideal temperature for cooked eggnog is 160°F (71°C). If you don’t have a thermometer, the spoon test works perfectly. Dip a wooden spoon into the custard and run your finger across the back. If the line stays clean and the custard doesn’t run back together, it’s thick enough.
Timing is everything. I like to make the custard the night before and let it chill overnight. Then, the next day, I whip the egg whites and fold them in just before serving. This saves a ton of stress when you’re hosting. The egg whites will start to deflate after about 30 minutes, so don’t fold them in too early.
For consistency: If your eggnog is too thick after chilling, whisk in a splash of milk until it reaches your desired consistency. If it’s too thin, you can cook it a little longer next time, but honestly, it will thicken as it sits in the fridge.
One more thing: don’t skip the egg whites. They add that light, frothy texture that makes homemade eggnog so much better than store-bought. It’s the secret to that “wow” factor.
Variations & Adaptations
This recipe is incredibly flexible, so feel free to make it your own. Here are a few variations I’ve tried and loved.
- Dairy-Free Eggnog: Replace the whole milk with oat milk or almond milk, and use canned coconut cream instead of heavy cream. The texture will be slightly thinner, but still delicious. I’ve made this for a friend with a dairy allergy, and she said it was the best she’d ever had.
- Spiked Eggnog: After the custard has cooled, stir in 1 cup of bourbon, dark rum, or brandy. The alcohol helps preserve the eggnog, so it will keep in the fridge for up to a week. Just remember to label it clearly if you’re serving a crowd with kids around!
- Vegan Version: Use silken tofu blended with oat milk, maple syrup, and a splash of vanilla. It sounds strange, but it creates a surprisingly creamy base. Add nutmeg and cinnamon, and you’ve got a plant-based eggnog that even non-vegans enjoy.
- Chocolate Eggnog: Melt 1/2 cup of dark chocolate chips into the warm custard before chilling. Stir until smooth, then proceed with the recipe. It’s like a liquid chocolate truffle, perfect for holiday dessert.
- Pumpkin Spice Eggnog: Add 1/4 cup of pumpkin puree and 1 teaspoon of pumpkin pie spice to the custard while it cooks. It gives a warm, autumnal twist that’s perfect for Thanksgiving.
I once tried a version with coconut milk and a splash of lime zest. It was interesting, but not my favorite. Stick with the classics, and you can’t go wrong.
Serving & Storage Suggestions
This eggnog is best served cold, straight from the fridge. I like to pour it into a large punch bowl with a ladle for parties, or into individual glasses with a sprinkle of nutmeg on top. For a pretty presentation, rim the glasses with cinnamon sugar by dipping the rims in water and then into a mix of sugar and cinnamon.
What to serve with it: Eggnog pairs beautifully with gingerbread cookies, shortbread, or a slice of apple pie. For a savory contrast, try it alongside a cheese board with sharp cheddar and crackers. The creamy sweetness balances the saltiness perfectly.
Storage: Keep the eggnog in an airtight container in the refrigerator for up to 5 days. The flavors actually meld and deepen after a day or two, so don’t be afraid to make it ahead. If you’ve added the egg whites, it’s best enjoyed within 24 hours, as they can start to separate. If you’re storing the base without the whites, it will keep for up to a week.
Reheating: This recipe is meant to be served cold, but if you prefer warm eggnog, gently heat it in a saucepan over low heat, stirring constantly. Do not boil, or it will curdle. You can also microwave individual portions in 30-second bursts, stirring in between.
One thing I love: the eggnog gets thicker and creamier as it sits. So don’t worry if it seems thin after cooking. A night in the fridge works magic.
Nutritional Information & Benefits
Here’s a rough estimate per 1-cup serving (without alcohol). Values will vary based on exact ingredients and substitutions.
| Nutrient | Amount |
|---|---|
| Calories | 280 |
| Fat | 18g |
| Saturated Fat | 10g |
| Cholesterol | 215mg |
| Sodium | 110mg |
| Carbohydrates | 22g |
| Sugar | 20g |
| Protein | 9g |
Eggnog is rich in protein from the eggs and milk, which helps keep you full. The eggs also provide choline, a nutrient important for brain health. The nutmeg and cinnamon offer antioxidants and anti-inflammatory properties. If you’re watching your sugar intake, you can reduce the sugar to 1/2 cup or use a sugar substitute like monk fruit. For a lower-fat option, use 2% milk and reduce the heavy cream to 1/2 cup.
This recipe contains dairy and eggs, so it’s not suitable for those with allergies to these ingredients. Always check labels if using substitutions.
Personally, I see this as a treat, not a daily drink. It’s perfect for special occasions, and I feel good knowing it’s made from real, whole ingredients without any artificial thickeners or preservatives.
Conclusion
This creamy classic eggnog is proof that the best things in life often come from happy accidents. It’s budget-friendly, feeds a crowd, and tastes like a hug in a cup. Whether you’re hosting a holiday party or just want something cozy on a cold winter night, this recipe delivers every single time.
I love how forgiving this recipe is. You can tweak the spices, adjust the sweetness, or add a splash of your favorite spirit, and it still turns out perfectly. It’s become a tradition in my house, and I hope it becomes one in yours too.
So go ahead, give it a try. Make it your own. And when you do, I’d love to hear about it. Drop a comment below, share your twist on the recipe, or tag me in your photos. Let’s keep the eggnog flowing and the holidays merry. Cheers, friends!
Frequently Asked Questions
Can I make this eggnog without raw eggs?
Yes, absolutely. This recipe cooks the egg yolks, so they are not raw. The egg whites are whipped and added uncooked, but you can use pasteurized egg whites from a carton if you’re concerned. You can also skip the egg whites entirely for a denser eggnog, just stir in an extra 1/2 cup of milk to thin it out.
How long does homemade eggnog last in the fridge?
Without the egg whites folded in, the custard base lasts up to 5 days in an airtight container. Once you add the whipped egg whites, it’s best within 24 hours. If you’ve added alcohol, it can last up to a week because the alcohol acts as a preservative.
Can I freeze eggnog?
Yes, you can freeze the custard base (without the whipped egg whites) for up to 3 months. Thaw it overnight in the refrigerator, then whisk in the whipped egg whites before serving. The texture may be slightly thinner after freezing, but it’s still delicious.
Why did my eggnog curdle?
Curdling happens when the eggs get too hot too quickly. Always temper the yolks by adding hot milk slowly while whisking constantly. Cook the custard over low heat and never let it boil. If it does curdle, strain it through a fine-mesh sieve to remove the lumps, and it will still taste fine.
Can I use low-fat milk instead of whole milk?
You can, but the eggnog will be thinner and less creamy. Whole milk gives the best texture because of its higher fat content. If you want a lighter version, use 2% milk and reduce the heavy cream to 1/2 cup. Avoid skim milk, as it can make the eggnog watery.
PrintEasy Budget-Friendly Creamy Classic Eggnog for a Crowd
This creamy classic eggnog is proof that the best things in life often come from happy accidents. It’s budget-friendly, feeds a crowd, and tastes like a hug in a cup.
- Prep Time: 15 minutes
- Cook Time: 20 minutes
- Total Time: 35 minutes (plus chilling time)
- Yield: 8 servings 1x
- Category: Beverage
- Cuisine: American
Ingredients
- 6 large eggs, separated (room temperature)
- 3/4 cup granulated sugar, divided
- 4 cups whole milk
- 1 cup heavy cream
- 1 teaspoon vanilla extract
- 1/2 teaspoon ground nutmeg
- 1/4 teaspoon ground cinnamon (optional)
- Pinch of salt
Instructions
- Separate the eggs. Place yolks in a large mixing bowl and whites in another clean bowl. Set whites aside.
- Whisk the yolks with 1/2 cup of the sugar until pale yellow and thick, about 2 minutes (ribbon stage).
- In a large saucepan, combine whole milk and heavy cream. Heat over medium heat until steaming but not boiling (small bubbles around edges), about 5-7 minutes.
- Temper the egg yolks: slowly pour about 1 cup of hot milk mixture into the yolk mixture while whisking constantly. Then pour the yolk mixture back into the saucepan, whisking continuously.
- Reduce heat to low and cook, stirring constantly, until mixture thickens enough to coat the back of a spoon, about 8-10 minutes (160°F/71°C). Do not let it boil.
- Remove from heat. Strain through a fine-mesh strainer into a clean pitcher or bowl. Stir in vanilla, nutmeg, cinnamon, and salt. Cool to room temperature (about 30 minutes), then cover and refrigerate until chilled (at least 2 hours or overnight).
- Just before serving, whip the reserved egg whites with the remaining 1/4 cup sugar using a hand mixer or stand mixer on medium-high speed until soft peaks form, about 3-4 minutes.
- Gently fold the whipped egg whites into the chilled custard using a rubber spatula until just combined (a few white streaks may remain).
- Serve immediately in cups or a punch bowl. Garnish with a sprinkle of nutmeg or a cinnamon stick if desired.
Notes
For best results, use fresh eggs and whole milk. The custard base can be made a day ahead and stored in the refrigerator. Fold in whipped egg whites just before serving for the best texture. If adding alcohol (bourbon, rum, or brandy), stir in 1 cup after the custard has cooled. The eggnog will keep in the fridge for up to 5 days without the egg whites, or up to a week with alcohol.
Nutrition
- Serving Size: 1 cup
- Calories: 280
- Sugar: 20
- Sodium: 110
- Fat: 18
- Saturated Fat: 10
- Carbohydrates: 22
- Protein: 9
Keywords: eggnog, homemade eggnog, classic eggnog, creamy eggnog, budget-friendly eggnog, holiday drink, Christmas eggnog, easy eggnog recipe


