The kindergarten holiday party was in six hours and I’d completely forgotten. Everyone else would be bringing Pinterest-perfect cookies and elaborate gingerbread houses. I had a box of raspberry Jell-O, some unflavored gelatin I’d bought for a science experiment that never happened, and a vague memory of something sparkly I’d seen online. Let me tell you, that morning was not my finest moment. I was standing in my kitchen at 8 AM, still in my pajamas, staring at those ingredients like they might magically transform themselves.
I mean, I’d promised my son I’d bring something “magical and sparkly” for his class celebration. No pressure, right? I grabbed a can of sweetened condensed milk from the pantry—leftover from a failed fudge attempt—and decided to just go for it. The kids wouldn’t care if it was fancy, they just wanted something fun. And honestly, isn’t that the whole point of Christmas with little ones?
So I started experimenting. I mixed the Jell-O, added some unflavored gelatin for extra wobble, and layered it with a creamy, dreamy milk mixture. Then came the sparkle—edible glitter I’d stashed away for birthday cupcakes. By the time the layers set, I had these gorgeous, jewel-toned cups that looked like little stained glass windows. My son called them “Christmas sparkle jello cups” and the name stuck. The best part? They were a total hit. The teacher asked for the recipe, and my kid strutted around like he’d single-handedly saved the holiday party. Maybe you’ve been there—that moment when a kitchen disaster turns into a happy accident. That’s what these are. A happy accident that became our family’s favorite Christmas tradition.
Why You’ll Love This Recipe
These Festive Christmas Sparkle Jello Cups for Kids are honestly the easiest thing you’ll make this holiday season. And I mean that. After years of testing (and accidentally making jello that was either too rubbery or too runny), I’ve nailed the perfect wobble-to-cream ratio. Here’s why you’re going to love them:
- Super Quick: Total active time is about 15 minutes. The hardest part is waiting for the layers to set.
- Kid-Friendly Ingredients: Nothing weird here. Jell-O, gelatin, milk, and a little sugar. You probably have most of it already.
- Perfect for Holiday Parties: These are the star of classroom celebrations, family dinners, and cookie swaps. Kids go absolutely nuts for them.
- No Baking Required: No oven, no stress. Perfect when you’re already overwhelmed with holiday prep.
- Customizable Colors: Red and green for Christmas, but you can switch it up for any holiday.
- Make-Ahead Magic: They keep in the fridge for days, so you can prep them the night before.
What makes these different from other jello recipes? It’s the texture. The combo of flavored and unflavored gelatin gives you that perfect, jiggly-but-not-too-firm bite. And the creamy layer? It’s rich without being heavy. I’ve tried a dozen versions, and this one wins every time. Honestly, it’s the kind of dessert that makes you close your eyes after the first spoonful. Simple, nostalgic, and just a little bit magical.
What Ingredients You Will Need
This recipe uses simple ingredients to create something that looks way more complicated than it is. Here’s what you’ll need:
For the Red Layer (Strawberry)
- 1 box (3 oz) strawberry Jell-O
- 1 packet (0.25 oz) unflavored gelatin (I use Knox brand for best results)
- 1 cup boiling water
- 1/2 cup cold water
For the Green Layer (Lime)
- 1 box (3 oz) lime Jell-O
- 1 packet (0.25 oz) unflavored gelatin
- 1 cup boiling water
- 1/2 cup cold water
For the Creamy Layer
- 1 can (14 oz) sweetened condensed milk
- 1 packet (0.25 oz) unflavored gelatin
- 1/2 cup boiling water
- 1/2 cup cold water
For the Sparkle
- Edible glitter or sparkle gel (I use Wilton brand—it’s safe and looks amazing)
Ingredient Tips: Use room temperature ingredients for the creamiest texture. If you’re dairy-free, you can swap the sweetened condensed milk for a can of coconut cream mixed with 1/4 cup sugar. Just know the texture will be slightly different—still delicious, just not as firm. For the Jell-O, I prefer the name-brand boxes because they have more consistent setting power. Store brands work, but you might need to add a little extra unflavored gelatin.
The unflavored gelatin is the secret here. It gives the layers that satisfying wobble without making them rubbery. I learned this after a few batches that were either too soft to hold their shape or so firm they bounced off the plate. The sweetened condensed milk adds richness and sweetness without needing extra sugar. It’s a pantry staple I always keep on hand during the holidays.
For the sparkle, use edible glitter or sparkle gel—not regular craft glitter. It’s non-toxic and dissolves slightly into the jello, creating that beautiful shimmer. You can find it at most baking supply stores or online.
Equipment Needed
- Small saucepans (or a microwave-safe bowl for boiling water)
- Mixing bowls (at least 3 medium-sized ones)
- Whisk (for smooth, lump-free gelatin)
- Measuring cups and spoons
- Small plastic cups (4 oz size works perfectly)
- Liquid measuring cup (for precise measurements)
- Refrigerator space (you’ll need room for the cups to set)
Tool Alternatives: No small cups? Use shot glasses, small mason jars, or even silicone muffin cups. I’ve used all of these in a pinch. No whisk? A fork works fine for mixing gelatin. Just make sure there are no lumps. I’ve also used a Pyrex measuring cup to microwave the water—it’s faster and means less cleanup. If you’re making a big batch, a large liquid measuring cup with a spout makes pouring the layers much easier and less messy.
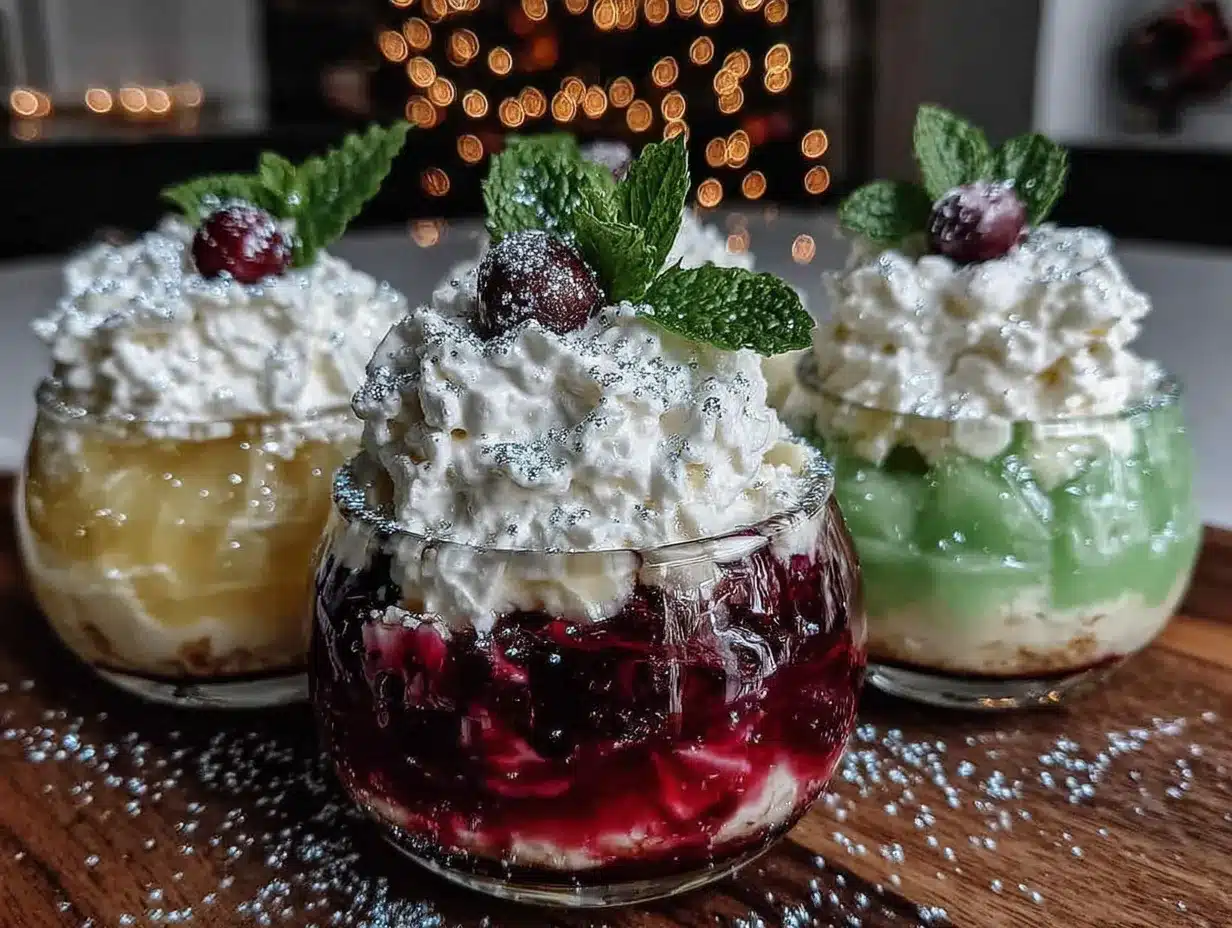
One thing I’ve learned the hard way: use clear cups if you want to show off the layers. The red, white, and green stripes are part of the magic. Opaque cups hide all that beauty. Trust me on this one.
Preparation Method
- Prepare the red layer: In a medium bowl, combine the strawberry Jell-O and one packet of unflavored gelatin. Add 1 cup of boiling water and whisk until completely dissolved—about 2 minutes. Stir in 1/2 cup cold water. Pour the mixture evenly into your cups, filling each about 1/3 full. Place cups in the refrigerator for 45 minutes to set. They should be firm to the touch but still slightly jiggly.
- Make the creamy layer: While the red layer sets, prepare the creamy middle. In a separate bowl, combine one packet of unflavored gelatin with 1/2 cup cold water. Let it sit for 1 minute to bloom. Add 1/2 cup boiling water and whisk until the gelatin dissolves completely. Stir in the entire can of sweetened condensed milk. Whisk until smooth and well combined. Let this mixture cool to room temperature—about 10 minutes. Don’t pour it hot over the set red layer or it will melt and create a muddy mess. I learned this the hard way.
- Add the creamy layer: Once the red layer is set and the creamy mixture is cool, gently pour the creamy layer over the red. Fill each cup about 2/3 full. Return to the refrigerator for another 45 minutes to set.
- Prepare the green layer: In a third bowl, combine the lime Jell-O and the remaining packet of unflavored gelatin. Add 1 cup of boiling water and whisk until dissolved. Stir in 1/2 cup cold water. Let this mixture cool to room temperature—again, about 10 minutes. You don’t want it hot when you pour it over the creamy layer.
- Finish the layers: Once the creamy layer is set, gently pour the green Jell-O mixture over it. Fill each cup to the top. Refrigerate for at least 2 hours, or until fully set. The jello should be firm and wobble slightly when you shake the cup.
- Add the sparkle: Just before serving, sprinkle edible glitter on top. For extra fun, use a small star-shaped cookie cutter to cut a fruit leather star and place it on top. My kids love this part—it makes them feel like they’re eating something truly magical.
Sensory Cues: The red layer should look like ruby glass when set. The creamy layer should be opaque and smooth, like thick cream. The green layer should be a vibrant emerald. When you tap the cup, the jello should wobble gently but hold its shape. If it’s too firm, you used too much gelatin. If it’s too soft, not enough. But honestly, even a imperfect batch tastes amazing.
Troubleshooting Tip: If your layers are separating or looking cloudy, you probably poured the next layer while it was still too warm. Patience is key here. Let each layer cool completely before adding the next. Also, make sure each layer is fully set before moving on. Rushing leads to a mess, and nobody wants a muddy Christmas jello.
Cooking Tips & Techniques
Here’s the thing about layered jello—it’s all about timing. I’ve made this recipe at least two dozen times, and I still mess up sometimes. Here are the tricks I’ve learned:
Temperature Control is Everything: The biggest mistake people make is pouring warm liquid over a set layer. It melts the layer underneath and creates a blurry mess. Let each mixture cool to room temperature before adding it to the cups. Test it with your finger—it should feel warm, not hot.
Bloom Your Gelatin: Always let unflavored gelatin sit in cold water for a minute before adding hot water. This “blooming” step ensures it dissolves evenly and gives you a smooth texture. Skip this, and you’ll end up with lumps. Trust me, I’ve had lumpy jello and it’s not pretty.
Use a Liquid Measuring Cup for Pouring: It sounds simple, but pouring from a bowl is messy. Use a Pyrex measuring cup with a spout for clean, controlled pours. This is especially important for the middle layer, where precision matters.
Don’t Over-Whisk: Once the gelatin is dissolved, stop whisking. Over-whisking introduces air bubbles that make the jello look cloudy. A gentle stir is all you need.
Refrigerator Placement: Place cups on a level shelf in the fridge, not in the door. The door gets jostled and the temperature fluctuates, which can mess with setting times. I learned this after a batch that never fully set because my kids kept opening the fridge to sneak a peek.
Make Ahead Strategy: These jello cups actually taste better the next day. The flavors meld together and the texture becomes perfectly smooth. I usually make them the night before and add the glitter just before serving. It saves so much stress on party day.
Variations & Adaptations
One of the best things about this recipe is how flexible it is. Here are some ways to change it up:
Holiday Color Swaps: For Valentine’s Day, use strawberry and cherry Jell-O with a pink creamy layer (add a drop of red food coloring). For Easter, use lemon and berry blue. For Fourth of July, go with berry blue and strawberry for red, white, and blue. The possibilities are endless.
Dairy-Free Version: Replace the sweetened condensed milk with a can of full-fat coconut cream mixed with 1/4 cup sugar. The texture will be slightly softer, but still delicious. I’ve made this for a friend with dairy allergies and it was a hit.
Sugar-Free Option: Use sugar-free Jell-O and replace the sweetened condensed milk with a mixture of 1 cup heavy cream and 1/4 cup powdered sweetener. It’s not as rich, but it works well for diabetics or anyone watching their sugar intake.
Fruit Additions: Add a few small berries or pomegranate seeds to each layer before it sets. They sink slightly and create a beautiful jewel-like effect. Just make sure the fruit is dry, or it can make the jello watery.
Layered Rainbow: For a birthday party, use four or five different Jell-O flavors and colors. It takes longer to set, but the result is stunning. I did this for my son’s birthday and the kids lost their minds.
Sparkle Variations: Use different colored edible glitter for different holidays. Gold and silver work for New Year’s, pink and red for Valentine’s, and pastels for Easter. You can also use sparkle gel to write names or messages on top.
Serving & Storage Suggestions
These Festive Christmas Sparkle Jello Cups for Kids are best served cold, straight from the refrigerator. The texture is perfect when they’re chilled—firm but tender, with a satisfying wobble. I like to serve them on a tray with a few extra sparkles sprinkled around for presentation.
Presentation Ideas: For a party, arrange the cups on a large platter or cake stand. Add some fresh cranberries and rosemary sprigs around the base for a festive touch. If you’re feeling fancy, tie a small ribbon around each cup or attach a gift tag with the child’s name. It makes them feel extra special.
Complementary Dishes: These jello cups pair beautifully with other light desserts. Serve them alongside sugar cookies, gingerbread, or a simple vanilla cake. They’re also great after a heavy holiday meal—the lightness of the jello is a refreshing palate cleanser.
Storage Instructions: Keep the jello cups covered in the refrigerator for up to 5 days. Use plastic wrap or a lid to prevent them from absorbing fridge odors. Do not freeze them—freezing ruins the texture and makes them watery when thawed.
Reheating: You don’t need to reheat these. Just take them out of the fridge about 10 minutes before serving to take the chill off. If you’ve added the glitter, wait until just before serving to sprinkle it on, or it will dissolve into the jello.
Flavor Development: These jello cups actually taste better the next day. The layers meld together slightly, creating a more cohesive flavor. If you can resist eating them right away, they’re even more delicious after 24 hours.
Nutritional Information & Benefits
Here’s the honest truth: these are a treat, not a health food. But they’re a fun, festive treat that kids love, and that counts for something during the holidays. Here’s a rough nutritional breakdown per serving (based on one 4 oz cup):
| Nutrient | Amount |
|---|---|
| Calories | 180 |
| Total Fat | 3g |
| Saturated Fat | 2g |
| Cholesterol | 10mg |
| Sodium | 80mg |
| Total Carbohydrates | 35g |
| Sugars | 30g |
| Protein | 4g |
Health Benefits: Gelatin is a good source of collagen, which supports joint health and skin elasticity. The sweetened condensed milk provides some calcium, though not a significant amount. The main benefit here is the joy factor—sometimes that’s just as important as nutrition.
Dietary Considerations: This recipe contains dairy from the sweetened condensed milk. It’s not gluten-free unless you verify your Jell-O brand (most are, but check labels). It’s also high in sugar, so it’s best enjoyed in moderation. For a lower-sugar option, use the variations I mentioned above.
Allergen Note: The sweetened condensed milk contains milk proteins. For dairy allergies, use the coconut cream variation. Jell-O is typically free of common allergens, but always check the label if you have specific concerns.
From a personal perspective, I love that these jello cups bring so much joy with minimal effort. They’re a reminder that the holidays don’t have to be complicated to be special. Sometimes the simplest things create the best memories.
Conclusion
These Festive Christmas Sparkle Jello Cups for Kids are more than just a dessert—they’re a little moment of magic. They’re the recipe I turn to when I need something quick, beautiful, and guaranteed to make kids smile. Whether you’re making them for a classroom party, a family gathering, or just a cozy night at home, they never disappoint.
I love how forgiving this recipe is. You can mess up the layers, forget the glitter, or use the wrong flavor, and they’ll still taste amazing. That’s the kind of recipe I want in my back pocket during the chaos of December. And honestly, the kids don’t care if the layers are perfect. They just want something sparkly and sweet.
So go ahead—give these a try. Customize them with your family’s favorite colors and flavors. Add extra sparkle if you’re feeling bold. And when someone asks for the recipe (they will), tell them it came from a happy accident in a messy kitchen. That’s what makes it special.
I’d love to hear how yours turn out! Drop a comment below and let me know what colors you used, or tag me in your photos if you share them online. Happy holidays, and happy cooking!
Frequently Asked Questions
Can I use sugar-free Jell-O for this recipe?
Yes, you can. Sugar-free Jell-O works fine, but the texture may be slightly softer. I recommend adding an extra 1/4 packet of unflavored gelatin per layer to help it set properly.
How long do these jello cups need to set?
Each layer needs about 45 minutes in the refrigerator, plus 2 hours for the final set. Total time is about 4 hours, but I always make them the night before to be safe.
Can I use different flavors of Jell-O?
Absolutely. Any flavor works. For Christmas, red and green are traditional, but you can use any combination. Just make sure the colors contrast well with the creamy layer.
Why did my layers blend together?
This happens when you pour the next layer while it’s still too warm. Make sure each mixture is at room temperature before adding it to the cups. Also, ensure the previous layer is fully set—it should be firm to the touch.
Can I make these in advance for a party?
Yes, they’re perfect for making ahead. Store them covered in the refrigerator for up to 5 days. Add the edible glitter just before serving to keep it looking fresh and sparkly.
PrintFestive Christmas Sparkle Jello Cups for Kids
These easy, no-bake layered Jello cups with a creamy center and edible glitter are a magical holiday treat that kids love. Perfect for classroom parties, family gatherings, or any festive occasion.
- Prep Time: 15 minutes
- Cook Time: 0 minutes
- Total Time: 4 hours (includes setting time)
- Yield: 8 servings 1x
- Category: Dessert
- Cuisine: American
Ingredients
- 1 box (3 oz) strawberry Jell-O
- 2 packets (0.25 oz each) unflavored gelatin (Knox brand recommended)
- 1 cup boiling water (for red layer)
- 1/2 cup cold water (for red layer)
- 1 box (3 oz) lime Jell-O
- 1 cup boiling water (for green layer)
- 1/2 cup cold water (for green layer)
- 1 can (14 oz) sweetened condensed milk
- 1/2 cup boiling water (for creamy layer)
- 1/2 cup cold water (for creamy layer)
- Edible glitter or sparkle gel (Wilton brand recommended)
Instructions
- Prepare the red layer: In a medium bowl, combine the strawberry Jell-O and one packet of unflavored gelatin. Add 1 cup of boiling water and whisk until completely dissolved (about 2 minutes). Stir in 1/2 cup cold water. Pour the mixture evenly into small plastic cups (4 oz size), filling each about 1/3 full. Refrigerate for 45 minutes until set but still slightly jiggly.
- Make the creamy layer: In a separate bowl, combine one packet of unflavored gelatin with 1/2 cup cold water. Let sit for 1 minute to bloom. Add 1/2 cup boiling water and whisk until gelatin dissolves completely. Stir in the entire can of sweetened condensed milk. Whisk until smooth. Let cool to room temperature (about 10 minutes).
- Add the creamy layer: Once the red layer is set and the creamy mixture is cool, gently pour the creamy layer over the red, filling each cup about 2/3 full. Refrigerate for another 45 minutes to set.
- Prepare the green layer: In a third bowl, combine the lime Jell-O and the remaining packet of unflavored gelatin. Add 1 cup of boiling water and whisk until dissolved. Stir in 1/2 cup cold water. Let cool to room temperature (about 10 minutes).
- Finish the layers: Once the creamy layer is set, gently pour the green Jell-O mixture over it, filling each cup to the top. Refrigerate for at least 2 hours, or until fully set.
- Add the sparkle: Just before serving, sprinkle edible glitter on top. For extra fun, use a small star-shaped cookie cutter to cut a fruit leather star and place it on top.
Notes
Use clear cups to show off the layers. Let each layer cool to room temperature before adding the next to prevent blending. For dairy-free, substitute sweetened condensed milk with coconut cream mixed with 1/4 cup sugar. Add edible glitter just before serving to keep it sparkly.
Nutrition
- Serving Size: 1 cup (4 oz)
- Calories: 180
- Sugar: 30
- Sodium: 80
- Fat: 3
- Saturated Fat: 2
- Carbohydrates: 35
- Protein: 4
Keywords: Christmas jello cups, kids dessert, holiday jello, layered jello, no-bake dessert, edible glitter jello


