This was supposed to be a batch of classic peanut butter blossoms—you know, the ones with the chocolate kiss pressed right in the middle. I had the dough chilling, the oven preheating, and I was feeling pretty good about myself for once. Then I realized I was completely out of chocolate kisses. Not a single one in the cupboard. I stood there staring at the empty bag like it had personally betrayed me, with my three-year-old tugging at my apron asking when the cookies would be ready. It was 4 PM on a Tuesday, and I was about to have a tiny meltdown over candy.
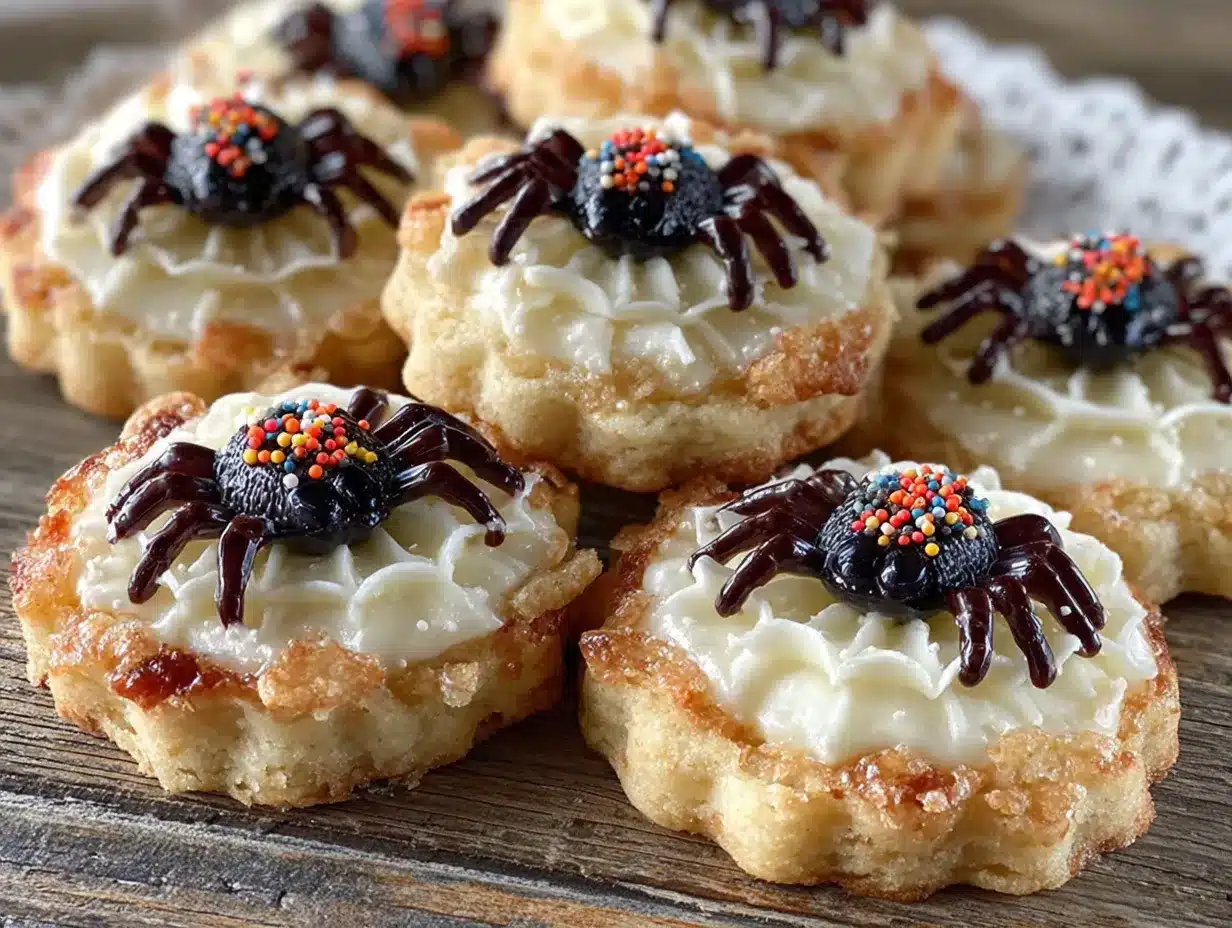
So I did what any reasonable person would do when faced with a baking crisis and a disappointed toddler. I raided the Halloween candy stash we’d already bought for trick-or-treaters. Mini pretzels, check. Those little candy eyeballs I picked up on a whim? Check. A bag of milk chocolate melts? Check. I started pressing things into the cookies just to see what would stick—literally. What came out was nothing like the plan. It was better. Eight legs made from pretzel sticks, two googly eyes staring back at me, and a chocolate-peanut butter cookie that tasted like everything I actually wanted.
I pulled the tray out of the oven, and honest to goodness, I laughed out loud. They looked ridiculous. They looked perfect. My kid grabbed one before I could even take a photo, and the silence that followed told me everything I needed to know. That first bite had this unexpected salty-sweet crunch that the original recipe never had. I mean, who knew a baking fail could turn into the most fun Halloween treat on the block? I’ve made these spider cookies every October since, and they never last more than an hour on the counter. Maybe you’ve been there—staring down a missing ingredient with no backup plan. Let me tell you, sometimes the best recipes come from the moments you think you’ve ruined everything.
Why You’ll Love This Recipe
These spider cookies aren’t just another Halloween dessert. They’re the kind that makes people stop mid-conversation to say, “Wait, you made those?” Here’s why they keep showing up at every party I bring them to:
- Quick & Easy : From start to finish, you’re looking at about 25 minutes. No chilling time, no complicated steps—just mix, shape, bake, and decorate. Perfect for those after-school Halloween baking sessions.
- Simple Ingredients : You probably have most of this in your pantry right now. Peanut butter, sugar, eggs, flour—the usual suspects. The only special items are candy eyeballs and mini pretzel sticks, both easy to find at any grocery store this time of year.
- Perfect for Halloween : These are the ultimate Halloween party treat. They’re spooky enough to fit the theme but cute enough that even the littlest ghosts and goblins won’t be scared. Great for classroom parties, trunk-or-treat events, or just a fun night in.
- Crowd-Pleaser : I’ve brought these to five different Halloween gatherings, and every single time, someone asks for the recipe. Kids love the goofy faces, and adults love the salty-sweet combo. It’s a win-win.
- Unbelievably Delicious : The peanut butter cookie base is soft and chewy, the chocolate adds richness, and the pretzel legs give you that irresistible crunch. It’s next-level comfort food disguised as a craft project.
What makes these different from every other spider cookie recipe out there? It’s the technique. I tested this six times to get the pretzel legs to stay put without falling off during baking. The secret is pressing them in at just the right angle after the cookie has baked for a few minutes but is still warm and soft. That little trick makes all the difference between a spider that looks like it’s crawling and one that looks like it melted in the sun.
This recipe isn’t just good—it is the kind that makes you close your eyes after the first bite. It’s Halloween fun reimagined, with the same soul-soothing satisfaction of a classic peanut butter cookie. Perfect for impressing guests without stress, or turning a simple October afternoon into something memorable.
What Ingredients You Will Need
This recipe uses simple, wholesome ingredients to deliver big flavor and that perfect spooky look without any fuss. Most of these are pantry staples, so you’re probably already halfway there.
For the Cookie Dough
- 1 cup creamy peanut butter (I prefer Skippy or Jif for consistent texture; natural peanut butter can make the cookies too greasy)
- 1 cup granulated sugar (adds sweetness and helps with that soft, chewy texture)
- 1 large egg (room temperature works best for even mixing)
- 1 teaspoon vanilla extract (pure vanilla, not imitation, if you have it)
- 1 cup all-purpose flour (spoon and level it—don’t scoop straight from the bag)
- 1/2 teaspoon baking soda (helps the cookies spread just enough)
- 1/4 teaspoon salt (balances the sweetness and enhances the peanut butter flavor)
For the Spider Decoration
- 24 milk chocolate candy melts or Hershey’s Kisses (unwrapped—use the melts if you want a flatter spider body)
- 48 mini pretzel sticks (broken in half to make 8 legs per spider; look for the thin, straight ones)
- 48 candy eyeballs (available in the baking aisle near the sprinkles; Wilton brand works great)
- 2 tablespoons melted chocolate or frosting (to glue the eyes on—I use store-bought chocolate frosting in a pinch)
If you’re making these with kids, I recommend setting up a little assembly line. Have the pretzels pre-broken, the candy melts ready, and the eyeballs in a small bowl. It makes the decorating part so much smoother and less chaotic. For a gluten-free version, swap the all-purpose flour with a 1:1 gluten-free baking blend. Just add an extra tablespoon of flour to account for the difference in absorption.
Equipment Needed
- Large mixing bowl (any size works, but bigger is better for mixing without spilling)
- Electric hand mixer or stand mixer (you can mix by hand, but a mixer makes it faster and gives a smoother dough)
- Baking sheet (I use a light-colored metal sheet for even browning; dark sheets can burn the bottoms)
- Parchment paper or silicone baking mat (non-negotiable for easy cleanup and preventing sticking)
- Cooling rack (lets the cookies cool evenly so the chocolate sets properly)
- Small microwave-safe bowl (for melting the chocolate or frosting to attach the eyes)
- Cookie scoop or tablespoon (keeps the cookies uniform in size—about 1.5 tablespoons each)
If you don’t have a cookie scoop, just use two spoons to portion the dough. It’s not as pretty, but it works. I’ve also used a regular dinner knife to press the pretzels in when I couldn’t find my spatula. Improvisation is the name of the game here.
Preparation Method
- Preheat your oven to 350°F (175°C). Line two baking sheets with parchment paper or silicone mats. This step matters—don’t skip it unless you enjoy scrubbing burnt cookie residue off metal.
- Mix the wet ingredients. In a large bowl, combine 1 cup creamy peanut butter, 1 cup granulated sugar, 1 large egg, and 1 teaspoon vanilla extract. Beat with an electric mixer on medium speed until smooth and creamy, about 2 minutes. The mixture should look glossy and hold together when you press it with a spoon. If it looks greasy or separated, your peanut butter might be too natural—add an extra tablespoon of sugar to help bind it.
- Add the dry ingredients. In a separate small bowl, whisk together 1 cup all-purpose flour, 1/2 teaspoon baking soda, and 1/4 teaspoon salt. Gradually add this to the peanut butter mixture, mixing on low speed until just combined. Don’t overmix—stop as soon as you no longer see streaks of flour. The dough will be soft but not sticky. If it feels too sticky to handle, pop it in the fridge for 10 minutes.
- Shape the cookies. Using a cookie scoop or tablespoon, portion out rounded tablespoons of dough (about 1.5 tablespoons each). Roll each portion into a smooth ball between your palms. Place them on the prepared baking sheets, spacing them about 2 inches apart. You should get 24 cookies total, 12 per sheet.
- Bake the cookies. Bake one sheet at a time in the center of the oven for 8 to 10 minutes. The cookies will look puffy and slightly cracked on top. They should be just set around the edges but still soft in the center. Don’t overbake—they continue cooking on the hot sheet after you pull them out. I learned this the hard way after my first batch turned into crunchy discs.
- Add the spider bodies. Remove the baking sheet from the oven and let the cookies cool on the sheet for exactly 2 minutes. While they’re still warm, gently press one milk chocolate candy melt or Hershey’s Kiss into the center of each cookie. Press just enough to flatten it slightly—the chocolate should stick to the cookie but not sink all the way through. If the chocolate melts too much and slides off, you waited too long. Try pressing them in at the 1-minute mark next time.
- Attach the legs. This is the trickiest part, so pay attention. While the cookie is still warm and the chocolate is soft, insert 4 pretzel stick halves into each side of the cookie, angling them slightly outward so they look like spider legs. Push them in about halfway—deep enough to stay put but not so deep that they poke through the bottom. Work quickly before the chocolate sets. If a pretzel breaks, just push the pieces in anyway. Imperfect spiders are still spiders.
- Add the eyes. Let the cookies cool completely on the baking sheet, about 15 minutes. Once cool, melt 2 tablespoons of chocolate or frosting in a small microwave-safe bowl (15-second intervals, stirring in between). Use a toothpick or the tip of a knife to dab a tiny amount onto the back of each candy eyeball, then press them onto the chocolate spider body. Position them close together for a cute look or slightly apart for a derpy expression. Let the eyes set for 5 minutes before moving the cookies.
- Final touch. If you want extra spooky points, use a toothpick dipped in melted chocolate to draw a tiny smile or fangs under the eyes. I’ve also added a drizzle of white chocolate to look like spider webs on the plate. Totally optional, but it makes for a prettier photo.
Cooking Tips & Techniques
I’ve made these spider cookies more times than I care to count, and I’ve made every mistake in the book so you don’t have to. Here’s what I’ve learned:
The dough is your foundation. If your cookies spread too much during baking, your dough was too warm. Pop it in the fridge for 15 minutes before shaping. If they don’t spread enough, your flour was packed too tightly—next time, spoon it into the measuring cup and level it off. I lost a whole batch once because I scooped flour straight from the bag like a maniac. They turned into little peanut butter rocks.
Timing is everything with the legs. I cannot stress this enough—the pretzels need to go in while the cookie is still warm but not hot. Too hot, and the pretzels get soggy. Too cold, and they won’t stick. I set a timer for 2 minutes after pulling the sheet out, and that’s my window. If you’re making these with kids, have the pretzels pre-broken and ready to go. Trust me, you don’t want to be snapping pretzels while the cookies cool.
Batch baking strategy. Bake one sheet at a time. I know it’s tempting to cram both sheets in the oven, but the uneven heat will mess with your bake time. While one sheet bakes, shape the next batch of dough balls. While one sheet cools and gets decorated, the other bakes. It’s a rhythm, and it works.
My biggest failure: The first time I made these, I used natural peanut butter that had separated in the jar. I didn’t stir it well enough, and the dough was oily and crumbly. The cookies spread into flat, greasy puddles. The pretzels slid right off. I sat on my kitchen floor and ate three of them anyway because I refuse to waste food. Use conventional peanut butter for this recipe. Save the natural stuff for your morning toast.
Variations & Adaptations
One of the best things about this recipe is how easy it is to tweak. Here are some variations I’ve tried and loved:
Chocolate Peanut Butter Spiders: Swap 1/4 cup of the flour with 1/4 cup unsweetened cocoa powder for a double-chocolate version. The dark cookie base makes the candy eyeballs pop even more. I did this for a Halloween party last year, and they disappeared before the regular ones.
Gluten-Free Version: Use a 1:1 gluten-free baking flour blend. I’ve tested this with Bob’s Red Mill and King Arthur brands, and both worked well. Add an extra tablespoon of flour to the dough since gluten-free blends tend to be more absorbent. The texture is slightly crumblier, but the taste is still spot-on.
Nut-Free Option: Substitute the peanut butter with sunflower seed butter or WowButter. The flavor is different—more earthy—but the texture holds up. Just note that sunflower seed butter can turn green when baked due to a reaction with baking soda. It’s perfectly safe to eat, but it might look a little funky. I’d stick with WowButter for a more neutral color.
Spider Variations: Instead of candy melts, try using a Rolo or a mini Reese’s cup for the spider body. The Rolo gives you a caramel center, and the Reese’s cup adds extra peanut butter flavor. For the legs, you can use chow mein noodles for a thinner, more delicate look. I tried this once, and they looked like daddy longlegs—creepy and cute at the same time.
Flavor Twists: Add 1/2 teaspoon of cinnamon to the dough for a warm, cozy fall flavor. Or mix in 1/4 cup of mini chocolate chips before shaping the cookies. I did a batch with crushed pretzels mixed into the dough AND pretzel legs on top, and it was a salt lover’s dream.
Serving & Storage Suggestions
These spider cookies are best served at room temperature, right after the chocolate eyes have set. I like to arrange them on a black or orange platter to really make the spider theme pop. Add a few fake spider webs from the dollar store around the edge of the plate, and you’ve got a centerpiece that doubles as dessert.
They pair beautifully with a cold glass of milk, a warm mug of apple cider, or a pumpkin spice latte if you’re feeling extra festive. For a Halloween party spread, I serve them alongside spooky dirt cups and mummy hot dogs for a full themed menu. The contrast between the sweet cookies and the savory hot dogs is always a hit.
Storage: Store the cookies in an airtight container at room temperature for up to 5 days. Layer them between sheets of parchment paper to keep the pretzel legs from breaking. Do not refrigerate—the pretzels will get soft and lose their crunch. If you live in a humid climate, the pretzels might soften after a day or two anyway. I just tell people it’s part of the spooky aesthetic.
Freezing: You can freeze the baked cookies (without the pretzel legs and eyes) for up to 3 months. Wrap them individually in plastic wrap, then place them in a freezer bag. When you’re ready to serve, thaw them at room temperature, then add the pretzels and eyes fresh. The legs stay much crunchier this way. I’ve also frozen the raw dough balls for up to 2 months. Just bake them straight from frozen, adding 2 minutes to the bake time.
The flavors actually get better after a day or two. The peanut butter mellows out, and the chocolate sets into a nice firm texture. I’ve been known to hide a few in the back of the pantry for myself.
Nutritional Information & Benefits
Here’s the estimated nutritional breakdown for one spider cookie (based on 24 cookies):
| Nutrient | Amount per Cookie |
|---|---|
| Calories | 165 |
| Total Fat | 9g |
| Saturated Fat | 3g |
| Carbohydrates | 19g |
| Sugar | 12g |
| Protein | 4g |
| Fiber | 1g |
| Sodium | 135mg |
These cookies are a treat, no doubt about it, but they do offer a few perks. The peanut butter provides a decent amount of protein and healthy monounsaturated fats, which help keep you full longer than a plain sugar cookie. The pretzels add a little iron and B vitamins from the enriched flour. And honestly, the act of making these with your kids is a mental health win in itself. There’s something deeply satisfying about creating something silly and delicious together.
For dietary considerations: This recipe contains peanuts, wheat, and dairy (if using milk chocolate). It is not vegan, but you can make it dairy-free by using dairy-free chocolate and a vegan butter substitute. The candy eyeballs are typically vegan, but check the label to be sure.
Conclusion
I’ve made a lot of Halloween treats over the years, but these spider cookies hold a special place in my heart. They came from a moment of panic and frustration, and they turned into something that makes people genuinely happy. Every time I pull a tray out of the oven and see those googly eyes staring back at me, I remember that it’s okay when things don’t go according to plan. Sometimes the detour is the destination.
I hope you give these a try, whether you’re hosting a Halloween party, looking for a fun activity with your kids, or just want to eat something that looks ridiculous and tastes amazing. Don’t be afraid to customize them—use different candies, change up the leg angles, give your spiders different expressions. That’s half the fun.
If you make these spider cookies, I’d love to hear about it. Drop a comment below and tell me how they turned out, or share a photo of your spooky creations. And if you have your own baking disaster that turned into a triumph, I’m all ears. We’re all just out here trying to make something good out of what we’ve got.
Happy Halloween, and happy baking!
Frequently Asked Questions
Can I use natural peanut butter for this recipe?
I don’t recommend it. Natural peanut butter has a higher oil content that can cause the cookies to spread too much and become greasy. Stick with conventional peanut butter like Jif or Skippy for the best texture. If you only have natural peanut butter, stir it very well and add an extra 2 tablespoons of flour to compensate.
How do I keep the pretzel legs from falling off?
The key is timing. Insert the pretzels while the cookie is still warm but not hot—about 2 minutes after it comes out of the oven. Press them in at a slight angle, going about halfway into the cookie. If they still fall off, try pressing a small indent into the cookie with your finger before inserting the pretzel. That little pocket helps hold it in place.
Can I make these cookies ahead of time?
Absolutely. You can bake the cookies and freeze them (without decorations) for up to 3 months. When you’re ready to serve, thaw them at room temperature, then add the pretzel legs and candy eyes fresh. The legs stay crunchier this way. You can also freeze the raw dough balls for up to 2 months and bake them straight from frozen.
What can I use instead of candy eyeballs?
If you can’t find candy eyeballs, you can make your own using white chocolate chips and mini chocolate chips. Melt a white chocolate chip slightly, press two mini chocolate chips into it for pupils, and let it set. It takes a little more time, but it works in a pinch. You can also just pipe two dots of white frosting and top them with a tiny sprinkle of black sanding sugar.
How do I store these cookies so the pretzels stay crunchy?
Store them in an airtight container at room temperature with a layer of paper towels at the bottom to absorb any excess moisture. Do not refrigerate, as the cold will soften the pretzels. If you live in a humid climate, the pretzels may soften after a day or two anyway. In that case, I recommend adding the pretzels right before serving rather than storing them attached.
PrintEasy Spider Cookies: Best Halloween Treat

These spider cookies are a fun and delicious Halloween treat made with a soft peanut butter cookie base, chocolate center, pretzel stick legs, and candy eyeballs. They’re quick to make, perfect for parties, and always a crowd-pleaser.
- Prep Time: 15 minutes
- Cook Time: 10 minutes
- Total Time: 25 minutes
- Yield: 24 cookies 1x
- Category: Dessert
- Cuisine: American
Ingredients
- 1 cup creamy peanut butter (Skippy or Jif recommended)
- 1 cup granulated sugar
- 1 large egg (room temperature)
- 1 teaspoon vanilla extract (pure vanilla preferred)
- 1 cup all-purpose flour (spooned and leveled)
- 1/2 teaspoon baking soda
- 1/4 teaspoon salt
- 24 milk chocolate candy melts or Hershey’s Kisses (unwrapped)
- 48 mini pretzel sticks (broken in half to make 8 legs per spider)
- 48 candy eyeballs
- 2 tablespoons melted chocolate or frosting (to glue the eyes on)
Instructions
- Preheat your oven to 350°F (175°C). Line two baking sheets with parchment paper or silicone mats.
- In a large bowl, combine 1 cup creamy peanut butter, 1 cup granulated sugar, 1 large egg, and 1 teaspoon vanilla extract. Beat with an electric mixer on medium speed until smooth and creamy, about 2 minutes.
- In a separate small bowl, whisk together 1 cup all-purpose flour, 1/2 teaspoon baking soda, and 1/4 teaspoon salt. Gradually add this to the peanut butter mixture, mixing on low speed until just combined. Do not overmix.
- Using a cookie scoop or tablespoon, portion out rounded tablespoons of dough (about 1.5 tablespoons each). Roll each portion into a smooth ball. Place them on the prepared baking sheets, spacing them about 2 inches apart. You should get 24 cookies total.
- Bake one sheet at a time in the center of the oven for 8 to 10 minutes. The cookies should look puffy and slightly cracked on top, just set around the edges but still soft in the center.
- Remove the baking sheet from the oven and let the cookies cool on the sheet for exactly 2 minutes. While still warm, gently press one milk chocolate candy melt or Hershey’s Kiss into the center of each cookie, flattening it slightly.
- While the cookie is still warm and the chocolate is soft, insert 4 pretzel stick halves into each side of the cookie, angling them slightly outward to look like spider legs. Push them in about halfway.
- Let the cookies cool completely on the baking sheet, about 15 minutes. Once cool, melt 2 tablespoons of chocolate or frosting in a small microwave-safe bowl (15-second intervals, stirring in between). Use a toothpick to dab a tiny amount onto the back of each candy eyeball, then press them onto the chocolate spider body. Let the eyes set for 5 minutes before moving the cookies.
- Optional: Use a toothpick dipped in melted chocolate to draw a tiny smile or fangs under the eyes, or drizzle white chocolate to look like spider webs.
Notes
For best results, use conventional peanut butter (like Jif or Skippy) rather than natural peanut butter, which can make the cookies too greasy. The pretzel legs must be inserted while the cookie is still warm (about 2 minutes after baking) to ensure they stick. If the dough is too sticky, refrigerate for 10 minutes before shaping. Store cookies in an airtight container at room temperature for up to 5 days; do not refrigerate as pretzels will soften. For gluten-free, use a 1:1 gluten-free baking flour blend and add an extra tablespoon of flour.
Nutrition
- Serving Size: 1 cookie
- Calories: 165
- Sugar: 12
- Sodium: 135
- Fat: 9
- Saturated Fat: 3
- Carbohydrates: 19
- Fiber: 1
- Protein: 4
Keywords: spider cookies, Halloween cookies, peanut butter cookies, easy Halloween treat, spider cookies recipe, Halloween dessert, peanut butter spider cookies


