I watched my neighbor, a woman named Clara from two doors down, struggle with a bag of groceries one rainy Thursday. I ran over to help, and as we stood under her awning, she laughed and said, “You know what my kids always ask for when the weather turns? That chicken pot pie. The one with the butter crust that flakes everywhere.” She didn’t offer the recipe right then. She just told me about it, like you’d tell someone about a good movie you saw. But a week later, a little note card appeared in my mailbox, with her handwriting all over it. That note card is stained now, honestly, but I’ve made this pie more times than I can count.
I used to think chicken pot pie was a lot of work for something that might not even turn out right. Maybe you’ve been there—soggy bottom crusts, a filling that’s too thin, or that weird canned taste from using cream-of-something soup. Let me tell you, Clara’s version changed my mind completely. The butter crust is the star here, but the filling—loaded with tender chicken, carrots, and peas in a rich, creamy sauce—is what makes everyone at the table go quiet for a second. Well, except for the “mmm” sounds.
I tweaked it a bit over the years. I added a little more thyme, swapped in frozen peas because they’re always in my freezer, and figured out the trick to keeping that crust flaky without it becoming a disaster. This recipe has become our go-to for rainy days, busy Sundays, and anytime we need a meal that feels like a hug. It’s not fancy, but it’s honest, and it works every single time. I mean, what more do you really need from a dinner?
Why You’ll Love This Recipe
This isn’t just another chicken pot pie recipe. This is the one that gets written on a stained note card and passed along. Here is why I keep coming back to it, and why I think you will too:
- Kid-Approved, No Question: I have yet to meet a child who turns down a bowl of this. The creamy filling, the tender chicken, the flaky crust—it’s like comfort food catnip for little ones. Even my friend’s super-picky eater cleaned his plate.
- Budget-Friendly Family Meal: You can use leftover roast chicken, rotisserie chicken from the store, or even a couple of chicken breasts you grabbed on sale. The vegetables are basic pantry staples. This is a meal that stretches your dollar without feeling like it.
- Flaky Butter Crust That Actually Works: I am not a pastry chef. I am a home cook who has made a lot of bad pie crusts. This one is forgiving. It uses cold butter and ice water, and it comes out golden, crisp, and flaky every time. No special skills required.
- Make-Ahead Friendly: You can assemble the whole pie a day ahead and bake it when you’re ready. Or you can freeze it for those nights when you just cannot. It reheats beautifully, too—leftovers are almost better the next day.
- Simple Ingredients, No Shortcuts: There is no canned soup in this recipe. Just butter, flour, chicken broth, and milk. It sounds fancy, but it is actually easier than you think. The flavor is so much better, and you control the salt and everything else.
This recipe is different because it respects your time and your wallet. It doesn’t ask you to hunt down obscure ingredients or spend hours in the kitchen. It just asks you to roll up your sleeves, make a little mess, and enjoy a dinner that makes everyone happy. And honestly, that is the best kind of recipe there is.
What Ingredients You Will Need
This recipe uses simple, wholesome ingredients to deliver bold flavor and satisfying texture without the fuss. Most of these are probably in your kitchen right now, which is exactly how I like it.
For the Flaky Butter Crust
- 2 ½ cups all-purpose flour (plus extra for dusting)
- 1 teaspoon salt
- 1 cup cold unsalted butter, cut into small cubes (I prefer Kerrygold for the flavor, but any good butter works)
- 6-8 tablespoons ice water (you might need a little more or less depending on the humidity)
Tip: Keep the butter as cold as possible. If it starts to soften while you’re cutting it, pop the cubes back in the fridge for 10 minutes. This is the secret to a flaky crust.
For the Creamy Chicken Filling
- 3 tablespoons unsalted butter
- 1 medium yellow onion, diced (about 1 cup)
- 2 medium carrots, peeled and diced (about 1 cup)
- 2 celery stalks, diced (about ½ cup)
- 3 cloves garlic, minced
- ⅓ cup all-purpose flour
- 2 cups low-sodium chicken broth
- 1 cup whole milk (or 2% works fine)
- 3 cups cooked chicken, shredded or diced (rotisserie chicken is perfect here)
- 1 cup frozen peas (no need to thaw them)
- 1 teaspoon dried thyme (or 1 tablespoon fresh, chopped)
- ½ teaspoon dried rosemary, crushed
- Salt and black pepper, to taste
- 1 egg, beaten with 1 tablespoon water (for the egg wash)
Ingredient note: I always use low-sodium broth so I can control the salt level. If you only have regular broth, just be careful with the extra salt you add. For the chicken, a store-bought rotisserie chicken is my favorite shortcut—it’s already seasoned and super tender. You can also use leftover turkey after Thanksgiving, and it works like a dream.
Equipment Needed
You don’t need a fancy kitchen to make this pie. Here is what you will need:
- A 9-inch pie dish (a deep-dish one is best, but a standard one works too)
- A large skillet or sauté pan (for cooking the vegetables and making the filling)
- A large mixing bowl (for the pastry dough)
- A pastry cutter or two forks (for cutting the butter into the flour)
- Plastic wrap (for chilling the dough)
- A rolling pin (a wine bottle works in a pinch, honestly)
- A sharp knife or pastry wheel
- A pastry brush (for the egg wash)
- A baking sheet (to place the pie dish on, in case it bubbles over)
If you don’t have a pastry cutter, just use your fingertips—work quickly so the butter doesn’t warm up. I used my grandmother’s old pastry cutter for years, and it still works perfectly. A good quality rolling pin is worth the investment, but a smooth glass bottle will get the job done.
Preparation Method
Take your time with this one. The steps are simple, but rushing the dough can make it tough. Let’s do it right.
Step 1: Make the Butter Crust
In a large mixing bowl, whisk together the 2 ½ cups of flour and 1 teaspoon of salt. Add the cold butter cubes. Using a pastry cutter or your fingertips, work the butter into the flour until it looks like coarse meal with some pea-sized butter pieces still visible. This is important—those little butter chunks are what create the flaky layers.
Sprinkle 6 tablespoons of ice water over the mixture and stir with a fork until it just comes together. If it seems too dry, add the remaining water, one tablespoon at a time. The dough should hold together when you squeeze a handful of it.
Turn the dough out onto a lightly floured surface. Divide it in half, shape each half into a flat disc, wrap tightly in plastic wrap, and refrigerate for at least 30 minutes. I usually let it chill for an hour if I have time. While it chills, you can make the filling.
Step 2: Cook the Vegetables
In a large skillet, melt the 3 tablespoons of butter over medium heat. Add the diced onion, carrots, and celery. Cook for about 6-8 minutes, stirring occasionally, until the vegetables are softened and the onion is translucent. You want them to be tender but not mushy. Add the minced garlic and cook for another minute until it smells amazing.
Step 3: Make the Creamy Sauce
Sprinkle the ⅓ cup of flour over the cooked vegetables. Stir constantly for about 2 minutes. This cooks the raw flour taste out. Slowly pour in the chicken broth while whisking continuously to prevent lumps. Then add the milk, still whisking. Bring the mixture to a gentle simmer. It will thicken nicely after a few minutes.
Step 4: Add the Chicken and Seasonings
Stir in the shredded chicken, frozen peas, dried thyme, and crushed rosemary. Let it simmer for another 2-3 minutes, until everything is heated through. Taste it and add salt and pepper as needed. I usually start with ½ teaspoon of salt and ¼ teaspoon of pepper, then adjust. Remove the skillet from the heat and let the filling cool slightly while you roll out the dough.
Step 5: Assemble the Pie
Preheat your oven to 400°F (200°C). Place a baking sheet on the middle rack to catch any drips. Remove one disc of dough from the fridge. On a lightly floured surface, roll it out into a circle about 12 inches in diameter. Gently transfer it to your pie dish, pressing it into the bottom and up the sides. Don’t stretch the dough—just let it settle naturally.
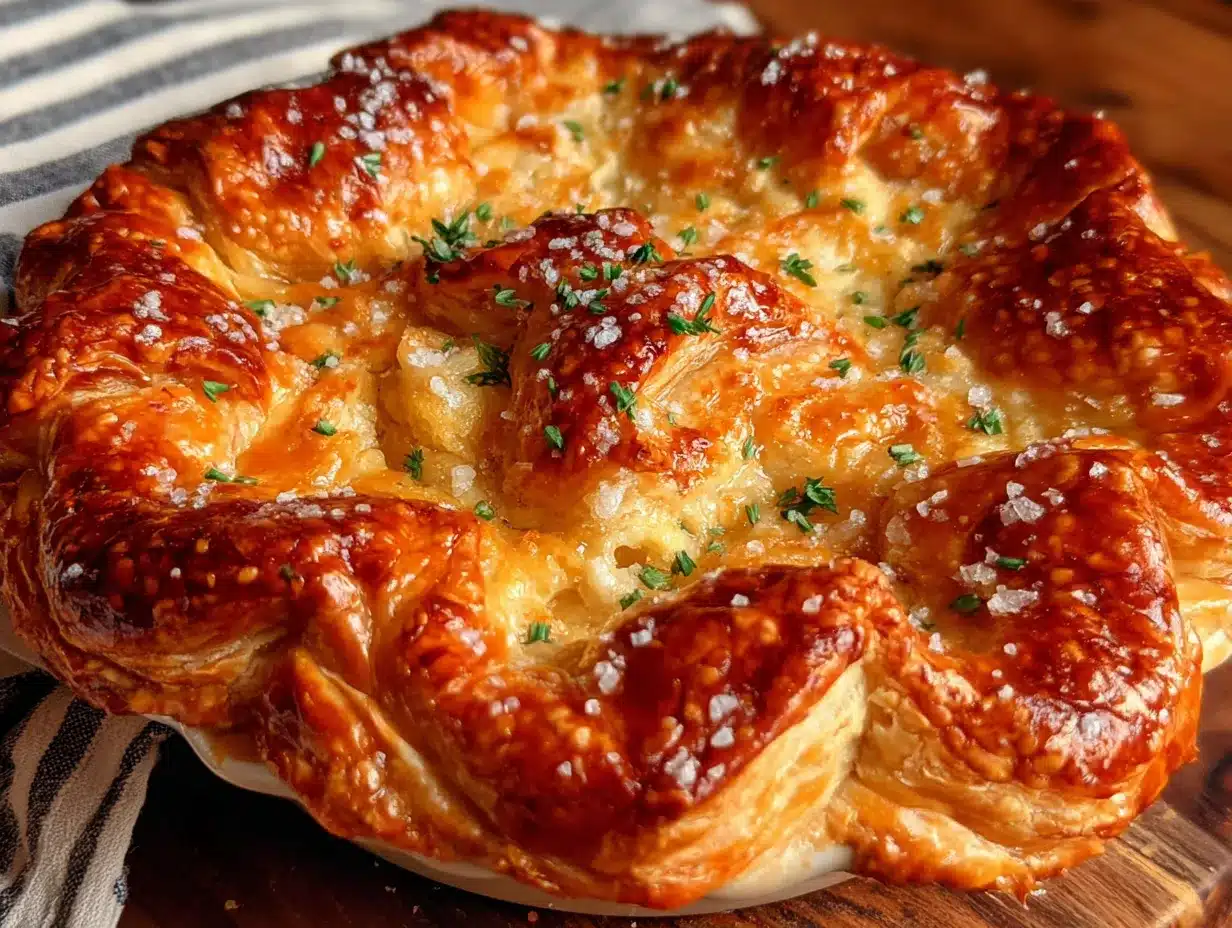
Pour the chicken filling into the crust and spread it evenly. Roll out the second disc of dough to the same size. Place it on top of the filling. Pinch the edges of the top and bottom crusts together to seal them. You can crimp them with a fork or your fingers. Cut 4-5 small slits in the top crust to let steam escape. Brush the top crust with the egg wash—this gives it that beautiful golden color.
Step 6: Bake to Perfection
Place the pie dish on the preheated baking sheet in the oven. Bake for 35-40 minutes, until the crust is deep golden brown and the filling is bubbling up through the slits. If the edges start to brown too quickly, cover them loosely with a strip of aluminum foil. Let the pie cool on a wire rack for at least 15 minutes before serving. This helps the filling set so it doesn’t run all over the plate.
Cooking Tips & Techniques
I have made this pie at least two dozen times, and I have learned a few things the hard way. Here are my best tips:
- Keep Everything Cold: Warm butter is the enemy of a flaky crust. If your kitchen is warm, pop the flour and butter in the freezer for 10 minutes before you start. I once made this on a hot summer day without air conditioning, and the crust was a disaster. Never again.
- Don’t Overwork the Dough: Mix the dough just until it comes together. Overmixing develops gluten, which makes the crust tough. A little lumpy is perfectly fine. Trust me on this.
- Let the Filling Cool: If you pour hot filling into the raw crust, it will start melting the butter before the pie even goes in the oven. Let it cool for 10-15 minutes. It makes a real difference.
- Use the Baking Sheet: I cannot stress this enough. The filling can bubble over, and cleaning burnt filling off the bottom of your oven is no fun. The baking sheet catches everything.
- Check for Doneness: Every oven runs a little differently. If your pie is browning too fast on top but the filling isn’t bubbling, lower the temperature to 375°F and bake for another 10 minutes.
I once forgot to add the peas until after I had already sealed the top crust. I had to poke a hole in the top and sneak them in one by one. It was ridiculous, but the pie still turned out great. So don’t worry if you make a mistake—it’s probably still going to be delicious.
Variations & Adaptations
This recipe is flexible, and I love playing around with it. Here are some ways you can make it your own:
- Vegetable-Packed Version: Add a cup of diced potatoes (cook them with the other veggies), some chopped mushrooms, or a handful of corn kernels. My kids love it when I add corn—it adds a little sweetness.
- Herb Swap: If you don’t have thyme and rosemary, use a teaspoon of dried sage or a tablespoon of fresh parsley. I’ve even used a pinch of poultry seasoning in a pinch, and it worked fine.
- Dairy-Free Adaptation: Use a good quality plant-based butter (like Miyoko’s) for the crust and filling. Swap the milk for unsweetened oat milk or cashew cream. It won’t be quite as rich, but it is still really good.
- Gluten-Free Option: Use a gluten-free all-purpose flour blend (I like Bob’s Red Mill 1-to-1) for both the crust and the filling. The crust will be a little more delicate, so handle it gently.
- Mini Pot Pies: Instead of one big pie, divide the dough and filling among 4-6 ramekins. Bake for 20-25 minutes instead. These are perfect for lunchboxes or when you want individual portions.
My personal favorite variation is adding a handful of shredded cheddar cheese to the filling. It makes it extra creamy and gives it a little tang. I tried it on a whim one night and now I do it half the time. You can thank me later.
Serving & Storage Suggestions
This pie is best served warm, right after it has rested for 15 minutes. The filling will be thick and creamy, and the crust will be perfectly flaky. I like to serve it in shallow bowls so you can get a little bit of everything in every bite.
For a complete meal, I pair it with a simple green salad dressed with lemon and olive oil. The brightness of the salad cuts through the richness of the pie. Sometimes I just steam some green beans or broccoli on the side. My kids are happy with just the pie, honestly.
Storage: Leftover pot pie keeps beautifully in the refrigerator for up to 4 days. Cover the dish tightly with foil or plastic wrap. The crust might lose a little bit of its crispness, but the flavor gets even better as the filling sits.
Reheating: The best way to reheat individual servings is in a 350°F oven for about 10-15 minutes. You can also microwave it, but the crust won’t be as flaky. If you’re reheating from frozen, thaw it in the fridge overnight first, then bake at 350°F for 20-25 minutes.
Freezing: You can freeze the unbaked assembled pie for up to 3 months. Wrap it tightly in plastic wrap and then in foil. When you’re ready to bake, add about 15-20 minutes to the baking time. No need to thaw it first—just pop it in the oven from frozen.
Nutritional Information & Benefits
Here is an approximate breakdown for one serving (1/6 of the pie):
| Nutrient | Amount |
|---|---|
| Calories | 480 |
| Fat | 28g |
| Saturated Fat | 16g |
| Carbohydrates | 38g |
| Fiber | 3g |
| Sugar | 5g |
| Protein | 22g |
| Sodium | 580mg |
This pie is a good source of protein from the chicken, and the carrots and peas provide a nice dose of vitamin A and fiber. Using whole milk and butter adds calcium, but you can lighten it up with lower-fat options if you prefer. I personally think the butter is worth it—it makes the crust what it is.
If you are watching your sodium, use low-sodium broth and go easy on the added salt. The natural flavors of the vegetables and chicken are plenty satisfying on their own.
FAQs
Can I use a store-bought pie crust instead?
Absolutely. If you are short on time, a good quality refrigerated pie crust from the store works fine. Just know that the homemade butter crust is really special—it is flakier and has so much more flavor. But no judgment here. We all have those days.
How do I prevent a soggy bottom crust?
Letting the filling cool before adding it to the crust helps a lot. Also, make sure your oven is fully preheated before you put the pie in. Baking on a preheated baking sheet gives the bottom crust a head start on cooking. I have never had a soggy bottom with this recipe.
Can I make this recipe with leftover turkey?
Yes! This is actually my favorite way to use up leftover Thanksgiving turkey. Just substitute the cooked chicken with an equal amount of shredded turkey. It works perfectly and tastes just as good.
How do I know when the pie is done?
The crust should be deep golden brown, and you should see the filling bubbling through the slits in the top. If you stick a knife through one of the slits, the filling should be hot and thick. The internal temperature should be around 165°F.
Can I add more vegetables?
Of course. You can add up to 1 ½ cups of extra vegetables without changing the recipe too much. Just make sure to cook them first so they are tender. Mushrooms, corn, green beans, and diced potatoes are all great options.
Conclusion
This chicken pot pie is the kind of recipe that becomes a family tradition. It is warm, comforting, and made with simple ingredients that come together to create something truly special. The flaky butter crust, the creamy filling, the tender chicken and vegetables—it is a meal that makes everyone at the table feel cared for.
I hope you give it a try, and I hope you make it your own. Add a little extra thyme, throw in some corn, or pile on the cheese if that is your thing. That is the beauty of a recipe like this—it is a starting point, not a rulebook. And if you make a mess along the way, that is okay too. I still have a flour handprint on my favorite cookbook from the first time I made it.
I would love to hear how it turns out for you. Drop a comment below and let me know if your kids loved it as much as mine do. And if you have a variation that worked really well, share that too. We are all in this together, figuring out how to get dinner on the table and make everyone happy. Happy cooking!
PrintBest Homemade Chicken Pot Pie with Flaky Butter Crust
This chicken pot pie features a flaky butter crust and a creamy filling loaded with tender chicken, carrots, and peas. It’s a comforting, budget-friendly family meal that’s kid-approved and perfect for rainy days.
- Prep Time: 30 minutes
- Cook Time: 40 minutes
- Total Time: 1 hour 10 minutes
- Yield: 6 servings 1x
- Category: Main Course
- Cuisine: American
Ingredients
- 2 ½ cups all-purpose flour (plus extra for dusting)
- 1 teaspoon salt
- 1 cup cold unsalted butter, cut into small cubes
- 6–8 tablespoons ice water
- 3 tablespoons unsalted butter
- 1 medium yellow onion, diced (about 1 cup)
- 2 medium carrots, peeled and diced (about 1 cup)
- 2 celery stalks, diced (about ½ cup)
- 3 cloves garlic, minced
- ⅓ cup all-purpose flour
- 2 cups low-sodium chicken broth
- 1 cup whole milk (or 2%)
- 3 cups cooked chicken, shredded or diced
- 1 cup frozen peas (no need to thaw)
- 1 teaspoon dried thyme (or 1 tablespoon fresh, chopped)
- ½ teaspoon dried rosemary, crushed
- Salt and black pepper, to taste
- 1 egg, beaten with 1 tablespoon water (for egg wash)
Instructions
- Make the butter crust: In a large mixing bowl, whisk together 2 ½ cups flour and 1 teaspoon salt. Add cold butter cubes. Using a pastry cutter or fingertips, work the butter into the flour until it resembles coarse meal with some pea-sized butter pieces. Sprinkle 6 tablespoons ice water over the mixture and stir with a fork until it just comes together. Add more water if needed. Turn dough out onto a floured surface, divide in half, shape into discs, wrap in plastic wrap, and refrigerate for at …
- Cook the vegetables: In a large skillet, melt 3 tablespoons butter over medium heat. Add diced onion, carrots, and celery. Cook for 6-8 minutes until softened. Add minced garlic and cook for 1 minute.
- Make the creamy sauce: Sprinkle ⅓ cup flour over the vegetables and stir constantly for 2 minutes. Slowly pour in chicken broth while whisking continuously. Add milk and whisk. Bring to a gentle simmer until thickened.
- Add chicken and seasonings: Stir in shredded chicken, frozen peas, dried thyme, and crushed rosemary. Simmer for 2-3 minutes. Season with salt and pepper to taste. Remove from heat and let cool slightly.
- Assemble the pie: Preheat oven to 400°F (200°C). Place a baking sheet on the middle rack. Roll out one disc of dough on a floured surface into a 12-inch circle. Transfer to a 9-inch pie dish. Pour filling into crust. Roll out second disc and place on top. Pinch edges to seal, cut slits in top, and brush with egg wash.
- Bake: Place pie dish on preheated baking sheet. Bake for 35-40 minutes until crust is deep golden brown and filling is bubbling. If edges brown too quickly, cover with foil. Let cool on a wire rack for at least 15 minutes before serving.
Notes
Keep butter as cold as possible for a flaky crust. Let filling cool before adding to crust to prevent a soggy bottom. Use a baking sheet to catch any drips. For best results, let pie rest 15 minutes before serving.
Nutrition
- Serving Size: 1/6 of pie
- Calories: 480
- Sugar: 5
- Sodium: 580
- Fat: 28
- Saturated Fat: 16
- Carbohydrates: 38
- Fiber: 3
- Protein: 22
Keywords: chicken pot pie, homemade pot pie, flaky butter crust, comfort food, family dinner, easy chicken pot pie


