My brother asked why I couldn’t just skip the flour dredge and dump the honey garlic sauce directly into the pan with the raw chicken. I started to explain why that wouldn’t work—something about caramelization and burning sugar and the sauce needing a sticky base to cling to. Then I stopped. Honestly, I had no real reason other than that’s how every recipe I’d ever seen did it. So I shrugged, said “fine, we’ll try it your way,” fully expecting a sad, watery mess.
What came out of that pan was, no exaggeration, the best honey garlic chicken I’d ever made. The sauce reduced right around the chicken thighs as they cooked, creating this impossibly sticky, lacquered glaze without a single extra step. I stood there at the stove, spatula in hand, feeling humbled by a beginner’s instinct that turned out to be exactly right.
The kitchen smelled like a fancy Asian takeout spot—sweet, savory, with that little punch of garlic that makes your mouth water. My brother just smirked and said “told you.” I’ve been making it this way ever since, and let me tell you, it’s become my go-to for those nights when I want something that tastes like I spent hours in the kitchen but really only took about 30 minutes from start to finish. Maybe you’ve had that moment where a recipe you thought you knew got completely turned on its head. This is that recipe.
Why You’ll Love This Recipe
These honey garlic chicken thighs aren’t just good—they’re the kind of meal that makes you close your eyes after the first bite. The glaze clings to every inch of the chicken, and that sticky-sweet exterior gives way to impossibly tender meat underneath. Here’s why this recipe has earned a permanent spot in my weekly rotation:
- Quick & Easy: From fridge to table in about 30 minutes, with just 10 minutes of hands-on prep. Perfect for those weeknights when you’re staring at the clock wondering what’s for dinner.
- Simple Ingredients: No trips to specialty stores or obscure spice blends. You probably have everything in your pantry right now—honey, soy sauce, garlic, maybe some ginger if you’re feeling fancy.
- Perfect for Busy Weeknights: This is the definition of a “set it and forget it” meal. Sear the chicken, pour the sauce over, and let the oven or stovetop do the heavy lifting.
- Crowd-Pleaser: I’ve served this to picky eaters, health-conscious friends, and my uncle who swears he doesn’t like “fancy chicken.” Empty plates all around, every single time.
- Unbelievably Delicious: That sticky glaze? It’s pure magic. The honey caramelizes just enough to create this glossy coating that’s sweet, savory, and just a little bit tangy from the soy sauce.
What makes this version different from the hundreds of honey garlic chicken recipes out there? It’s the technique—or rather, the lack of it. By skipping the flour dredge and letting the sauce reduce directly around the chicken, you get a glaze that’s somehow both thicker and more delicate than anything you’d get from a complicated method. It’s comfort food reimagined: faster, simpler, but with the same soul-soothing satisfaction. Perfect for impressing guests without stress, or turning a random Tuesday into something memorable.
What Ingredients You Will Need
This recipe uses simple, wholesome ingredients to deliver bold flavor and satisfying texture without the fuss. Most of these are pantry staples, which means you’re probably already halfway there.
- Chicken Thighs – bone-in, skin-on (about 6-8 thighs, roughly 2 pounds total). The skin gets wonderfully crispy under the glaze, and the bone keeps the meat juicy. If you only have boneless, skinless thighs, they’ll work too—just reduce cooking time by about 8-10 minutes.
- Honey – 1/3 cup. Use a good-quality honey here; the flavor really comes through. I prefer a mild wildflower honey, but any liquid honey works. Avoid honey that’s crystallized or too thick—it won’t dissolve as smoothly.
- Soy Sauce – 1/4 cup. I recommend low-sodium soy sauce so you can control the salt level. Tamari or coconut aminos work great for gluten-free options.
- Garlic – 5-6 cloves, minced. Fresh garlic is non-negotiable here. The jarred stuff just doesn’t have the same punch, and you want that fragrant garlic flavor to infuse the sauce.
- Rice Vinegar – 2 tablespoons. This adds a subtle tang that balances the sweetness of the honey. Apple cider vinegar works in a pinch, but rice vinegar is milder and more authentic.
- Fresh Ginger – 1 tablespoon, grated. Optional but highly recommended. It adds a warm, spicy note that cuts through the sweetness beautifully.
- Sesame Oil – 1 teaspoon. Just a little for that nutty aroma at the end. Toasted sesame oil is best—regular sesame oil is too mild.
- Cornstarch – 1 tablespoon mixed with 2 tablespoons water (for the slurry). This is optional, but if you want an extra-thick glaze, this is your secret weapon.
- Green Onions – 2-3, sliced, for garnish. Also some sesame seeds for that classic look.
- Salt and Pepper – to taste. Go easy on the salt since the soy sauce brings plenty.
Pro tip from my kitchen: I always use chicken thighs from a local farm when I can find them. The flavor difference is noticeable—richer, more chicken-y. But honestly, whatever you find at the grocery store will work beautifully. Just pat them dry with paper towels before cooking for the best sear.
Equipment Needed
You don’t need a fancy kitchen to make this recipe shine. Here’s what you’ll need:
- Large Oven-Safe Skillet – cast iron is my go-to, but any heavy-bottomed skillet works. You need something that can go from stovetop to oven if you’re using the oven method.
- Tongs – for flipping the chicken without piercing the skin. Trust me, save yourself the frustration and use tongs.
- Small Bowl – for mixing the sauce ingredients together.
- Measuring Cups and Spoons – pretty standard, but get them out beforehand so you’re not scrambling.
- Chef’s Knife and Cutting Board – for mincing garlic and grating ginger.
- Microplane or Fine Grater – for grating the ginger. A regular grater works too, but a microplane gives you that almost-paste texture that dissolves into the sauce.
If you don’t have an oven-safe skillet, no worries. You can cook the chicken entirely on the stovetop, or transfer it to a baking dish for the oven. I’ve done it both ways, and honestly, the stovetop-only method works just fine—you just need to watch the sauce more carefully so it doesn’t burn.
Preparation Method
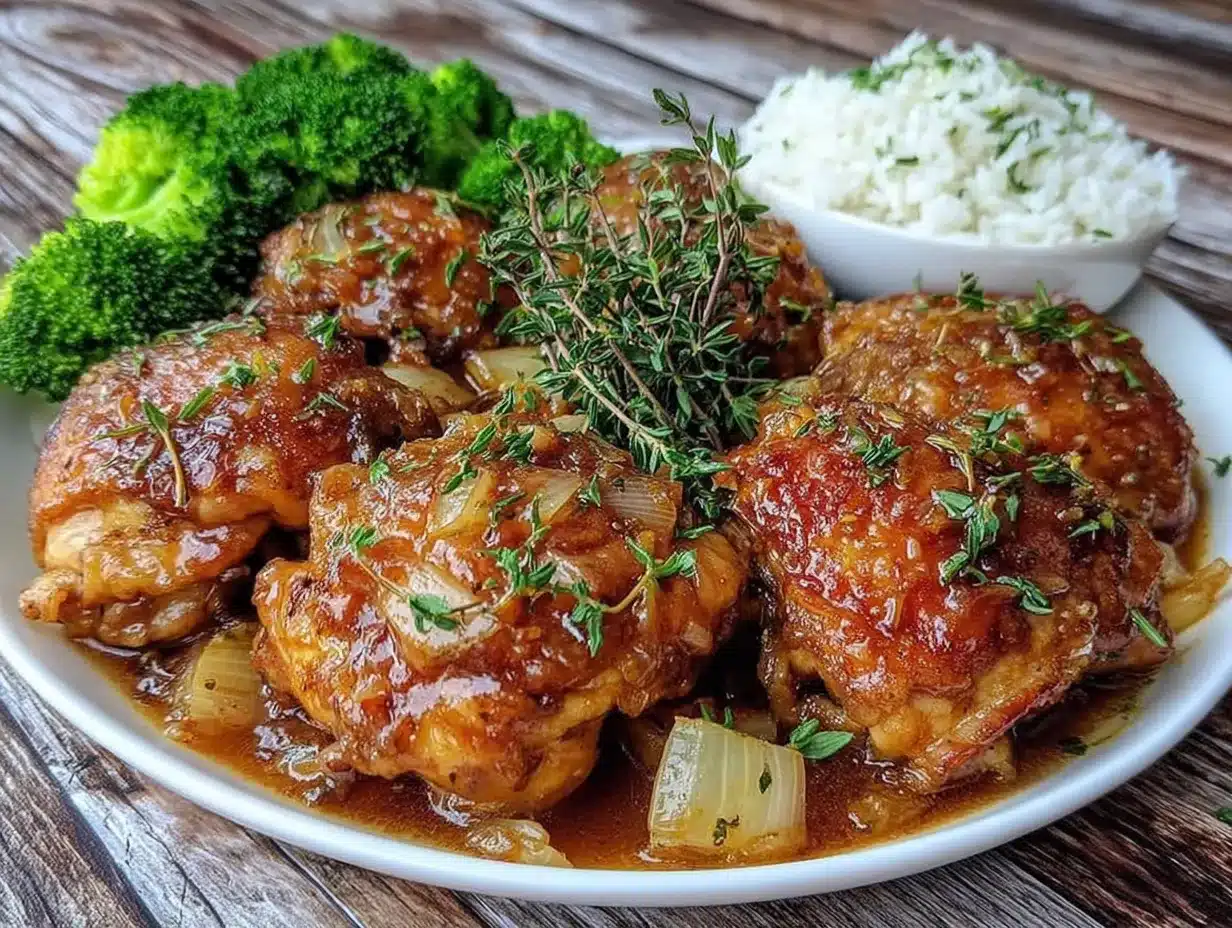
Step 1: Prep the Chicken
Pat the chicken thighs dry with paper towels. This is crucial—wet skin won’t get crispy. Season both sides generously with salt and pepper. Let them sit at room temperature for about 10 minutes while you prep the sauce.
Step 2: Make the Honey Garlic Sauce
In a small bowl, whisk together 1/3 cup honey, 1/4 cup soy sauce, 2 tablespoons rice vinegar, 5-6 minced garlic cloves, and 1 tablespoon grated ginger (if using). Set aside. The sauce should smell sweet and pungent, with that sharp garlic kick that tells you it’s going to be good.
Step 3: Sear the Chicken
Heat 1 tablespoon of oil (vegetable or avocado oil works best) in your large skillet over medium-high heat. When the oil shimmers, place the chicken thighs skin-side down. Don’t crowd the pan—work in batches if needed. Let them cook undisturbed for 5-6 minutes until the skin is golden brown and crispy. Flip and cook for another 3 minutes on the other side.
Visual cue: The skin should be deep golden, almost amber in spots, with crispy edges. If it’s pale, let it go longer.
Step 4: Add the Sauce
Pour the honey garlic sauce over the chicken thighs. Reduce the heat to medium-low and let the sauce simmer. As it cooks, the sauce will start to thicken and reduce, coating the chicken in that gorgeous sticky glaze. Spoon the sauce over the chicken occasionally to build up layers of flavor.
Step 5: Finish Cooking
Cook for another 10-12 minutes, or until the chicken reaches an internal temperature of 165°F (74°C). If you want an extra-thick glaze, stir in the cornstarch slurry (1 tablespoon cornstarch mixed with 2 tablespoons water) during the last 2 minutes of cooking. The sauce should bubble and thicken almost immediately.
Step 6: Garnish and Serve
Remove from heat. Drizzle with 1 teaspoon sesame oil and toss to coat. Sprinkle with sliced green onions and sesame seeds. Let the chicken rest for 5 minutes before serving—this lets the glaze set and the juices redistribute.
My personal efficiency tip: While the chicken is searing, I prep the green onions and mix the cornstarch slurry. That way, everything is ready to go when I need it, and I’m not frantically chopping while the sauce reduces.
Cooking Tips & Techniques
I’ve made this recipe at least two dozen times, and I’ve learned a few things the hard way. Here’s what I wish someone had told me:
- Don’t skip the pat-dry step. I know it seems fussy, but moisture is the enemy of crispy skin. If your chicken is wet, it’ll steam instead of sear, and you’ll end up with pale, rubbery skin. Nobody wants that.
- Watch the heat. Honey burns faster than you think. Keep the heat at medium-low once you add the sauce. If you see the sauce getting dark too quickly or smelling burnt, pull the pan off the heat immediately.
- Use a meat thermometer. I can’t stress this enough. Chicken thighs are forgiving, but they’re done at 165°F (74°C). Overcooking them—even by a few minutes—can make them dry. I use an instant-read thermometer and check the thickest part of the thigh.
- Let it rest. I know you’re hungry, but resting is non-negotiable. The sauce sets, the juices reabsorb, and the whole thing becomes more cohesive. Five minutes feels like forever, but it’s worth it.
I once tried to rush this recipe by cranking the heat to high. Big mistake. The honey burned before the chicken was even close to done, and I ended up with bitter, charred chicken and a pan that took forever to scrub clean. Learn from my impatience.
Variations & Adaptations
This recipe is surprisingly flexible. Here are some ways I’ve adapted it over the years:
Spicy Honey Garlic Chicken
Add 1-2 teaspoons of sriracha or red pepper flakes to the sauce. The heat cuts through the sweetness beautifully. I do this when I’m craving something with a little kick.
Slow Cooker Version
Sear the chicken first (don’t skip this—it adds so much flavor), then transfer to a slow cooker with the sauce. Cook on low for 4-5 hours or high for 2-3 hours. Thicken the sauce on the stovetop with a cornstarch slurry before serving. The chicken will be fall-apart tender.
Gluten-Free Option
Use tamari or coconut aminos instead of soy sauce. Everything else is naturally gluten-free. I’ve made this for friends with celiac disease, and they couldn’t tell the difference.
Baked Version
After searing, transfer the skillet to a preheated 375°F (190°C) oven for 15-20 minutes. The dry heat of the oven helps the glaze set even better. This is my preferred method when I’m making a larger batch.
Vegetable Add-Ins
Throw in some broccoli florets, snap peas, or bell peppers during the last 5 minutes of cooking. They’ll soak up the extra sauce and become a delicious side dish. I’ve done this many times when I wanted a one-pan meal.
Serving & Storage Suggestions
These honey garlic chicken thighs are incredibly versatile when it comes to serving. Here’s how I like to enjoy them:
Serving Temperature: Serve hot, straight from the pan. The glaze is at its stickiest and most flavorful when it’s just been cooked. Let it rest for 5 minutes, but don’t let it cool completely—the sauce will thicken and become less glossy.
What to Serve With It: Steamed jasmine rice is my go-to—it soaks up the extra sauce perfectly. For a low-carb option, try cauliflower rice or a simple green salad. Roasted vegetables like broccoli, asparagus, or green beans also work beautifully. I sometimes serve it with garlic noodles for an indulgent treat.
Storage: Store leftovers in an airtight container in the refrigerator for up to 4 days. The glaze will thicken as it cools, but it will loosen up when reheated.
Reheating: The best way to reheat is in a skillet over medium-low heat with a splash of water or chicken broth. This helps the glaze loosen up without burning. You can also use the microwave, but the skin won’t be as crispy. If you’re reheating in the oven, cover with foil to prevent the glaze from burning.
Freezing: These freeze beautifully. Place the cooled chicken in a freezer-safe container with the sauce. Freeze for up to 3 months. Thaw overnight in the refrigerator and reheat as directed above. The flavor actually gets better after freezing—the sauce has time to really penetrate the meat.
Nutritional Information & Benefits
Here’s the approximate nutritional breakdown per serving (based on 4 servings, with one chicken thigh each):
- Calories: 380
- Protein: 28g
- Fat: 18g
- Carbohydrates: 24g
- Sugar: 20g (from honey)
- Sodium: 680mg
Health Benefits: Chicken thighs are a great source of protein, iron, and B vitamins. Honey provides antioxidants and has natural antibacterial properties. Garlic is known for its immune-boosting benefits. Ginger adds anti-inflammatory compounds. This recipe fits well into a balanced diet—it’s indulgent but made with real, whole ingredients.
Dietary Considerations: This recipe is naturally dairy-free and can be made gluten-free with a simple soy sauce swap. It’s not low-carb due to the honey, but you can reduce the honey to 1/4 cup to cut the sugar. If you’re watching your sodium, use low-sodium soy sauce and go easy on the added salt.
My personal perspective: I love that this recipe feels like a treat but doesn’t rely on processed ingredients. It’s the kind of meal that makes you feel good about what you’re eating—satisfying, flavorful, and made from scratch.
Frequently Asked Questions
Can I use chicken breasts instead of thighs?
Yes, but be careful. Chicken breasts cook faster and can dry out. Use boneless, skinless breasts and reduce the cooking time by about 5-7 minutes. Check for doneness at 160°F (71°C)—they’ll carry over to 165°F while resting.
Why is my sauce not thickening?
Either the heat is too low, or you need a cornstarch slurry. If the sauce is thin after 10 minutes of simmering, turn the heat up slightly and stir in the slurry. It should thicken within a minute or two.
Can I make this ahead of time?
Absolutely. Cook the chicken completely, then store it in the fridge. Reheat gently in a skillet with a splash of water. The flavors actually meld together even more overnight.
How do I prevent the honey from burning?
Keep the heat at medium-low once you add the sauce. If you see the sauce getting too dark or smelling burnt, pull the pan off the heat immediately. You can also add a tablespoon of water to the sauce to thin it out and lower the cooking temperature.
Can I double this recipe?
Yes, but use a larger pan and don’t crowd the chicken. If you’re doubling, sear the chicken in batches to get that crispy skin. You may need to simmer the sauce a bit longer to thicken it properly.
Conclusion
These easy honey garlic chicken thighs have become my secret weapon for nights when I need dinner to be both impressive and effortless. That sticky, glossy glaze—the one my brother accidentally invented—has ruined me for any other version. I can’t go back to flour dredges and complicated methods when this shortcut works so beautifully.
I hope you give this recipe a try, and I hope it surprises you the way it surprised me. Maybe you’ll add a little extra ginger, or throw in some chili flakes, or serve it over rice with a side of roasted broccoli. Whatever you do, make it your own. That’s the beauty of a simple recipe—it leaves room for your personality to shine through.
If you make these honey garlic chicken thighs, I’d love to hear about it. Drop a comment below and tell me how they turned out, or share your own twist on the recipe. And if you’re looking for more easy weeknight dinners, you might enjoy our crispy garlic chicken or these sticky soy glazed meatballs. Happy cooking, friends!
PrintEasy Honey Garlic Chicken Thighs: Sticky Glazed Perfection
These honey garlic chicken thighs are quick, easy, and incredibly delicious. The sticky, lacquered glaze clings to every inch of the chicken, creating a sweet and savory dish that’s perfect for busy weeknights.
- Prep Time: 10 minutes
- Cook Time: 20 minutes
- Total Time: 30 minutes
- Yield: 4 servings 1x
- Category: Main Course
- Cuisine: Asian-inspired
Ingredients
- 6–8 bone-in, skin-on chicken thighs (about 2 pounds)
- 1/3 cup honey
- 1/4 cup low-sodium soy sauce
- 5–6 cloves garlic, minced
- 2 tablespoons rice vinegar
- 1 tablespoon fresh ginger, grated (optional)
- 1 teaspoon sesame oil
- 1 tablespoon cornstarch mixed with 2 tablespoons water (optional, for extra-thick glaze)
- 2–3 green onions, sliced (for garnish)
- Sesame seeds (for garnish)
- Salt and pepper to taste
- 1 tablespoon vegetable or avocado oil (for searing)
Instructions
- Pat the chicken thighs dry with paper towels. Season both sides generously with salt and pepper. Let them sit at room temperature for about 10 minutes.
- In a small bowl, whisk together honey, soy sauce, rice vinegar, minced garlic, and grated ginger (if using). Set aside.
- Heat 1 tablespoon of oil in a large oven-safe skillet over medium-high heat. When the oil shimmers, place the chicken thighs skin-side down. Cook undisturbed for 5-6 minutes until the skin is golden brown and crispy. Flip and cook for another 3 minutes on the other side.
- Pour the honey garlic sauce over the chicken thighs. Reduce the heat to medium-low and let the sauce simmer. Spoon the sauce over the chicken occasionally.
- Cook for another 10-12 minutes, or until the chicken reaches an internal temperature of 165°F (74°C). If desired, stir in the cornstarch slurry during the last 2 minutes of cooking for a thicker glaze.
- Remove from heat. Drizzle with sesame oil and toss to coat. Sprinkle with sliced green onions and sesame seeds. Let the chicken rest for 5 minutes before serving.
Notes
Don’t skip patting the chicken dry for crispy skin. Watch the heat to prevent honey from burning. Use a meat thermometer for perfect doneness. Let the chicken rest for 5 minutes before serving.
Nutrition
- Serving Size: 1 chicken thigh
- Calories: 380
- Sugar: 20
- Sodium: 680
- Fat: 18
- Saturated Fat: 5
- Carbohydrates: 24
- Protein: 28
Keywords: honey garlic chicken, chicken thighs, sticky glaze, easy weeknight dinner, Asian chicken recipe


