The woman at the next stall watched me eyeing her tiny pumpkins—the ones no bigger than my fist—and she didn’t say anything at first. Then she picked one up, turned it over in her weathered hands, and said, “You’re not going to carve these, are you?” I laughed and admitted I was thinking more about baking than jack-o’-lanterns. Her name was Gloria, and she’d been selling produce at that market for thirty-seven years. She told me her grandmother used to roast these miniature pumpkins and fold the puree into a cheesecake so light it felt like eating a cloud. I told her that sounded impossible—cheesecake is supposed to be dense, right? She just smiled and wrote her email on a crumpled receipt. “I’ll send you the recipe,” she said. “But you have to promise not to mess it up.”
Three weeks later, after four failed attempts and one very memorable kitchen disaster involving a springform pan and my ceiling fan, I finally got it right. The secret, it turns out, wasn’t in the pumpkin at all—it was in how you treated the cream cheese. Gloria’s grandmother knew something that most modern recipes forget: you can have richness without heaviness. These light & creamy mini pumpkin cheesecakes are proof. They’ve got that familiar fall flavor you crave, but they won’t leave you reaching for a napkin after two bites. Honestly, I’ve brought these to three different gatherings this season, and every single time someone asks for the recipe before they’ve finished their first one.
Maybe you’ve been there—looking for a dessert that feels special but doesn’t require you to unbutton your jeans afterward. Or maybe you just want something pumpkin-flavored that isn’t another loaf of bread. Either way, these little cheesecakes are about to become your new favorite thing. They’re creamy without being heavy, sweet without being cloying, and cute enough to make your friends think you spent way more effort than you actually did. Let me tell you, that’s a win-win in my book.
Why You’ll Love This Recipe
I’ve tested this recipe more times than I care to admit—partly because I kept eating the test batches, and partly because I wanted every detail to be just right. After all those trials, here’s what I know for sure about these light & creamy mini pumpkin cheesecakes:
- Quick & Easy: From start to finish, you’re looking at about 45 minutes of active time. The rest is just chilling in the fridge, which is totally hands-off. Perfect for those weeknights when you suddenly remember you need to bring dessert to tomorrow’s potluck.
- Simple Ingredients: No weird specialty items here. Cream cheese, pumpkin puree, eggs, sugar, and a few warm spices—that’s pretty much it. You probably have most of this in your kitchen right now.
- Perfect for Fall Gatherings: Thanksgiving, Friendsgiving, Halloween parties, or just a cozy Sunday dinner—these mini cheesecakes fit every occasion. They’re individual-sized, so no one has to fight over the corner piece.
- Crowd-Pleaser: I’ve served these to everyone from my picky-eater nephew to my grandmother who “doesn’t like pumpkin.” They all went back for seconds. The texture is so light and airy that even people who claim they’re full somehow find room.
- Unbelievably Delicious: The secret is in the ratio—more cream cheese than pumpkin, with a touch of sour cream for tanginess. The result is a cheesecake that tastes indulgent but feels surprisingly light. You’ll close your eyes after the first bite, I promise.
What makes this version different from all the other pumpkin cheesecake recipes out there? It’s the technique. Instead of dumping everything in a bowl and hoping for the best, you’ll whip the cream cheese until it’s truly fluffy before adding anything else. That extra minute of beating time makes all the difference between a dense brick and a creamy cloud. Plus, using mini muffin tins instead of a full-size pan means they bake faster and cool quicker—less waiting, more eating.
These little cheesecakes have become my go-to for fall entertaining because they’re the kind of dessert that makes people feel special without making me feel stressed. And honestly, isn’t that what we’re all looking for?
What Ingredients You Will Need
This recipe uses simple, wholesome ingredients to deliver that signature creamy texture and warm pumpkin flavor. Most of these are pantry staples, especially if you do any fall baking at all. Let me walk you through each one and share a few tips I’ve learned along the way.
For the Crust
- 1 ½ cups graham cracker crumbs (about 12 full sheets) — You can buy pre-crushed crumbs, but I find that crushing your own gives a better texture. Just toss them in a zip-top bag and go to town with a rolling pin. It’s oddly satisfying.
- 5 tablespoons unsalted butter, melted — Salted butter works in a pinch, just reduce any added salt in the crust. I use Land O’Lakes because it’s what my mom always used.
- 2 tablespoons granulated sugar — Just enough to give the crust a little sweetness without competing with the filling.
- ¼ teaspoon ground cinnamon — This is optional, but honestly, why wouldn’t you? It makes the crust taste like fall.
For the Filling
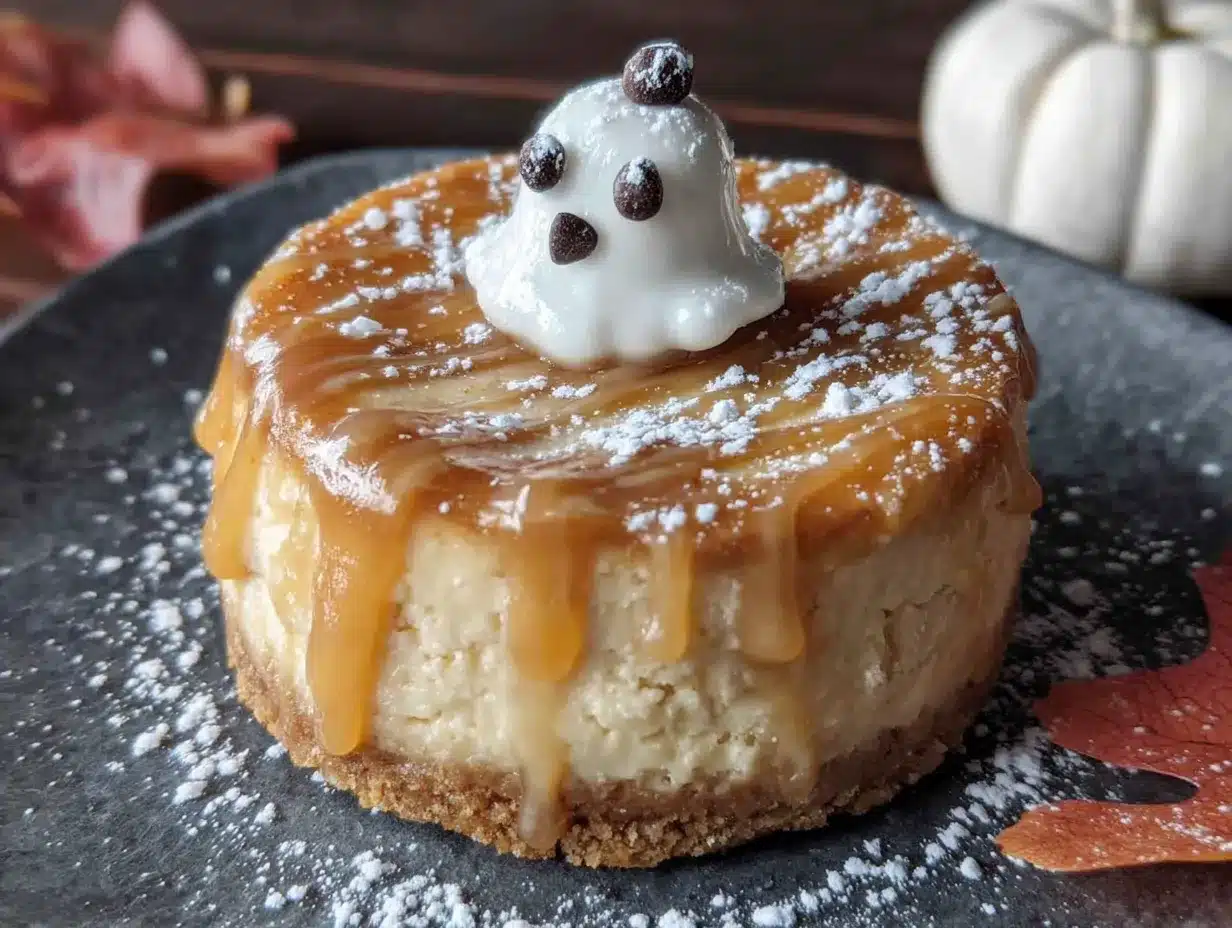
- 16 ounces cream cheese, softened to room temperature — This is non-negotiable. Cold cream cheese will give you lumpy cheesecake. I recommend Philadelphia brand for the creamiest results. Leave it on the counter for at least an hour before you start.
- ¾ cup granulated sugar — Regular white sugar keeps the texture light. Brown sugar would make it too dense and molasses-heavy.
- 2 large eggs, room temperature — Cold eggs can seize up your batter. If you forgot to take them out ahead of time, place them in a bowl of warm water for 5 minutes.
- 1 cup pumpkin puree — Not pumpkin pie filling! Make sure you grab the 100% pure pumpkin. Libby’s is my go-to brand. If you’re feeling ambitious, you can roast and puree your own pumpkin, but canned works beautifully.
- ¼ cup sour cream — This is the secret ingredient for that light, tangy finish. Greek yogurt works as a substitute if that’s what you have on hand.
- 1 teaspoon vanilla extract — Pure vanilla extract makes a difference here. The imitation stuff has a chemical aftertaste that really stands out in a simple recipe like this.
- 1 teaspoon pumpkin pie spice — If you don’t have this blend, mix ½ teaspoon cinnamon, ¼ teaspoon nutmeg, ¼ teaspoon ginger, and a pinch of cloves. Trust me, it’s worth measuring separately rather than guessing.
- ½ teaspoon ground cinnamon — Because you can never have too much cinnamon in a pumpkin recipe.
- ¼ teaspoon salt — Salt balances the sweetness and makes all the flavors pop. Don’t skip it.
For the Topping (Optional but Recommended)
- ½ cup heavy whipping cream — Cold, straight from the fridge.
- 1 tablespoon powdered sugar — Just enough to sweeten the cream without making it heavy.
- ¼ teaspoon vanilla extract — Again, pure is best.
- Ground cinnamon or nutmeg for dusting — This makes them look bakery-finished.
Equipment Needed
You don’t need a fancy kitchen to make these light & creamy mini pumpkin cheesecakes. Here’s what you’ll want to have on hand:
- Mini muffin tin(s): You’ll need two 24-cup mini muffin tins, or you can bake in batches. I bought mine at a thrift store for three dollars, and they work perfectly. If you only have one tin, just refrigerate the remaining batter while the first batch bakes.
- Muffin liners: Mini-sized paper liners make removal a breeze. Without them, you’ll be fighting to get the cheesecakes out in one piece. Trust me on this one—I learned the hard way after my first batch ended up as cheesecake crumble.
- Electric hand mixer or stand mixer: You can mix by hand if you have impressive arm strength, but an electric mixer makes getting that fluffy texture much easier. I use my KitchenAid stand mixer for the cream cheese and a hand mixer for the whipped cream.
- Large mixing bowls: One for the crust, one for the filling. Glass or stainless steel works best.
- Small bowl: For combining the crust ingredients.
- Measuring cups and spoons: Accurate measurements matter in baking, so use proper measuring tools rather than guessing.
- Spatula: A rubber spatula for scraping down the bowl is essential. You don’t want to leave any of that creamy filling behind.
- Cookie scoop or small spoon: For evenly distributing the batter into the muffin cups. A #60 cookie scoop (about 1 tablespoon) works perfectly.
- Cooling rack: For cooling the cheesecakes before refrigerating them.
If you don’t have a mini muffin tin, you can use a regular 12-cup muffin tin. Just increase the baking time by 5-8 minutes and expect to get about 12 regular-sized cheesecakes instead of 24 minis.
Preparation Method
Let’s get baking! I’ve broken this down into clear steps so you can follow along without any surprises. Take your time with each step—rushing is the number one reason cheesecakes end up dense instead of light and creamy.
Step 1: Prepare the Crust
Preheat your oven to 325°F (163°C). Line your mini muffin tins with paper liners—this makes all the difference later when you’re trying to get the cheesecakes out in one piece.
In a small bowl, combine the graham cracker crumbs, melted butter, sugar, and cinnamon. Stir with a fork until the mixture looks like wet sand and holds together when you squeeze it. If it’s too dry, add another teaspoon of melted butter. If it’s too wet, add a tablespoon more crumbs.
Press about 1 teaspoon of the crust mixture into the bottom of each liner. Use the back of a small spoon or a shot glass to press it down firmly and evenly. You want a compact layer about ¼-inch thick. Don’t skip this pressing step—a loose crust will fall apart when you try to eat the cheesecake.
Bake the crusts for 5 minutes, just until they’re set and barely starting to brown at the edges. Set them aside to cool while you make the filling. Leave the oven on—you’ll need it again soon.
Step 2: Make the Filling
In a large mixing bowl, beat the softened cream cheese with an electric mixer on medium speed until it’s completely smooth and fluffy. This takes about 2-3 minutes. Scrape down the sides and bottom of the bowl with a spatula at least once. I cannot stress this enough—the cream cheese must be truly soft and well-beaten. Any lumps now will stay lumps forever.
Add the sugar and beat for another minute until the mixture is light and airy. You should see it visibly lighten in color. Add the eggs one at a time, beating on low speed just until each is incorporated. Overbeating at this stage can incorporate too much air, which causes cracks during baking.
Add the pumpkin puree, sour cream, vanilla extract, pumpkin pie spice, cinnamon, and salt. Mix on low speed until everything is just combined. Stop and scrape the bowl, then give it one final quick mix. The batter should be smooth, thick, and a beautiful orange color. Don’t worry if it looks a bit thinner than regular cheesecake batter—that’s normal for the light version.
Step 3: Fill the Muffin Cups
Using your cookie scoop or a small spoon, divide the filling evenly among the prepared crusts. Fill each cup almost to the top—about ¾ full is perfect. The cheesecakes will rise slightly during baking but won’t overflow if you leave a little room.
Tap the muffin tin gently on the counter a few times to release any air bubbles. You’ll see tiny bubbles rise to the surface—that’s exactly what you want. If you see large bubbles, pop them with a toothpick.
Step 4: Bake the Cheesecakes
Bake at 325°F (163°C) for 15-18 minutes, or until the edges look set and the centers are still slightly jiggly. The key word here is “slightly.” If the centers are still liquid, they need more time. If they’re completely firm and starting to crack, they’ve overbaked.
I always check at the 15-minute mark. The cheesecakes should look puffed around the edges but still have a slight wobble in the very center when you gently shake the pan. They’ll continue to set as they cool, so don’t be tempted to leave them in longer.
Let the cheesecakes cool in the pan on a wire rack for 15 minutes. Then carefully transfer them (still in the pan) to the refrigerator and chill for at least 2 hours, or overnight. This is the hardest part—waiting. But trust me, it’s worth it. The texture improves dramatically as they chill.
Step 5: Make the Whipped Cream Topping
Just before serving, pour the cold heavy cream, powdered sugar, and vanilla into a chilled bowl. Beat with an electric mixer on medium-high speed until soft peaks form—about 2-3 minutes. Be careful not to overbeat, or you’ll end up with butter. You want the cream to be billowy and light, able to hold its shape but still soft.
Pipe or spoon a small dollop onto each chilled cheesecake. Dust with a pinch of cinnamon or nutmeg for that finished look. If you’re feeling fancy, add a tiny cinnamon stick or a star anise for garnish.
Cooking Tips & Techniques
After making these light & creamy mini pumpkin cheesecakes more times than I can count (and messing up plenty along the way), I’ve gathered some tips that will save you from my mistakes.
Room temperature ingredients are not optional. I learned this the hard way when I tried to rush the process and ended up with lumpy batter. Cream cheese, eggs, and sour cream all need to be at room temperature for the smoothest, creamiest texture. Set everything out on the counter at least an hour before you start. If you’re short on time, cut the cream cheese into cubes and let it sit for 30 minutes—that helps it warm up faster.
Don’t overmix after adding the eggs. This is probably the most common mistake I see. Once the eggs go in, mix just until they’re incorporated. Overmixing incorporates too much air, which expands during baking and then collapses, causing cracks. A few streaks are fine—you’ll mix them out with the next addition.
Use a water bath alternative. Traditional cheesecakes often bake in a water bath to prevent cracking. For mini cheesecakes, that’s a hassle. Instead, place a small pan of hot water on the oven rack below the cheesecakes. The steam creates a humid environment that helps prevent cracks without the risk of water seeping into your liners.
Let them cool gradually. After baking, turn off the oven and crack the door open for 5 minutes before removing the cheesecakes. This gradual cooling prevents the sudden temperature change that causes cracks. Then let them sit on the counter for 15 minutes before refrigerating.
Patience with chilling is key. I know it’s tempting to eat one after 30 minutes in the fridge, but they really need at least 2 hours to set properly. Overnight is even better. The texture firms up and the flavors meld together beautifully. One time I served them after only an hour, and they were still too soft to hold their shape. Learn from my impatience!
Use a cookie scoop for consistent sizes. This ensures all your cheesecakes bake evenly. I use a #60 scoop that holds about 1 tablespoon. If you don’t have one, use a measuring spoon to portion the batter.
Variations & Adaptations
One of the best things about this recipe is how easy it is to customize. Here are some variations I’ve tried and loved:
Gluten-Free Version
Swap the graham cracker crumbs for gluten-free cookie crumbs—ginger snaps work especially well because they add a warm spice that complements the pumpkin. You can also use crushed gluten-free vanilla wafers. The crust-to-filling ratio stays the same, so no adjustments needed.
Dairy-Free Adaptation
Use dairy-free cream cheese (I like Kite Hill or Miyoko’s) and coconut cream instead of sour cream. The texture will be slightly different—a bit less tangy and a touch more coconut-flavored—but still delicious. For the whipped topping, use chilled coconut cream whipped with powdered sugar. Just make sure all your ingredients are at room temperature before mixing.
Low-Sugar Option
Replace the granulated sugar with a cup-for-cup monk fruit sweetener or erythritol. The texture will be nearly identical, though the sweetness level might be slightly different. I’ve also tried using just ½ cup of sugar and adding 2 tablespoons of maple syrup—the flavor was amazing, though the cheesecakes were a bit softer.
Spice Variations
Feeling adventurous? Try adding ¼ teaspoon of cardamom for a more exotic flavor profile, or swap the pumpkin pie spice for chai spice blend. I once made a batch with a pinch of cayenne pepper and a teaspoon of orange zest—the combination of heat and citrus was surprisingly good. My neighbor called it “the most interesting cheesecake” she’d ever had.
Different Crust Options
Graham crackers are classic, but crushed Biscoff cookies, shortbread cookies, or even crushed pretzels (for a sweet-salty combo) all work beautifully. If you use pretzels, reduce the sugar in the crust to 1 tablespoon since pretzels are already salty.
Serving & Storage Suggestions
These light & creamy mini pumpkin cheesecakes are best served chilled, straight from the fridge. The cold temperature keeps them firm and makes the creamy texture really shine. If you’ve added the whipped cream topping, serve them within an hour of topping—otherwise the cream can start to deflate and make the cheesecakes soggy.
For presentation, arrange them on a platter with fresh cranberries, small sage leaves, or cinnamon sticks scattered around. They look gorgeous on a tiered serving stand for parties. I like to dust them with a light sprinkle of cinnamon just before serving—it makes them look like they came from a bakery.
These mini cheesecakes pair beautifully with:
- A cup of hot apple cider or spiced chai
- A scoop of vanilla bean ice cream (if you’re feeling extra indulgent)
- A drizzle of salted caramel sauce
- A side of fresh apple slices or pear slices
Storage: Keep the cheesecakes in an airtight container in the refrigerator for up to 5 days. Without the whipped cream topping, they actually get better after a day or two as the flavors meld together. With the topping, they’re best within 24 hours.
Freezing: These freeze beautifully! Place the cooled, untopped cheesecakes on a baking sheet and freeze until solid (about 2 hours). Transfer them to a freezer-safe container or zip-top bag, separating layers with parchment paper. They’ll keep for up to 3 months. Thaw overnight in the refrigerator before serving, then add the whipped cream topping just before serving.
Reheating: I don’t recommend reheating these—they’re meant to be served cold. But if you accidentally left them out and they’ve warmed up, just pop them back in the fridge for 30 minutes to firm up again.
Nutritional Information & Benefits
Here’s the approximate nutritional breakdown for one mini cheesecake (without whipped cream topping):
- Calories: 145
- Fat: 9g
- Carbohydrates: 14g
- Protein: 3g
- Fiber: 0.5g
- Sugar: 11g
These numbers are estimates and will vary based on your specific ingredients and portion sizes. The whipped cream topping adds about 30 calories per serving.
What I love about these mini cheesecakes is that they feel like a splurge but aren’t actually that heavy on calories. Pumpkin is packed with vitamin A and fiber, while the cream cheese provides calcium and protein. By keeping the portions small (mini size!) and using a lighter technique, you get all the satisfaction of cheesecake without the guilt.
For those watching their sugar intake, you can easily reduce the sugar to ½ cup without sacrificing texture. The pumpkin adds natural sweetness, so they’ll still taste plenty indulgent.
These cheesecakes are vegetarian-friendly and can be made gluten-free or dairy-free with the substitutions mentioned earlier. They’re also nut-free as written, making them a safe option for school bake sales or parties.
Conclusion
These light & creamy mini pumpkin cheesecakes have become my fall signature for a reason. They capture everything I love about autumn baking—the warm spices, the cozy feeling, the way a single bite can make you feel like you’re wrapped in a sweater—without the heaviness that often comes with seasonal desserts.
What started as a conversation with a stranger at a farmer’s market turned into a recipe that I genuinely look forward to making every year. Gloria’s grandmother knew what she was doing, and I’m so grateful that knowledge found its way to my kitchen. Now I’m passing it on to you, with all my trials and errors baked in so you don’t have to make the same mistakes.
I’d love to hear how these turn out for you! Did you try any of the variations? Did your family fight over the last one like mine did? Drop a comment below and let me know. And if you share them on Pinterest or Instagram, tag me—I want to see your beautiful creations. Happy baking, friends. May your cream cheese always be soft and your cheesecakes always be creamy.
Frequently Asked Questions
Can I use canned pumpkin pie filling instead of pure pumpkin puree?
No, I don’t recommend it. Pumpkin pie filling already has sugar and spices added, which will throw off the sweetness and texture of the cheesecake. Stick with 100% pure pumpkin puree for the best results. If you accidentally bought pie filling, you can try using it, but reduce the sugar in the recipe to ¼ cup and skip the added spices.
Why did my cheesecakes crack on top?
Cracks usually happen from overbaking or sudden temperature changes. Make sure you’re taking them out while the centers are still slightly jiggly. Also, avoid opening the oven door during baking, and let them cool gradually in the pan before refrigerating. If cracks do appear, don’t worry—the whipped cream topping covers them perfectly!
Can I make these in a regular muffin tin instead of mini?
Absolutely! Use a standard 12-cup muffin tin with paper liners. You’ll get about 12 regular-sized cheesecakes instead of 24 minis. Increase the baking time to 20-25 minutes, checking at the 20-minute mark. The same doneness test applies—edges set, centers slightly jiggly.
How far in advance can I make these for a party?
You can make the cheesecakes (without the whipped cream topping) up to 3 days in advance. Store them in an airtight container in the refrigerator. Add the whipped cream topping just before serving for the best presentation. If you want to make them even further ahead, freeze them for up to 3 months.
Can I skip the sour cream in the filling?
You can, but the texture won’t be as light and creamy. Sour cream adds tanginess and helps create that airy texture. If you don’t have sour cream, you can substitute plain Greek yogurt (full-fat works best) or even buttermilk powder mixed with a little water. The result will be slightly different but still delicious.
PrintBest Easy Mini Pumpkin Cheesecakes Recipe—Light & Creamy
These light & creamy mini pumpkin cheesecakes are the perfect fall dessert—rich, creamy, and full of warm pumpkin spice, but surprisingly light. They’re easy to make, perfect for gatherings, and sure to be a crowd-pleaser.
- Prep Time: 45 minutes
- Cook Time: 18 minutes
- Total Time: 2 hours 3 minutes (plus chilling time)
- Yield: 24 servings 1x
- Category: Dessert
- Cuisine: American
Ingredients
- 1 ½ cups graham cracker crumbs (about 12 full sheets)
- 5 tablespoons unsalted butter, melted
- 2 tablespoons granulated sugar
- ¼ teaspoon ground cinnamon
- 16 ounces cream cheese, softened to room temperature
- ¾ cup granulated sugar
- 2 large eggs, room temperature
- 1 cup pumpkin puree (not pumpkin pie filling)
- ¼ cup sour cream
- 1 teaspoon vanilla extract
- 1 teaspoon pumpkin pie spice
- ½ teaspoon ground cinnamon
- ¼ teaspoon salt
- ½ cup heavy whipping cream (for topping)
- 1 tablespoon powdered sugar (for topping)
- ¼ teaspoon vanilla extract (for topping)
- Ground cinnamon or nutmeg for dusting (for topping)
Instructions
- Preheat oven to 325°F (163°C). Line mini muffin tins with paper liners.
- In a small bowl, combine graham cracker crumbs, melted butter, 2 tablespoons sugar, and ¼ teaspoon cinnamon. Stir until mixture resembles wet sand.
- Press about 1 teaspoon of crust mixture into the bottom of each liner. Use the back of a spoon to press firmly and evenly.
- Bake crusts for 5 minutes, until set and barely starting to brown. Set aside to cool. Keep oven on.
- In a large bowl, beat softened cream cheese with an electric mixer on medium speed until smooth and fluffy, about 2-3 minutes. Scrape down bowl.
- Add ¾ cup sugar and beat for another minute until light and airy.
- Add eggs one at a time, beating on low speed just until incorporated. Do not overmix.
- Add pumpkin puree, sour cream, 1 teaspoon vanilla, pumpkin pie spice, ½ teaspoon cinnamon, and salt. Mix on low until just combined. Scrape bowl and mix briefly.
- Using a cookie scoop or small spoon, divide filling evenly among prepared crusts, filling each cup about ¾ full.
- Tap muffin tin gently on counter to release air bubbles. Pop large bubbles with a toothpick.
- Bake at 325°F (163°C) for 15-18 minutes, until edges are set and centers are slightly jiggly.
- Cool in pan on a wire rack for 15 minutes. Then transfer pan to refrigerator and chill for at least 2 hours, or overnight.
- Just before serving, make whipped cream: In a chilled bowl, beat cold heavy cream, powdered sugar, and ¼ teaspoon vanilla with an electric mixer on medium-high until soft peaks form, about 2-3 minutes.
- Pipe or spoon a dollop of whipped cream onto each chilled cheesecake. Dust with cinnamon or nutmeg.
Notes
Room temperature ingredients are essential for a smooth, creamy texture. Do not overmix after adding eggs to prevent cracks. For a water bath alternative, place a small pan of hot water on the oven rack below the cheesecakes. Let cheesecakes cool gradually before refrigerating. Chill for at least 2 hours, preferably overnight. Use a cookie scoop for consistent sizes. For gluten-free, use gluten-free cookie crumbs. For dairy-free, use dairy-free cream cheese and coconut cream. For low-sugar, use monk fruit sweetener or reduce sugar to ½ cup. Store in an airtight container in the refrigerator for up to 5 days. Freeze untopped cheesecakes for up to 3 months.
Nutrition
- Serving Size: 1 mini cheesecake
- Calories: 145
- Sugar: 11
- Fat: 9
- Carbohydrates: 14
- Fiber: 0.5
- Protein: 3
Keywords: mini pumpkin cheesecakes, light cheesecake, creamy cheesecake, fall dessert, pumpkin dessert, mini cheesecake, easy cheesecake


