The school bake sale was in twelve hours and I’d completely forgotten. My son, Leo, had reminded me three times that week, and I’d nodded along while mentally sorting through grocery lists and soccer schedules. Now it was 9 PM on a Tuesday, I was out of butter, and every other parent would be bringing those Pinterest-perfect cakes that looked like they belonged in a bakery window. I had a box of Funfetti cake mix in the pantry, some eggs, and about fifteen minutes before I needed to start the laundry. Honestly, I almost just sent in a bag of store-bought cookies. But then I remembered that trick my neighbor Sarah mentioned once—the one where you turn cake mix into cookies. I figured it was worth a shot. Worst case, I’d grab a box of donuts on the way to school. Best case, we’d have something that didn’t look like a total disaster. I let Leo stir the dough while I preheated the oven, and he got sprinkles all over the counter. Classic. The cookies came out puffy and soft, with those little bursts of color that kids go crazy for. I packed them up, half expecting complaints. Instead, Leo’s teacher called me that afternoon to ask for the recipe. Turns out, the simple cookie won the bake sale. Not the fancy layered cake with the buttercream roses. Not the gourmet cupcakes from the expensive bakery. The cookies I threw together in a panic. Maybe you’ve been there—scrambling for something that looks like you tried when you really just survived. These birthday cake cookies are that recipe. They’re the ones that make you look like a hero when you were just trying to get through the night.
Why You’ll Love This Recipe
Let me tell you why these cookies have become a staple in my house. I’ve tested this recipe about seven times now, tweaking the bake time and the dough temperature, and I’ve got it down to a science. These aren’t just cookies—they’re a solution to about a dozen different problems.
- Budget-Friendly: You need a box of cake mix, which costs about a dollar at most stores. No fancy extracts, no specialty flours, no expensive chocolate chips. This is real-food-on-a-real-budget cooking.
- Kid-Approved: My kids, Leo and Maya, fight over the last one every single time. They’ve brought them to school for birthday treats and classroom parties, and they always come back with empty containers.
- Incredibly Easy: We’re talking one bowl, a spoon, and ten minutes of hands-on work. If you can stir, you can make these cookies. No stand mixer required, no chilling the dough for hours.
- Perfect for Last-Minute Needs: Bake sale in the morning? Playdate this afternoon? Forgotten birthday party? This recipe has saved me more times than I can count.
- Endlessly Customizable: Swap the sprinkles, change the extract, add chocolate chips—the base recipe is forgiving and adaptable.
What makes these cookies different from the other cake mix cookie recipes out there is the texture. Most versions come out flat and greasy. My version uses a specific ratio of oil to egg that gives you a puffy, bakery-style cookie with a soft center and slightly crisp edges. I spent three batches figuring out that balance, and the result is a cookie that actually tastes like a homemade birthday cake, not a sad compromise.
This is the kind of recipe that makes you feel like you’ve got it together, even on the days when you definitely don’t. It’s comfort food that costs pennies per serving and makes everyone at the table happy. That’s not nothing.
What Ingredients You Will Need
This recipe uses simple, budget-friendly ingredients that you probably already have in your kitchen. No special trips to the fancy grocery store required.
- 1 box (15.25 oz or 432g) yellow or Funfetti cake mix: I’ve tested this with Betty Crocker, Duncan Hines, and store brands. They all work, but I prefer Duncan Hines for the softest texture. If you’re using a store brand, add an extra tablespoon of oil to prevent dryness.
- 1/3 cup (80 ml) vegetable oil: Canola or sunflower oil works great too. Don’t use olive oil—it’s too heavy and the flavor comes through. Melted coconut oil works if that’s what you have, just make sure it’s cooled slightly.
- 2 large eggs: Room temperature eggs mix in more evenly, but if you forgot to take them out of the fridge, just run them under warm water for a minute. It’s not a dealbreaker.
- 1 teaspoon vanilla extract: Pure vanilla is better, but imitation works fine here since the cake mix already has artificial flavoring. I use McCormick because it’s reliable and not too expensive.
- 1/2 cup (80g) rainbow sprinkles: The key here is to use the round, jimmie-style sprinkles, not the nonpareils (those tiny round balls). Nonpareils bleed color into the dough and turn your cookies into a grayish mess. Trust me on this one. I learned the hard way.
Optional add-ins that work great:
- 1/2 cup white chocolate chips (adds sweetness and texture)
- 1/4 cup mini chocolate chips (for a cookies-and-cream vibe)
- 1 teaspoon almond extract (swap for vanilla for a more complex flavor)
- Zest of one lemon (brightens the whole cookie)
The beauty of this recipe is its flexibility. If you’re out of eggs, you can use 1/4 cup of applesauce instead. If you’re avoiding oil, melted butter works—just know the cookies will spread a bit more. I’ve even made these with a gluten-free cake mix for a friend’s kid, and they turned out beautifully. Just add an extra tablespoon of oil to help with the texture.
Equipment Needed
You don’t need much for this recipe, which is part of the appeal. Here’s what you’ll want to have on hand:
- Large mixing bowl: Any bowl works, but a wide, shallow one makes mixing easier. I use my grandmother’s old ceramic bowl because it’s sentimental and the right size.
- Wooden spoon or rubber spatula: A wooden spoon gives you more leverage for mixing the thick dough. A rubber spatula is better for scraping the sides. I use both.
- Baking sheets: Two standard half-sheet pans work best. If you only have one, let it cool completely between batches or the cookies will spread too much.
- Parchment paper or silicone baking mat: Parchment paper is cheap and makes cleanup a breeze. Silicone mats work great too, but they can make cookies spread slightly more. If you’re out of both, grease the pan lightly with cooking spray.
- Cookie scoop or tablespoon: A 1.5-tablespoon cookie scoop gives you perfectly uniform cookies. If you don’t have one, use a regular tablespoon and shape the dough balls with your hands.
- Cooling rack: Not strictly necessary, but it helps the cookies cool evenly and prevents soggy bottoms. A wire cooling rack costs about five dollars at any grocery store.
That’s it. No stand mixer, no food processor, no special gadgets. This is a recipe that respects your time and your wallet.
Preparation Method
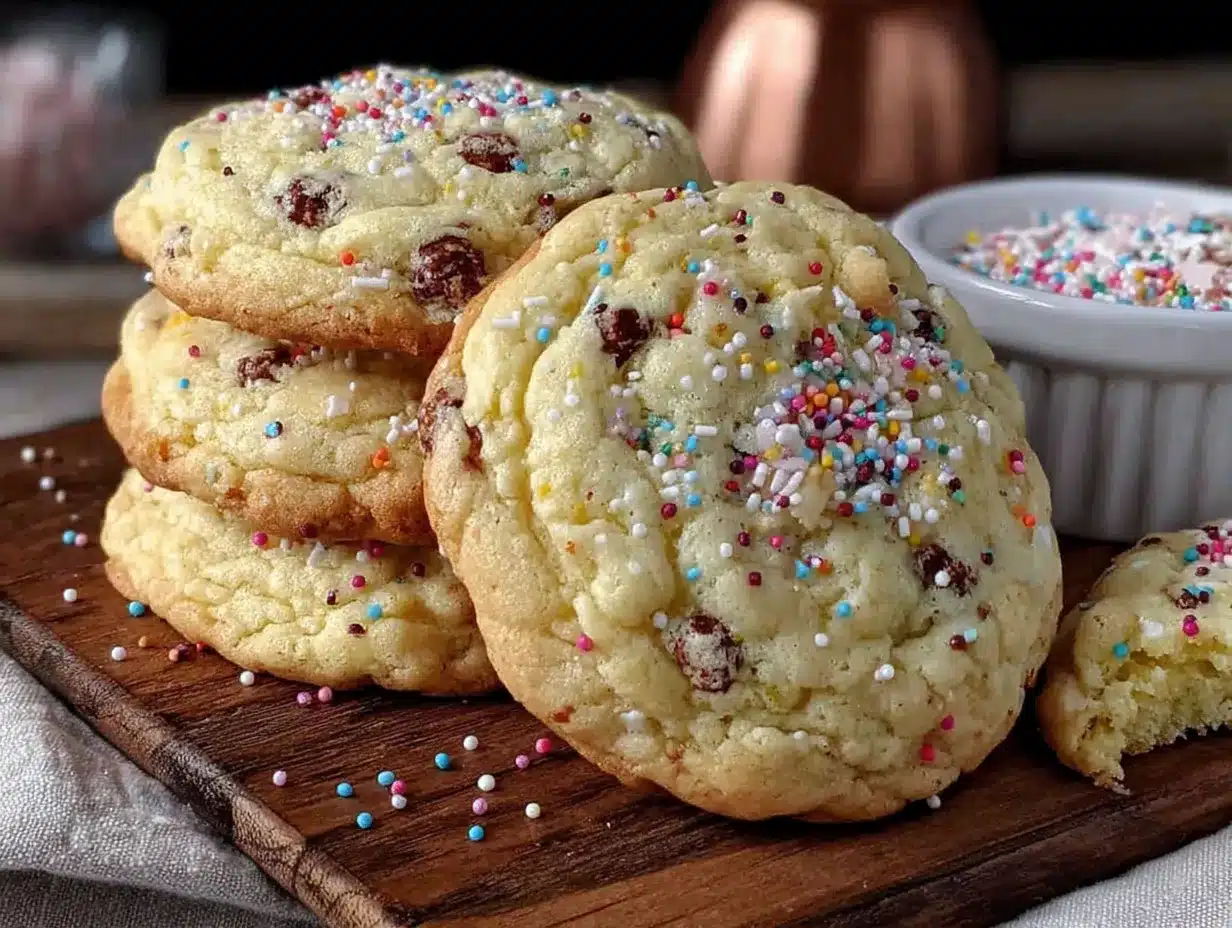
Let’s get into the actual process. I’ve broken this down step by step so you can follow along without any guesswork.
- Preheat your oven to 350°F (175°C). Line two baking sheets with parchment paper. While the oven is heating, take your eggs out of the fridge so they can come to room temperature. If you’re short on time, place them in a bowl of warm water for five minutes.
- In your large mixing bowl, combine the cake mix, vegetable oil, eggs, and vanilla extract. Stir everything together with your wooden spoon until a thick, cohesive dough forms. This takes about two minutes of steady stirring. The dough will be stiff and a little sticky—that’s exactly what you want. If it seems too dry, add a teaspoon of water at a time until it comes together. If it seems too wet, add a tablespoon of flour.
- Fold in the sprinkles gently. Pour the sprinkles into the bowl and use your spatula to fold them in with about six to eight strokes. Don’t overmix here, or the sprinkles will start to bleed their color into the dough. You want distinct pockets of color throughout the cookie. I usually stop when I can still see a few streaks of plain dough.
- Scoop the dough into balls. Using your cookie scoop or a tablespoon, portion out the dough into balls about 1.5 tablespoons each. Roll them gently between your palms to make them round. Place them on the prepared baking sheets, spacing them about 2 inches apart. These cookies spread moderately, so give them room.
- Bake for 9 to 11 minutes. The exact time depends on your oven. I start checking at 9 minutes. The cookies should look puffy and set around the edges, but the centers will still look slightly underdone and soft. That’s the sweet spot. If you wait until the centers look fully baked, they’ll be overdone and dry. Trust the visual cue, not the timer.
- Let the cookies cool on the baking sheet for 5 minutes. This is crucial. The cookies are very soft when they come out of the oven, and moving them too soon will cause them to fall apart. After 5 minutes, transfer them to a wire cooling rack to cool completely. If you don’t have a cooling rack, just let them sit on the baking sheet for 10 minutes instead.
- Repeat with the remaining dough. If you’re reusing the same baking sheet, let it cool completely between batches. A hot baking sheet will cause the dough to spread too much and the cookies will come out flat.
One thing I learned the hard way: don’t press the dough balls down before baking. These cookies spread on their own, and pressing them down gives you flat, dense cookies instead of puffy, soft ones. Let the dough do its thing.
Cooking Tips & Techniques
After making these cookies more times than I can count, I’ve picked up a few tricks that make a real difference. Here are the ones I wish someone had told me from the start.
Use the right cake mix. Not all cake mixes are created equal. The standard 15.25-ounce box is what you want. The bigger 18-ounce boxes throw off the ratio and make the cookies too dry. If all you have is a larger box, use only 2 cups of the mix and save the rest for another project.
Don’t overbake. This is the number one mistake people make with cake mix cookies. They look undone when they’re actually perfect. Pull them out when the edges are set and the centers are still soft and puffy. They’ll continue to cook on the hot baking sheet for the first few minutes out of the oven.
Chill the dough if you have time. If you can refrigerate the dough balls for 30 minutes before baking, the cookies will be even puffier and chewier. I don’t always have time for this step, but when I do, the results are noticeably better. The cold dough spreads less in the oven, giving you thicker cookies.
Double the recipe for freezing. These cookies freeze beautifully. I make a double batch, bake half, and freeze the remaining dough balls on a baking sheet. Once they’re frozen solid, I transfer them to a freezer bag. Then I can bake fresh cookies in about 12 minutes whenever I need them. It’s a game-changer for last-minute school events.
Watch your sprinkle choice. I mentioned this before, but it bears repeating: use jimmies, not nonpareils. Nonpareils bleed color into the dough and leave you with sad, gray cookies. I made this mistake once and ended up with cookies that looked like they’d been through the washing machine.
Let the cookies cool completely before storing. If you put warm cookies in an airtight container, the steam will make them soggy. Let them cool fully on the rack, then store them in a container with a loose-fitting lid. The slight airflow helps maintain that perfect texture.
Variations & Adaptations
This base recipe is incredibly versatile. Here are some variations I’ve tried and loved:
Chocolate Birthday Cake Cookies: Use a chocolate cake mix instead of yellow. Add 1/2 cup of white chocolate chips and 1/4 cup of rainbow sprinkles. The chocolate base with the pops of color is gorgeous and tastes like a chocolate birthday cake in cookie form.
Lemon Birthday Cake Cookies: Use a lemon cake mix (or add the zest of two lemons to a yellow cake mix). Swap the vanilla extract for lemon extract. Omit the rainbow sprinkles and use yellow sprinkles instead. These are bright, tangy, and perfect for spring or summer events.
Gluten-Free Version: Use a gluten-free yellow cake mix. I’ve tested this with King Arthur’s gluten-free mix and it works perfectly. Add an extra tablespoon of oil to compensate for the drier texture of gluten-free flours. Everyone at the table will love these, whether they eat gluten-free or not.
Confetti Cookie Sandwiches: Bake the cookies as directed. Once they’re cool, spread a thin layer of cream cheese frosting on the flat side of one cookie and sandwich it with another. These are perfect for birthday parties and feel extra special without much extra work.
Mini Cookie Bites: Use a teaspoon-sized scoop instead of a tablespoon. Bake for 6 to 7 minutes instead of 9 to 11. These are perfect for lunchboxes or toddler snacks. My daughter Maya loves the mini version because she can eat three without feeling guilty.
Vegan Adaptation: Use a vegan cake mix (most yellow cake mixes are accidentally vegan). Replace the eggs with 1/4 cup of applesauce plus 1 tablespoon of cornstarch. Use a neutral oil like canola. The texture will be slightly more cake-like, but they’re still delicious and totally plant-based.
Serving & Storage Suggestions
These cookies are best served at room temperature, but honestly, they’re good at any temperature. Here’s how I like to serve and store them:
Serving: Arrange the cookies on a plate or platter. For extra flair, drizzle a simple glaze over the top—just mix 1 cup of powdered sugar with 2 tablespoons of milk and a splash of vanilla. The glaze sets in about 15 minutes and makes the cookies look bakery-worthy. If you’re serving these for a birthday party, add a few extra sprinkles on top of the glaze while it’s still wet.
Pairings: These cookies are fantastic with a cold glass of milk, a scoop of vanilla ice cream, or a warm cup of coffee. For a dessert board, arrange them with fresh strawberries, chocolate-dipped pretzels, and a bowl of whipped cream. They’re also great crumbled over ice cream sundaes.
Room Temperature Storage: Store the cookies in an airtight container at room temperature for up to 5 days. Place a slice of bread in the container to keep them soft—the cookies will absorb moisture from the bread. Replace the bread slice every other day if the cookies last that long.
Refrigerator Storage: You can refrigerate the cookies for up to 2 weeks. Let them come to room temperature before serving, or pop them in the microwave for 10 seconds to soften them up.
Freezer Storage: Baked cookies freeze well for up to 3 months. Layer them between sheets of parchment paper in a freezer-safe container. Thaw at room temperature for about 30 minutes. Unbaked dough balls freeze even better—just scoop and freeze on a baking sheet, then transfer to a freezer bag. Bake from frozen, adding 2 minutes to the bake time.
Flavor Development: These cookies actually get better after a day or two. The flavors meld together and the texture becomes even more tender. I’ve had people tell me they prefer them on day two. So don’t worry if you’re making them a day ahead—they’ll be even better.
Nutritional Information & Benefits
Here’s the honest truth: these are cookies, not health food. But they’re made with real ingredients, and there are a few bright spots worth mentioning.
Per cookie (based on 24 cookies per batch):
- Calories: 145
- Fat: 7g
- Carbohydrates: 20g
- Protein: 2g
- Sugar: 12g
- Sodium: 180mg
Health highlights: The eggs provide a small amount of protein and essential nutrients like vitamin D and choline. The vegetable oil adds healthy unsaturated fats. If you use a fortified cake mix, you’ll get small amounts of iron and B vitamins. The sprinkles? Well, they’re pure joy, and that counts for something.
Dietary considerations: This recipe is nut-free if you use a nut-free cake mix (most are, but check the label). It’s also soy-free if you use a soy-free oil. For lower sugar options, you can use a sugar-free cake mix, though the texture will be slightly different. For a lower fat version, replace half the oil with unsweetened applesauce.
My perspective: I believe in balance. These cookies are a treat, and treats are part of a happy life. I serve them alongside fruit and veggie-filled meals, and I don’t stress about the sugar content. My kids eat them at birthday parties and bake sales, and they also eat carrots and broccoli. Everything in moderation, including moderation.
Conclusion
These birthday cake cookies have saved me more times than I can count. They’ve been the last-minute bake sale hero, the playdate peace offering, the after-school surprise that turns a bad day around. They cost pennies to make, take almost no time, and they make everyone feel special. That’s a pretty powerful combination for a simple cookie.
I hope you make these cookies your own. Add your favorite sprinkles, swap in different extracts, experiment with mix-ins. The base recipe is a canvas, and you’re the artist. If you try something brilliant, come back and tell me about it. I love hearing how these cookies show up in other people’s kitchens.
So go ahead—grab that box of cake mix from the back of your pantry, preheat your oven, and make something that feels like a celebration. You deserve it. And honestly? The people you feed will thank you.
Happy baking, friends. Let me know in the comments how your cookies turned out, what variations you tried, and whether your kids fought over the last one. Because let’s face it—they probably will.
Frequently Asked Questions
Can I use a different flavor of cake mix?
Absolutely! White cake mix, vanilla cake mix, or even strawberry cake mix all work beautifully. Just adjust your add-ins to match the flavor profile. Chocolate cake mix with mint chips is a personal favorite.
Why did my cookies turn out flat?
Flat cookies usually mean the dough was too warm, the baking sheet was too hot, or you used a different size of cake mix. Make sure your dough is room temperature (not hot from mixing), let your baking sheets cool between batches, and stick to the standard 15.25-ounce box.
Can I make these cookies without eggs?
Yes! Replace each egg with 1/4 cup of unsweetened applesauce or a flax egg (1 tablespoon ground flaxseed mixed with 3 tablespoons water, let sit for 5 minutes). The texture will be slightly more cake-like, but they’re still delicious.
How do I keep the sprinkles from bleeding?
Use jimmies (the long, round sprinkles) instead of nonpareils (the tiny round balls). Fold them in gently at the very end, using just a few strokes. Overmixing is what causes the color to bleed.
Can I freeze the baked cookies?
Yes, for up to 3 months. Layer them between sheets of parchment paper in a freezer-safe container. Thaw at room temperature for about 30 minutes, or microwave for 10 seconds for that fresh-baked feel.
Pin This Recipe!
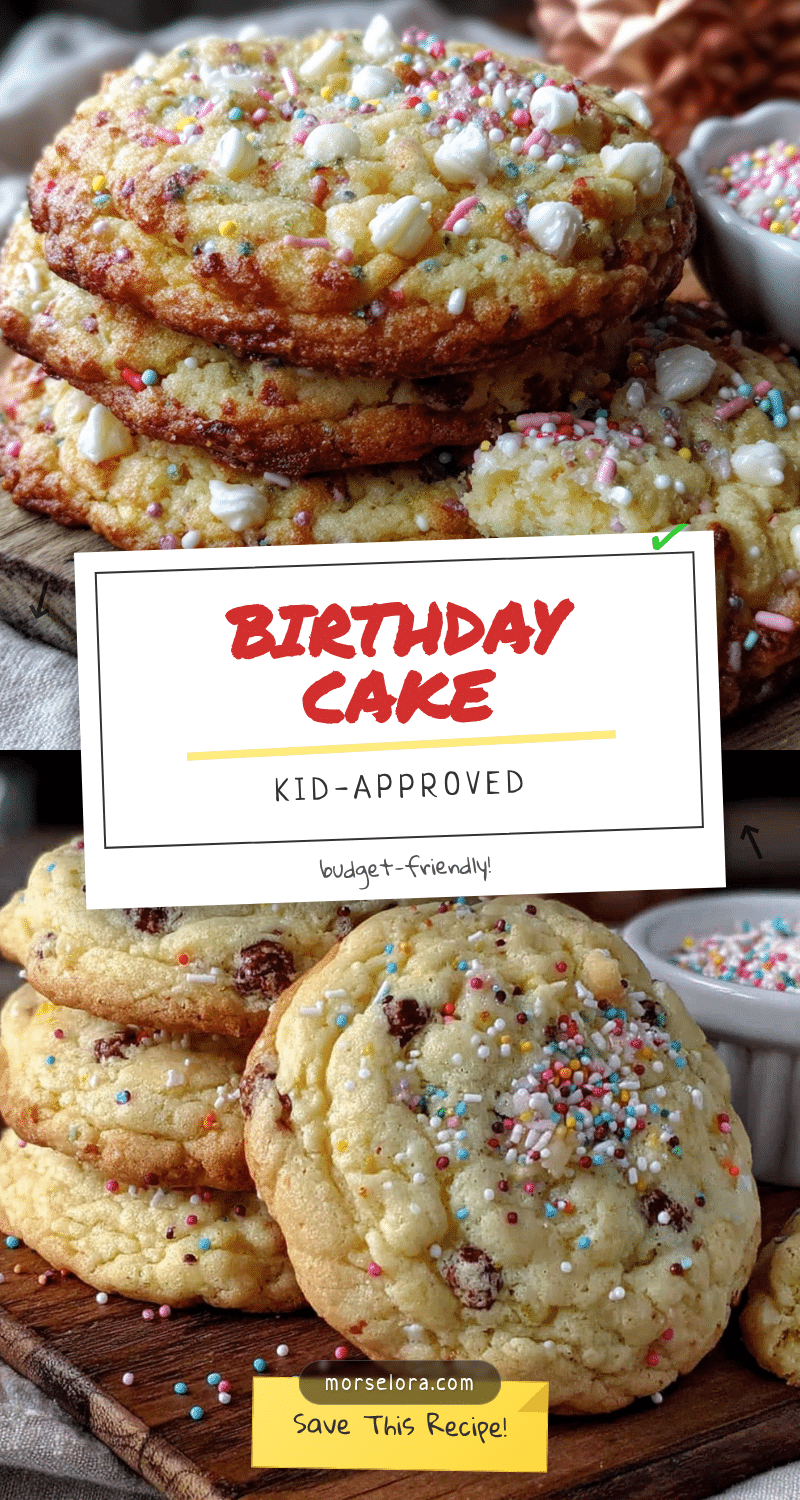
Birthday Cake Cookies: Easy Budget-Friendly Recipe

These birthday cake cookies are a budget-friendly, kid-approved treat made from a box of cake mix. They’re puffy, soft, and perfect for last-minute bake sales, playdates, or any celebration.
- Prep Time: 10 minutes
- Cook Time: 10 minutes
- Total Time: 20 minutes
- Yield: 24 cookies 1x
- Category: Dessert
- Cuisine: American
Ingredients
- 1 box (15.25 oz or 432g) yellow or Funfetti cake mix
- 1/3 cup (80 ml) vegetable oil
- 2 large eggs
- 1 teaspoon vanilla extract
- 1/2 cup (80g) rainbow sprinkles (jimmies-style)
Instructions
- Preheat your oven to 350°F (175°C). Line two baking sheets with parchment paper.
- In a large mixing bowl, combine the cake mix, vegetable oil, eggs, and vanilla extract. Stir until a thick, cohesive dough forms (about 2 minutes).
- Gently fold in the sprinkles with a spatula using 6-8 strokes. Do not overmix.
- Scoop the dough into balls about 1.5 tablespoons each. Roll gently between your palms to make them round. Place on prepared baking sheets, spacing 2 inches apart.
- Bake for 9 to 11 minutes. The cookies should look puffy and set around the edges, but the centers will still look slightly underdone.
- Let the cookies cool on the baking sheet for 5 minutes, then transfer to a wire cooling rack to cool completely.
- Repeat with remaining dough, letting the baking sheet cool completely between batches.
Notes
Use jimmies-style sprinkles, not nonpareils, to prevent color bleeding. Don’t press dough balls down before baking. For puffier cookies, chill dough balls for 30 minutes before baking. Cookies freeze well for up to 3 months.
Nutrition
- Serving Size: 1 cookie
- Calories: 145
- Sugar: 12
- Sodium: 180
- Fat: 7
- Saturated Fat: 1
- Carbohydrates: 20
- Protein: 2
Keywords: birthday cake cookies, cake mix cookies, easy cookies, budget-friendly cookies, kid-friendly cookies, Funfetti cookies


