There used to be a tiny bakery called The Gilded Oven tucked into a brick storefront on Elm Street that made the most incredible chocolate mint sandwich cookies every October. When they closed their doors three years ago — just packed up and vanished one day — I genuinely mourned those cookies more than I’d like to admit. I mean, I actually stood outside that dark window with my face pressed to the glass, trying to see if maybe they’d left a recipe card behind. Honestly, I got a little obsessed.
After seventeen tries — and I’m not exaggerating, my kitchen counter was a graveyard of failed buttercream and cracked cookies — I finally nailed it. The exact texture, that perfect minty-chocolate balance, the way the filling stays soft but doesn’t squish out the sides when you bite into it. Let me tell you, the day I got it right, I actually texted my sister a photo with the caption “WE’RE BACK.” She thought I was talking about a cancelled TV show.
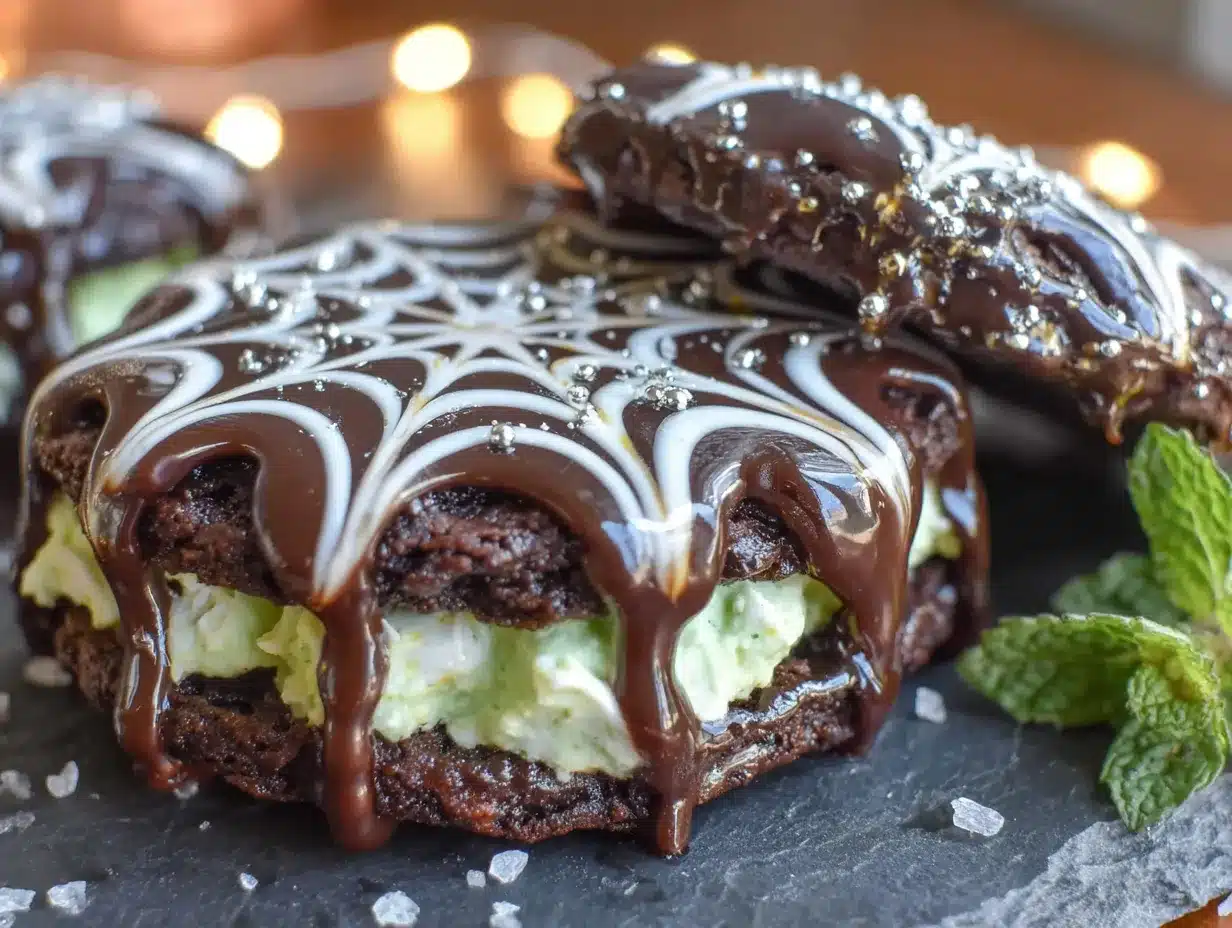
These cozy chocolate mint Halloween sandwich cookies are everything I loved about those lost bakery treats, but better because now I can make them whenever the craving hits. And let’s be honest, once you taste that cool mint buttercream sandwiched between two fudgy chocolate cookies, you’re going to want them all year long — not just when the ghosts and goblins come out. Maybe you’ve been there too, chasing a flavor memory that just won’t let go. Well, this is your happy ending.
Why You’ll Love These Cozy Chocolate Mint Halloween Sandwich Cookies
Look, I’ve tested a lot of cookie recipes in my time — some were winners, some ended up in the trash with me muttering under my breath. These cozy chocolate mint Halloween sandwich cookies? They’re the ones I keep coming back to, and here’s why:
- Ready in 30 Minutes: From mixing bowl to cookie plate in half an hour. No chilling, no complicated steps, no waiting around. Perfect for when you suddenly remember it’s the night before the school Halloween party and you promised to bring treats.
- Simple Pantry Ingredients: You probably have most of this stuff already. Butter, sugar, eggs, flour, cocoa powder — the usual suspects. The only special thing is the peppermint extract, and that’s easy to find.
- Perfect for Halloween Gatherings: These little sandwiches are the star of any Halloween spread. Kids love them, adults sneak extra ones when nobody’s looking, and they look way more impressive than they actually are to make.
- Total Crowd-Pleaser: I’ve brought these to potlucks, office parties, and family dinners. Every single time, someone asks for the recipe. Every single time.
- Unbelievably Delicious: That moment when the cool mint hits the rich chocolate? It’s the kind of combo that makes you close your eyes after the first bite. Pure comfort in cookie form.
What makes these different from every other chocolate mint cookie out there? It’s the texture. The cookies themselves are soft and fudgy — almost brownie-like — but sturdy enough to hold that creamy mint filling without falling apart. I spent a lot of burnt batches figuring out the perfect balance of butter and cocoa powder to get that exact consistency. Plus, the filling uses a trick I learned from my grandmother: a tiny pinch of salt in the buttercream to make the mint flavor pop. Trust me, it works.
These aren’t just cookies. They’re the kind of treat that makes a cold October evening feel cozy. The kind that reminds you of wrapping up in a blanket with a hot drink and a good movie. The kind that says “Halloween” without being scary or over-the-top. Just pure, simple comfort.
What Ingredients You Will Need
This recipe uses simple, honest ingredients to create something special. Nothing fancy, nothing hard to find — just good basics that work together beautifully. Here’s what you’ll need:
For the Chocolate Cookies
- 1 cup unsalted butter, softened (I prefer Kerrygold for the richness, but any good butter works)
- 1 cup granulated sugar
- 1 large egg, room temperature
- 1 teaspoon vanilla extract
- 1 ½ cups all-purpose flour
- ¾ cup unsweetened cocoa powder (use Dutch-process for a deeper chocolate flavor)
- ½ teaspoon baking soda
- ¼ teaspoon salt
For the Mint Buttercream Filling
- ½ cup unsalted butter, softened
- 2 cups powdered sugar
- 2 tablespoons heavy cream (or whole milk if that’s what you have)
- ¾ teaspoon peppermint extract (start with less and taste — this stuff is strong!)
- 2-3 drops green food coloring (optional, but it makes them look so festive)
- A tiny pinch of salt (trust me on this one)
Ingredient Tips from My Kitchen
Let me share a few things I’ve learned the hard way. First, make sure your butter is truly softened — not melted, not rock hard. If you press your finger into it, it should leave a gentle indent. I’ve ruined batches by rushing this step, and the cookies spread into flat, sad pancakes every time.
For the cocoa powder, I really recommend using Dutch-process if you can find it. It gives the cookies that dark, rich color and a smoother chocolate taste. Regular cocoa powder works fine, but the cookies will be a bit lighter in color and slightly more bitter. Both are good, just different.
And about that peppermint extract — please don’t use mint extract that’s meant for savory dishes. Peppermint is what you want. Also, start with ½ teaspoon, taste the buttercream, then add more. I once dumped in a full teaspoon without tasting first and ended up with buttercream that tasted like toothpaste. Not my finest moment.
If you want to make these dairy-free, swap the butter for a good plant-based butter and use coconut cream instead of heavy cream. The texture will be slightly different, but still delicious. For a gluten-free version, use a 1:1 gluten-free flour blend — I’ve had good results with Bob’s Red Mill.
Equipment Needed
- Large mixing bowl and electric hand mixer or stand mixer (I use my KitchenAid, but a hand mixer works perfectly)
- Medium mixing bowl for dry ingredients
- Measuring cups and spoons
- Baking sheets (I like using light-colored ones for even browning)
- Parchment paper or silicone baking mats
- Cookie scoop or tablespoon for uniform cookies
- Wire cooling rack
- Spatula for spreading filling
- Small offset spatula (not essential, but makes filling the cookies so much easier)
Don’t have a cookie scoop? No worries. Just use a regular tablespoon and roll the dough into balls with your hands. Your cookies won’t be perfectly uniform, but honestly, homemade-looking cookies have more charm anyway.
Preparation Method
Step 1: Preheat and Prep
Preheat your oven to 350°F (175°C). Line two baking sheets with parchment paper or silicone mats. This step is non-negotiable — trust me, you don’t want these fudgy cookies sticking to the pan.
Step 2: Make the Cookie Dough
In your large mixing bowl, beat the softened butter and granulated sugar together until light and fluffy. This takes about 2-3 minutes with an electric mixer. You’re looking for a pale, creamy texture — scrape down the sides of the bowl halfway through.
Add the egg and vanilla extract, then beat until well combined. The mixture might look a little curdled at this point, but don’t panic — that’s normal. It’ll come together when you add the dry ingredients.
In a separate medium bowl, whisk together the flour, cocoa powder, baking soda, and salt. Make sure there are no lumps in the cocoa powder — I always sift mine just to be safe.
Gradually add the dry ingredients to the wet mixture, mixing on low speed until just combined. Don’t overmix! Stop as soon as you don’t see any more flour streaks. Overmixing will make your cookies tough instead of tender.
Step 3: Shape and Bake
Scoop tablespoon-sized balls of dough and place them about 2 inches apart on your prepared baking sheets. I use a cookie scoop for this, but you can roll them by hand — just make sure they’re roughly the same size so they bake evenly.
Bake for 8-10 minutes. The cookies will look puffy and slightly cracked on top. They might seem underdone in the center, but that’s exactly what you want — they’ll continue cooking on the hot baking sheet as they cool. If you overbake them, they’ll be dry and crumbly instead of fudgy.
Let the cookies cool on the baking sheet for 5 minutes, then transfer them to a wire rack to cool completely. Don’t try to fill them while they’re warm, or the buttercream will melt into a gooey mess. I learned this the hard way and ended up with chocolate mint soup.
Step 4: Make the Mint Buttercream
While the cookies are cooling, make the filling. Beat the softened butter in a clean bowl until smooth and creamy. Gradually add the powdered sugar, beating on low speed to avoid a sugar cloud explosion in your kitchen. I speak from experience here.
Add the heavy cream, peppermint extract, green food coloring (if using), and that tiny pinch of salt. Beat on medium-high speed for 2-3 minutes until the buttercream is light, fluffy, and well combined. Taste it and adjust the peppermint if needed — you want a cool, refreshing mint flavor, not an overpowering blast.
Step 5: Assemble the Sandwich Cookies
Once the cookies are completely cool, pair them up by size. Spread or pipe about 1-2 teaspoons of buttercream onto the flat side of one cookie, then gently press another cookie on top. Don’t press too hard, or the filling will squish out the sides.
Repeat with the remaining cookies. You should end up with about 18-20 sandwich cookies, depending on how generous you are with the filling.
Cooking Tips & Techniques
Here are some things I wish someone had told me before I started making these cookies:
Don’t skip the parchment paper. I know it’s tempting to just grease the pan and call it a day, but these cookies are delicate and fudgy. Parchment paper or silicone mats make removal effortless and cleanup a breeze.
Rotate your baking sheets halfway through. Every oven has hot spots, and rotating your sheets halfway through baking ensures even cooking. I forgot to do this once and ended up with half-burnt cookies and half-underdone ones.
Let the cookies cool completely. I know you’re excited, I know the kitchen smells amazing, but please wait. Warm cookies + cold buttercream = melted disaster. I’ve made this mistake more times than I’d like to admit.
Use a piping bag for the filling. If you have one, a piping bag makes filling the cookies so much cleaner and more consistent. Just snip the end off and pipe a spiral of buttercream onto each cookie. If you don’t have a piping bag, a zip-top bag with the corner snipped off works just as well.
Chill the filled cookies for 10 minutes. Before serving, pop the assembled cookies in the fridge for 10 minutes. This sets the buttercream and makes the cookies easier to handle. Plus, that cold mint center against the fudgy chocolate? Perfection.
Variations & Adaptations
One of the best things about this recipe is how easy it is to customize. Here are some variations I’ve tried and loved:
Dark Chocolate Mint: Swap the regular cocoa powder for black cocoa powder. The cookies will be almost black in color and have a deeper, more intense chocolate flavor. It’s dramatic and delicious — perfect for Halloween.
Spooky Sprinkle Edition: Before baking, press a few orange and black sprinkles onto the tops of the cookie dough balls. When you sandwich them, make sure the sprinkle side is on the outside. They look so festive and fun.
Vegan Version: Use plant-based butter for both the cookies and the filling. Replace the egg with a flax egg (1 tablespoon ground flaxseed mixed with 3 tablespoons water, let sit for 5 minutes). Use coconut cream instead of heavy cream. The texture is slightly different, but still absolutely delicious.
Chocolate Mint Brownie Cookies: Add ½ cup of mini chocolate chips to the cookie dough. The extra chocolate chunks make the cookies even more fudgy and add little pockets of melted chocolate. My kids go crazy for this version.
Peppermint Bark Twist: Crush up some peppermint candies or candy canes and sprinkle them on top of the buttercream before sandwiching the cookies. The crunch adds a wonderful texture contrast.
Serving & Storage Suggestions
These cozy chocolate mint Halloween sandwich cookies are best served at room temperature or slightly chilled. That cool mint center against the rich chocolate is truly something special.
For a Halloween party, arrange them on a platter with some orange and black napkins. They look gorgeous next to a bowl of candy corn or piled on a cake stand. I like to dust a little powdered sugar on top for a snowy, ghostly effect.
They pair beautifully with a cold glass of milk, a warm cup of hot chocolate, or even a peppermint mocha coffee. For the adults, try serving them with a glass of red wine or a creamy stout beer — the chocolate and mint complement both beautifully.
Storage: Store the filled cookies in an airtight container in the refrigerator for up to 5 days. The flavors actually meld together and get even better after a day or two. Just let them sit at room temperature for 10 minutes before serving if you prefer a softer texture.
Freezer Instructions: These cookies freeze beautifully. Place the unfilled cookies in a single layer in a freezer-safe container, with parchment paper between layers. Freeze for up to 3 months. When you’re ready to enjoy them, thaw the cookies at room temperature, make fresh buttercream, and assemble. Or freeze the filled cookies in a single layer, then transfer to a container. Thaw in the refrigerator overnight.
Make-Ahead Tip: You can make the cookie dough up to 3 days in advance and keep it in the refrigerator. Just let it soften slightly at room temperature before scooping and baking. The buttercream can also be made ahead and stored in the fridge for up to a week — just let it come to room temperature and re-whip before using.
Nutritional Information & Benefits
Let’s be real — these are cookies, not health food. But here’s the estimated nutritional info per sandwich cookie (based on 20 cookies):
- Calories: 210
- Fat: 12g
- Saturated Fat: 7g
- Carbohydrates: 25g
- Sugar: 17g
- Protein: 2g
- Fiber: 1g
That being said, there are some redeeming qualities. Cocoa powder is rich in antioxidants and can help improve heart health. Peppermint is known for aiding digestion and providing a natural energy boost. And honestly, there’s something to be said for the mental health benefits of treating yourself to something delicious.
For those with dietary restrictions, this recipe contains dairy, eggs, and gluten. But as I mentioned earlier, it’s easy to adapt for vegan or gluten-free diets. Just be mindful of the substitutions and adjust accordingly.
FAQs
Can I use mint extract instead of peppermint extract?
You can, but the flavor will be different. Peppermint extract has a cleaner, cooler mint taste, while mint extract often has a more herbal, less sweet profile. I recommend sticking with peppermint for these cookies.
Why did my cookies spread too much?
This usually happens when the butter is too soft or melted. Make sure your butter is at room temperature — soft but not greasy. Also, chilling the dough balls for 15 minutes before baking can help prevent spreading.
Can I make these cookies smaller for a party?
Absolutely! Use a teaspoon instead of a tablespoon for smaller cookies, and reduce the baking time by 2-3 minutes. You’ll get more cookies and they’re perfect for bite-sized treats.
How do I get perfectly round cookies?
Right after you take the cookies out of the oven, use a round cookie cutter or the rim of a glass to gently scoot the edges of each cookie into a perfect circle. Do this while they’re still warm and soft.
Can I skip the food coloring?
Of course! The buttercream will be a pale cream color without it, and the cookies will taste exactly the same. The green color is purely for the Halloween aesthetic.
Conclusion
These cozy chocolate mint Halloween sandwich cookies are more than just a recipe — they’re a little piece of comfort wrapped up in chocolate and mint. Every time I make them, I think about that little bakery on Elm Street and how something as simple as a cookie can hold so much memory.
But here’s the thing: now the memory is mine. And it can be yours too. Whether you’re making them for a Halloween party, a cozy night in, or just because you’re craving something sweet and comforting, these cookies deliver. They’re easy enough for a beginner baker, impressive enough to share, and delicious enough to become a new tradition.
So go ahead — preheat that oven, break out the butter, and make some memories of your own. And if you try these cookies, I’d love to hear about it. Drop a comment below, share a photo, tell me how they turned out. Did you add sprinkles? Did you double the filling? Did you hide them from your kids? I want to know all of it.
Happy baking, friends. And happy Halloween.
PrintCozy Chocolate Mint Halloween Cookies – Easy 30-Min Recipe

These fudgy chocolate mint sandwich cookies are ready in 30 minutes with simple pantry ingredients. A cool mint buttercream filling between two soft, brownie-like chocolate cookies makes them the perfect Halloween treat.
- Prep Time: 15 minutes
- Cook Time: 10 minutes
- Total Time: 25 minutes
- Yield: 18-20 sandwich cookies 1x
- Category: Dessert
- Cuisine: American
Ingredients
- 1 cup unsalted butter, softened
- 1 cup granulated sugar
- 1 large egg, room temperature
- 1 teaspoon vanilla extract
- 1 ½ cups all-purpose flour
- ¾ cup unsweetened cocoa powder (Dutch-process preferred)
- ½ teaspoon baking soda
- ¼ teaspoon salt
- ½ cup unsalted butter, softened (for filling)
- 2 cups powdered sugar
- 2 tablespoons heavy cream (or whole milk)
- ¾ teaspoon peppermint extract
- 2–3 drops green food coloring (optional)
- A tiny pinch of salt
Instructions
- Preheat oven to 350°F (175°C). Line two baking sheets with parchment paper or silicone mats.
- In a large mixing bowl, beat softened butter and granulated sugar together until light and fluffy, about 2-3 minutes.
- Add egg and vanilla extract, beat until well combined.
- In a separate medium bowl, whisk together flour, cocoa powder, baking soda, and salt until no lumps remain.
- Gradually add dry ingredients to wet mixture, mixing on low speed until just combined. Do not overmix.
- Scoop tablespoon-sized balls of dough and place 2 inches apart on prepared baking sheets.
- Bake for 8-10 minutes until puffy and slightly cracked on top. Cookies will look underdone in center.
- Let cookies cool on baking sheet for 5 minutes, then transfer to a wire rack to cool completely.
- For the mint buttercream: Beat softened butter until smooth and creamy. Gradually add powdered sugar, beating on low speed.
- Add heavy cream, peppermint extract, green food coloring (if using), and a tiny pinch of salt. Beat on medium-high speed for 2-3 minutes until light and fluffy.
- Once cookies are completely cool, pair them by size. Spread or pipe 1-2 teaspoons of buttercream onto the flat side of one cookie, then gently press another cookie on top.
- Repeat with remaining cookies to make about 18-20 sandwich cookies.
Notes
Make sure butter is truly softened but not melted. Use Dutch-process cocoa for deeper flavor. Start with ½ teaspoon peppermint extract and adjust to taste. Let cookies cool completely before filling to prevent buttercream from melting. Chill filled cookies for 10 minutes before serving for best texture.
Nutrition
- Serving Size: 1 sandwich cookie
- Calories: 210
- Sugar: 17
- Sodium: 85
- Fat: 12
- Saturated Fat: 7
- Carbohydrates: 25
- Fiber: 1
- Protein: 2
Keywords: chocolate mint cookies, Halloween cookies, sandwich cookies, easy cookie recipe, 30-minute recipe, fudgy chocolate cookies, mint buttercream


