My brother-in-law Mark had refused to eat a Rice Krispie Treat for fifteen years. Fifteen years. He claimed they were “too sweet,” “stale by noon,” and “just not worth the calories.” That was his official position, stated anytime someone brought a pan to a family gathering. He’d give this little shrug and wave them away like they were beneath his refined adult palate. I believed him. I mean, why wouldn’t I? The man was stubborn as a barnacle.
Then I caught him. Last Halloween. I’d made a batch of these Cozy Halloween Rice Krispie Treats with Candy Eyes purely for my niece’s class party—left them cooling on the counter while I ran to grab sprinkles from the pantry. When I came back, there he was. Hand frozen mid-reach, a gooey, marshmallowy corner already half in his mouth. His eyes went wide, like a kid caught stealing cookies. “These are different,” he mumbled, crumbs flying. “These are… good.”
And honestly? That moment made my whole night. Because these aren’t your average, sad, cardboard-flavored cereal bars. They’re buttery, they’re impossibly soft, and they stay that way for days. The candy eyes aren’t just for show either—they add this little pop of sweetness and crunch that makes every bite feel like a tiny Halloween surprise. I’d been tweaking the recipe for weeks, trying to get the marshmallow-to-butter ratio just right so they’d have that melt-in-your-mouth texture without being a sticky mess.
So yeah, I proved him wrong. But more than that, I made something that turned a guy who swore off an entire dessert category into a sneaky midnight snacker. Maybe you’ve got a skeptic in your house too. Or maybe you just want a Halloween treat that actually tastes as good as it looks. Either way, let me tell you—this is the one.
Why You’ll Love This Recipe
Let’s be real for a second. There are about a million Halloween dessert recipes out there, and most of them are more trouble than they’re worth. You spend hours piping frosting onto cookies that end up looking like sad pumpkins, or you wrestle with finicky chocolate that seizes up on you at the last second. Not these. These Cozy Halloween Rice Krispie Treats with Candy Eyes are the kind of recipe that makes you look like a rockstar with almost zero effort.
- Quick & Easy: From start to finish, you’re looking at about 15 minutes of active time. No baking, no complicated steps, no waiting for dough to chill. Perfect for those “oh no, the school party is tomorrow” moments.
- Simple Ingredients: You probably already have butter, marshmallows, and cereal in your pantry right now. The candy eyes are the only special purchase, and you can find them at any grocery store or craft store around Halloween.
- Perfect for Halloween Gatherings: These are the first thing to disappear at parties, potlucks, and classroom celebrations. Kids love the spooky eyes, and adults love that they’re not overly sweet.
- Unbelievably Soft: The secret is in the technique—low heat, patience, and a specific marshmallow-to-butter ratio that keeps these chewy for days, not hours.
- Completely Customizable: You can dress them up or down, add different colors, or swap in different candies. They’re a blank canvas for your Halloween creativity.
What makes these different from every other Rice Krispie treat recipe out there? It’s the little details. I use a full stick of butter—not margarine, not a substitute—and I let it melt slowly with the marshmallows so everything emulsifies properly. I also add a pinch of salt, which sounds weird but trust me, it makes the sweetness taste deeper and more satisfying. And the candy eyes? They’re not just decorative. They add this subtle crunch that contrasts perfectly with the soft, gooey marshmallow base.
This is the kind of recipe that makes you close your eyes after the first bite. It’s comfort food in its purest form—nostalgic, cozy, and just a little bit spooky. Perfect for a cold October evening when all you want is something warm and sweet to curl up with.
What Ingredients You Will Need
This recipe uses simple, honest ingredients to create something truly special. No weird additives, no obscure specialty items—just good, basic components that work together beautifully. Here’s what you’ll need to gather before you start:
For the Marshmallow Base:
- 6 tablespoons unsalted butter (I always use Land O’Lakes for consistent results—the higher fat content makes a difference in texture)
- 1 package (10 ounces) mini marshmallows (about 6 cups—the mini ones melt more evenly than the big ones)
- ¼ teaspoon salt (a flaky sea salt like Maldon works beautifully here if you have it)
- ½ teaspoon vanilla extract (pure, not imitation—you can taste the difference)
For the Cereal Base:
- 6 cups crispy rice cereal (Kellogg’s Rice Krispies are the classic choice, but any generic brand works fine—just make sure it’s fresh and crunchy)
- 1 cup candy eyeballs (the round, edible sugar eyes found in the baking aisle—you’ll want the kind that are mostly white with a black pupil, not the flat frosting kind)
For the Topping (Optional but Recommended):
- ¼ cup candy eyeballs (reserved for pressing on top)
- 1 tablespoon orange or black sprinkles (for that extra Halloween pop)
- Flaky sea salt (a light sprinkle on top creates that sweet-salty magic)
Ingredient Notes and Tips:
The butter is the star here—don’t skimp on quality. I’ve tested this with salted butter and it works in a pinch, but unsalted gives you better control over the final flavor. If you only have salted, just reduce or omit the added salt.
For the marshmallows, fresh matters. If your bag has been sitting in the pantry for six months, they’ll be stale and won’t melt as smoothly. Same goes for the cereal—if it’s stale, your treats will be dense instead of light and airy. For the best results, buy everything fresh the day before you plan to make them.
The candy eyes are surprisingly easy to find. Most grocery stores stock them in the baking aisle near the sprinkles and food coloring during September and October. If you can’t find them locally, Amazon has them year-round. You want the ones that are about ½ inch in diameter—big enough to see but small enough to stay embedded in the marshmallow mixture.
One last thing: if you’re making these for someone with a nut allergy, double-check your candy eyes. Some brands are processed in facilities that also handle tree nuts, so read the label carefully. The same goes for the cereal—Rice Krispies are generally nut-free, but some store brands might not be.
Equipment Needed
You don’t need a fancy kitchen to pull these off. Here’s what you’ll need:
- Large pot or Dutch oven (at least 5 quarts—you need room to stir everything without making a mess)
- 9×13-inch baking dish (a glass one works best because you can see the bottom, but metal is fine too)
- Parchment paper (non-negotiable—this is what saves you from having to scrape marshmallow off your dish for the next week)
- Rubber spatula (silicone is ideal because it doesn’t scratch your pot and it’s flexible enough to get every last bit of marshmallow)
- Butter knife or offset spatula (for smoothing the top)
- Measuring cups and spoons
- Sharp knife (for cutting clean squares—a dull knife will squish them)
If you don’t have a 9×13 dish, you can use a 9×9 square pan for thicker treats (just adjust the cooking time slightly—they’ll need a few more minutes to set). I’ve also used a disposable aluminum pan in a pinch, and it worked fine. Just line it with parchment and you’re golden.
One tool I swear by: a good quality rubber spatula that won’t melt. I learned this the hard way when I used a cheap one that literally started bubbling against the hot marshmallow. Not a fun cleanup. Spend the extra few bucks on a silicone spatula with a heat rating of at least 500°F.
Preparation Method
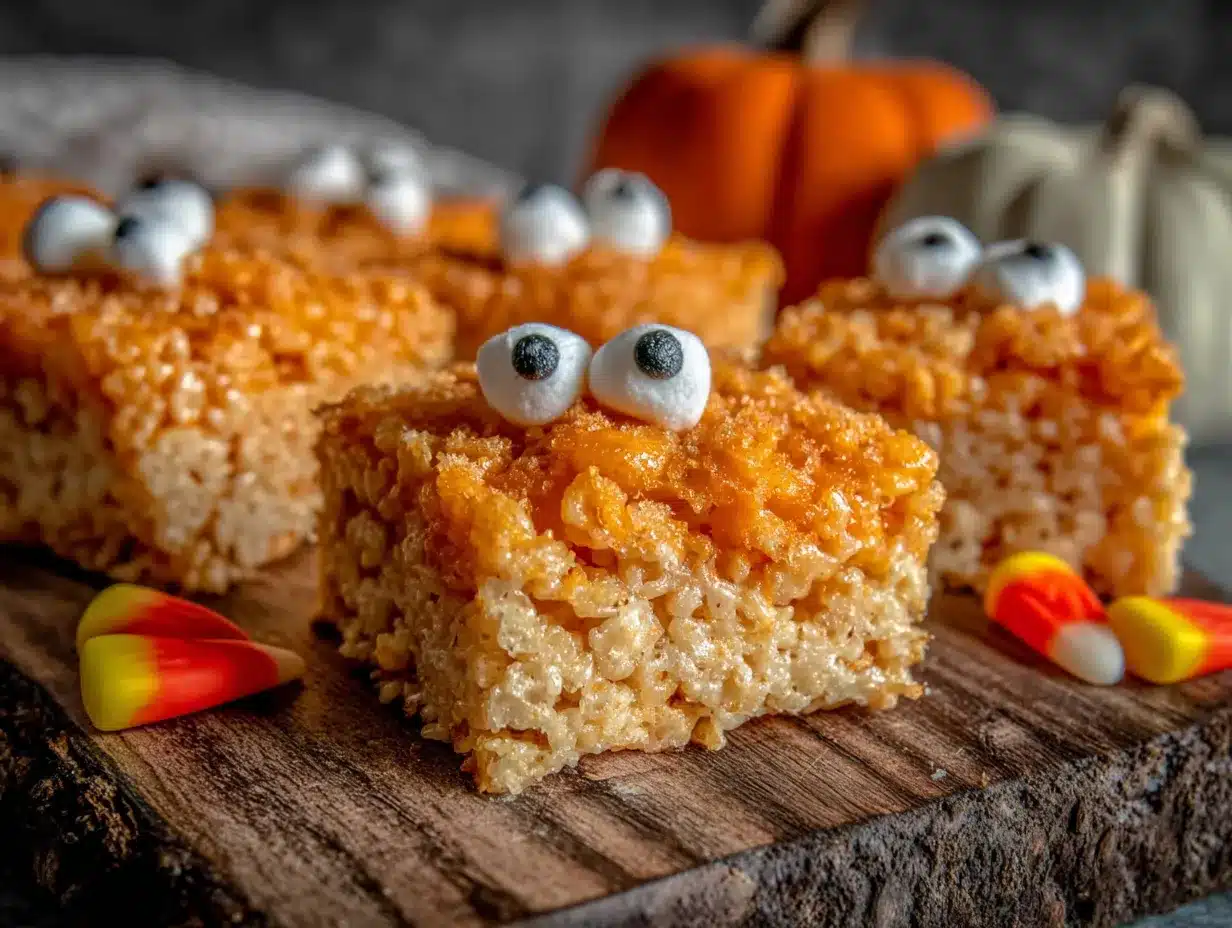
Alright, let’s get to the good part. Follow these steps carefully, and you’ll have the best Cozy Halloween Rice Krispie Treats with Candy Eyes you’ve ever tasted.
- Prep your pan. Line your 9×13-inch baking dish with parchment paper, leaving about 2 inches of overhang on two opposite sides. This creates handles that let you lift the whole block out later. Lightly grease the parchment with butter or nonstick spray—don’t skip this, or the marshmallow will stick.
- Melt the butter. Place your large pot over medium-low heat. Add the 6 tablespoons of unsalted butter and let it melt slowly, swirling the pan occasionally. You want it fully melted but not bubbling or browning. If it starts to sizzle, your heat is too high—turn it down. This takes about 2-3 minutes.
- Add the marshmallows. Pour in the entire bag of mini marshmallows. Stir constantly with your rubber spatula, scraping the bottom and sides to prevent scorching. The marshmallows will start to puff up and then collapse into a smooth, glossy liquid. This should take about 5-7 minutes. Be patient—low and slow is the key here. If you rush it on high heat, the marshmallows will seize up and turn grainy.
- Season the mixture. Once the marshmallows are completely melted and smooth, remove the pot from the heat. Stir in the ¼ teaspoon of salt and the ½ teaspoon of vanilla extract. The mixture will smell amazing at this point—like buttery vanilla heaven. Give it a good stir to make sure everything is evenly distributed.
- Add the cereal. Pour in the 6 cups of crispy rice cereal all at once. Fold gently with your spatula, starting from the bottom and working your way up. Use a cutting motion rather than stirring—this helps coat every piece of cereal without crushing it. You want the marshmallow mixture to be evenly distributed, with no dry cereal pockets. This takes about 2 minutes of gentle folding.
- Add the candy eyes. Once the cereal is mostly coated, add 1 cup of candy eyeballs. Fold them in gently, trying to distribute them evenly throughout the mixture. Some will sink to the bottom, some will stay on top—that’s perfect. You want a surprise in every bite.
- Transfer to the pan. Scrape the entire mixture into your prepared baking dish. Don’t dump it all in one spot—try to spread it out as you go. Use your spatula to gently press it into an even layer. Here’s the trick: don’t press too hard. If you compact the mixture, the treats will be dense and hard instead of light and chewy. Just coax it into place with gentle pressure.
- Add the topping. While the mixture is still warm, press the reserved ¼ cup of candy eyes into the top. Space them out evenly so every square gets at least one. If you’re using sprinkles, scatter them over the top now. And if you’re feeling fancy, add a light sprinkle of flaky sea salt—trust me on this one.
- Let them set. Let the treats cool at room temperature for at least 30 minutes. Don’t rush this by putting them in the fridge—it can make the marshmallow texture weird and rubbery. Just let them sit on the counter until they’re firm enough to cut.
- Cut and serve. Once set, use the parchment handles to lift the whole block out of the pan. Place it on a cutting board. Use a sharp knife to cut into squares—I usually go for 12 large squares or 24 smaller ones. Wipe the knife clean between cuts for the neatest edges.
A note on timing: The whole process from start to finish takes about 45 minutes, including setting time. The active work is only about 15 minutes, so it’s perfect for a quick afternoon project with kids.
Cooking Tips & Techniques
I’ve made more batches of Rice Krispie treats than I care to count, and I’ve learned a few things the hard way. Here are my best tips for perfect results every time:
The Low Heat Rule: This is the most important tip I can give you. Keep your heat on medium-low or even low the entire time you’re melting the butter and marshmallows. High heat will scorch the marshmallows, creating brown spots that taste bitter and burnt. I ruined my first three batches this way before I learned to be patient. If you see steam rising from the pot, your heat is too high.
The Freshness Factor: Stale marshmallows don’t melt properly. If your bag has been open for more than a week, go buy a new one. Same goes for the cereal—if it’s soft instead of crispy, your treats will be dense and sad. Fresh ingredients make a world of difference.
The Butter Debate: I’ve tested this recipe with margarine, with butter substitutes, and with different butter brands. Full-fat, unsalted butter from a reputable brand gives the best results every time. The higher fat content creates a richer flavor and a softer texture. Margarine makes them greasy and flat.
The Pressing Technique: When you transfer the mixture to the pan, use a light touch. I used to press down firmly, trying to get everything flat and even. That made the treats hard and crunchy instead of soft and chewy. Now I use a second piece of parchment paper on top and press gently with my hands—just enough to even things out without compacting the cereal.
The Sticky Spatula Solution: Your spatula will get coated in marshmallow, and it’s a pain to clean. Spray it with nonstick cooking spray before you start, and the marshmallow will slide right off. Same goes for your hands if you’re pressing the mixture into the pan—a little butter or spray on your fingers works wonders.
Variations & Adaptations
One of the best things about this recipe is how easy it is to customize. Here are some of my favorite variations:
Dark Chocolate Drizzle: After the treats have set, melt ½ cup of dark chocolate chips with 1 teaspoon of coconut oil. Drizzle it over the top in zigzag patterns, then add the candy eyes before the chocolate sets. The bitterness of the dark chocolate balances the sweetness of the marshmallow perfectly. I made this version for a Halloween party last year and it was gone in ten minutes.
Peanut Butter Swirl: Melt ¼ cup of creamy peanut butter with the butter and marshmallows. Stir until fully incorporated before adding the cereal. The peanut butter adds a savory richness that makes these even more addictive. Just make sure to use a natural peanut butter without added sugar, or the sweetness will be overwhelming.
Gluten-Free Version: Use a certified gluten-free crispy rice cereal (like One Degree Organic Sprouted Brown Rice Crisps) and double-check that your marshmallows are gluten-free. Most standard marshmallows are, but some specialty brands add wheat starch. This version tastes exactly the same as the original—no one will notice the difference.
Monster Mash Variation: Instead of candy eyes, use a mix of candy corn, candy pumpkins, and orange M&M’s. Press them into the top while the mixture is still warm for a colorful, festive look. This is great for younger kids who might find the eyes a little creepy.
Spooky Spider Version: After cutting the treats into squares, use black licorice strings to create spider legs. Press four pieces into each side of a square, then add a candy eye in the center. It takes a few extra minutes but the presentation is incredible.
Serving & Storage Suggestions
These Cozy Halloween Rice Krispie Treats with Candy Eyes are best served at room temperature. The texture is soft and chewy, the marshmallow is pliable, and the candy eyes stay firmly embedded. If you serve them straight from the fridge, they’ll be too firm and the marshmallow will lose its magic.
For presentation, I like to arrange them on a black or orange platter with some fake spiderwebs and plastic spiders scattered around. It’s a simple touch that makes them look like they belong at a Halloween party. If you’re serving them at a classroom party, you can wrap each square in a little cellophane bag tied with orange ribbon—easy to grab and no sticky fingers.
Storage: Keep them in an airtight container at room temperature for up to 5 days. I use a glass container with a tight-fitting lid, and I layer parchment paper between the squares so they don’t stick together. Do not refrigerate them—the cold air dries out the marshmallow and makes the cereal stale. Do not freeze them either, unless you want sad, soggy treats when you thaw them.
Reheating: If your treats have been sitting out for a day or two and they’ve started to firm up, you can revive them. Place a single square on a microwave-safe plate and microwave for 5-10 seconds. It’ll soften the marshmallow and make it taste fresh again. Just don’t overdo it, or the marshmallow will melt into a puddle.
One thing I love about these treats is that the flavors actually get better after a day. The marshmallow absorbs a little moisture from the cereal, making the texture even softer and more uniform. They’re good on day one, but they’re magical on day two.
Nutritional Information & Benefits
Let’s be honest—these are a treat, not a health food. But that doesn’t mean they can’t fit into a balanced lifestyle. Here’s what you’re looking at per square (based on 12 large squares):
- Calories: 245
- Total Fat: 12g
- Saturated Fat: 7g
- Carbohydrates: 34g
- Sugar: 18g
- Protein: 2g
- Sodium: 180mg
The butter provides a small amount of vitamin A and healthy fats, while the marshmallows are mostly sugar and air. The cereal adds a tiny bit of iron and B vitamins if you use the fortified kind. It’s not a nutritional powerhouse, but it’s a dessert—and sometimes that’s exactly what you need.
For those with dietary restrictions: these treats contain dairy (butter) and are not gluten-free unless you use certified gluten-free cereal. They are nut-free if you check your candy eyes and cereal labels carefully. They are not vegan due to the butter and marshmallows (most marshmallows contain gelatin).
My personal approach: I make these once or twice during October, and I enjoy every single bite without guilt. Life is too short to stress about a marshmallow treat. Balance is about the big picture, not about any single food.
Conclusion
Look, I know Rice Krispie treats aren’t exactly groundbreaking. They’re a classic for a reason, though—simple, satisfying, and endlessly adaptable. These Cozy Halloween Rice Krispie Treats with Candy Eyes take everything you love about the original and give it a festive twist that’s perfect for the season.
What I love most about this recipe is how it brings people together. I’ve seen kids light up when they spot the candy eyes. I’ve seen adults get nostalgic about making these with their own parents. And yeah, I’ve seen a stubborn brother-in-law eat three of them in one sitting. They have a way of making any moment feel a little more special.
So go ahead—make a batch tonight. Customize them however you like. Add extra eyes, throw in some sprinkles, drizzle on some chocolate. Make them your own. And when someone takes that first bite and their face lights up, you’ll know exactly why I keep coming back to this recipe year after year.
If you make these, I’d love to hear about it. Leave a comment below and tell me how they turned out, or share your own twist on the recipe. And if you’re looking for more cozy Halloween recipes, check out our spooky pumpkin cookies or our easy Halloween popcorn mix for more festive fun. Happy Halloween!
Frequently Asked Questions
Can I use regular-sized marshmallows instead of mini marshmallows?
Yes, but you’ll need to melt them more slowly and stir more frequently. Mini marshmallows melt faster and more evenly, which is why I prefer them. If you use regular-sized ones, chop them into smaller pieces first to help them melt faster.
How do I keep the candy eyes from falling off?
Press them into the marshmallow mixture while it’s still warm and sticky. If you wait until the treats have cooled, the marshmallow won’t hold them as well. You can also add a tiny dab of melted marshmallow to the back of each eye before pressing it in.
Can I make these ahead of time for a party?
Absolutely. They actually taste better on day two! Make them up to two days in advance and store them in an airtight container at room temperature. Just don’t add the candy eyes on top until the day you’re serving them, or they might get soft and lose their crunch.
Why did my treats turn out hard and crunchy?
You probably pressed the mixture too firmly into the pan. Rice Krispie treats should be light and airy, not compacted. Next time, use a gentle touch when spreading the mixture into the pan. Also, make sure your marshmallows are fresh—stale marshmallows don’t bind as well, which can lead to a harder texture.
Can I use colored marshmallows for a more festive look?
Yes! You can find orange and black marshmallows around Halloween, or you can dye regular marshmallows with food coloring. Just add the coloring when the marshmallows are melting and stir until the color is even. Keep in mind that colored marshmallows might stain your pot and spatula, so use caution.
Pin This Recipe!
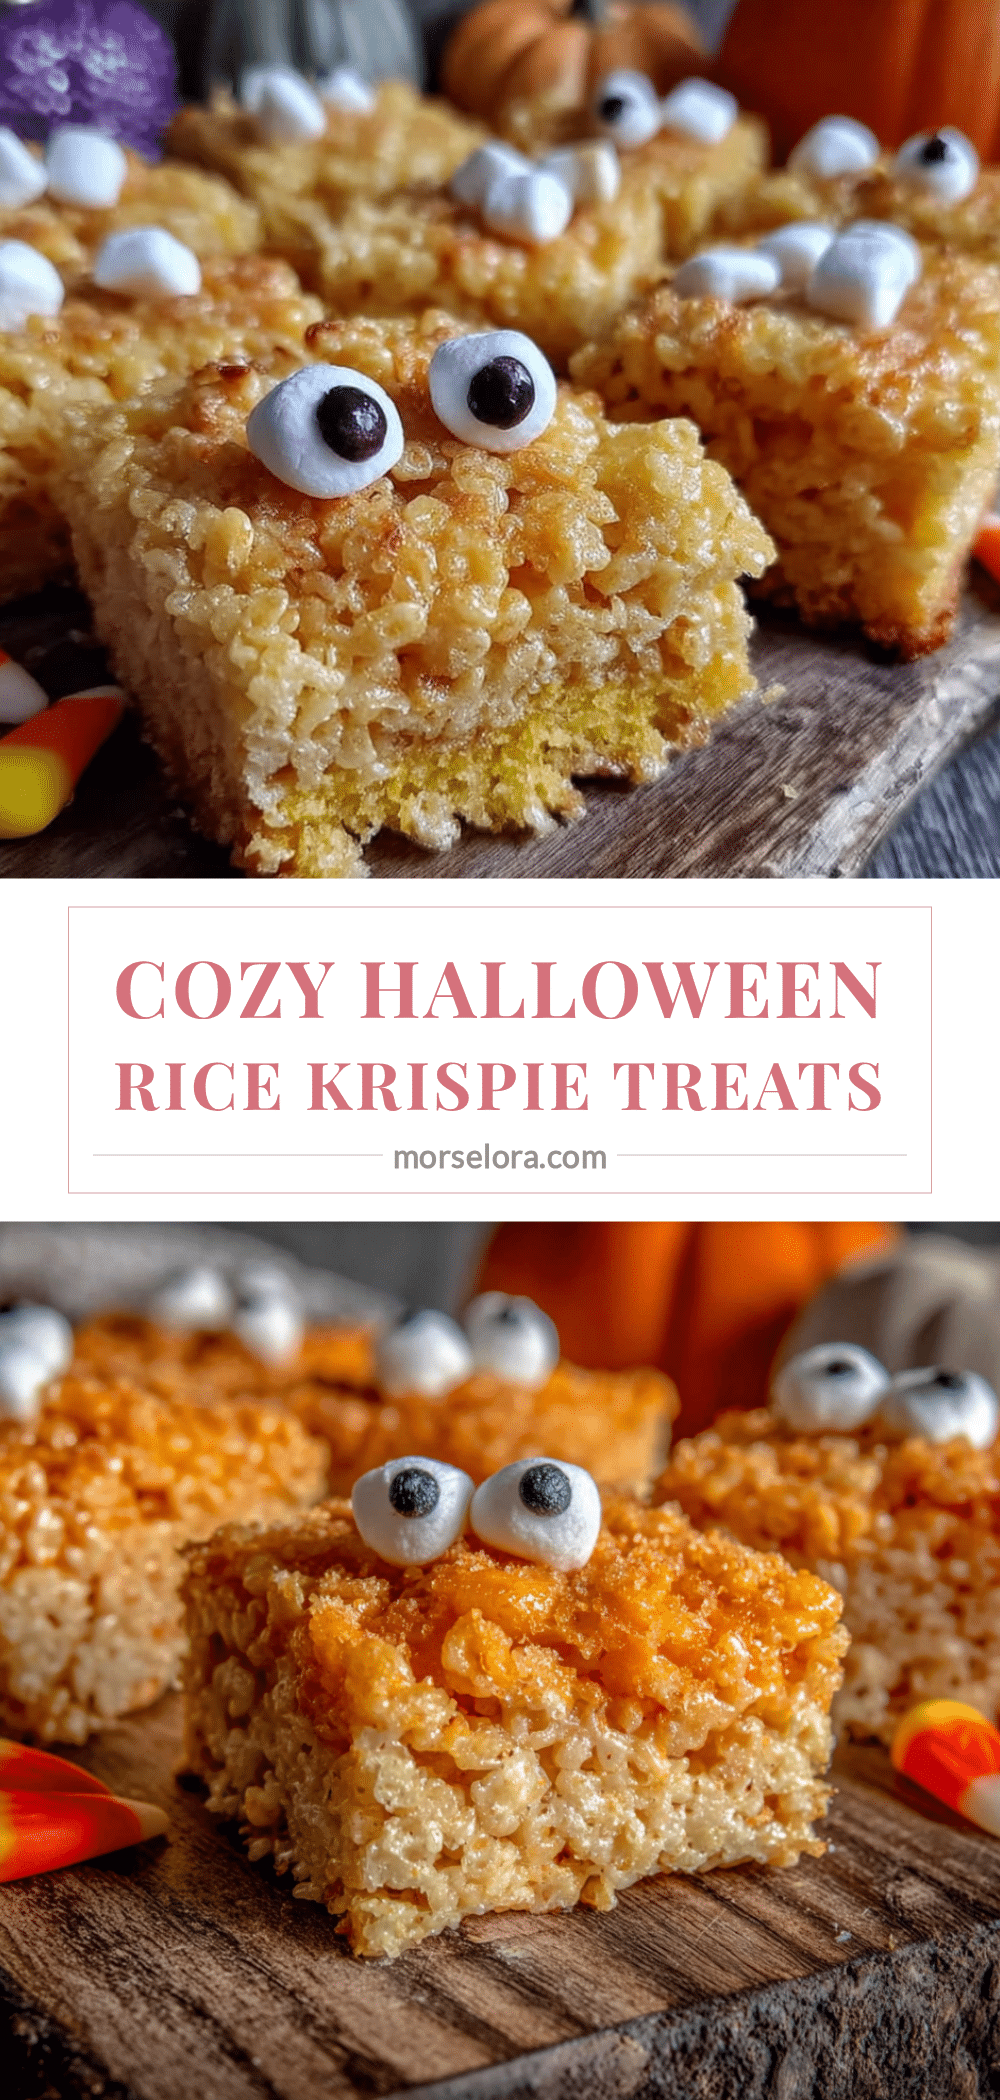
Cozy Halloween Rice Krispie Treats with Candy Eyes
These buttery, impossibly soft Rice Krispie treats are studded with candy eyes for a spooky Halloween twist. Quick and easy to make, they stay chewy for days and are perfect for parties, potlucks, and classroom celebrations.
- Prep Time: 15 minutes
- Cook Time: 10 minutes
- Total Time: 45 minutes
- Yield: 12 servings 1x
- Category: Dessert
- Cuisine: American
Ingredients
- 6 tablespoons unsalted butter
- 1 package (10 ounces) mini marshmallows (about 6 cups)
- ¼ teaspoon salt
- ½ teaspoon vanilla extract
- 6 cups crispy rice cereal
- 1 cup candy eyeballs
- ¼ cup candy eyeballs (reserved for topping)
- 1 tablespoon orange or black sprinkles (optional)
- Flaky sea salt (optional, for topping)
Instructions
- Line a 9×13-inch baking dish with parchment paper, leaving about 2 inches of overhang on two opposite sides. Lightly grease the parchment with butter or nonstick spray.
- Place a large pot over medium-low heat. Add the 6 tablespoons of unsalted butter and let it melt slowly, swirling occasionally, until fully melted but not bubbling or browning (about 2-3 minutes).
- Pour in the entire bag of mini marshmallows. Stir constantly with a rubber spatula, scraping the bottom and sides, until the marshmallows are completely melted and smooth (about 5-7 minutes). Remove from heat.
- Stir in the ¼ teaspoon of salt and the ½ teaspoon of vanilla extract until evenly distributed.
- Pour in the 6 cups of crispy rice cereal all at once. Fold gently with a cutting motion until every piece of cereal is coated and no dry pockets remain (about 2 minutes).
- Add 1 cup of candy eyeballs and fold them in gently, distributing them evenly throughout the mixture.
- Scrape the mixture into the prepared baking dish. Use a spatula to gently press it into an even layer without compacting it too much.
- While the mixture is still warm, press the reserved ¼ cup of candy eyes into the top. If using, scatter sprinkles and a light sprinkle of flaky sea salt over the top.
- Let the treats cool at room temperature for at least 30 minutes until firm enough to cut.
- Use the parchment handles to lift the block out of the pan. Place on a cutting board and cut into squares (12 large or 24 small) with a sharp knife, wiping the knife clean between cuts.
Notes
Use fresh marshmallows and cereal for best results. Keep heat on medium-low to avoid scorching. Do not press the mixture too firmly into the pan to maintain a light, chewy texture. Store in an airtight container at room temperature for up to 5 days. Do not refrigerate or freeze. For a gluten-free version, use certified gluten-free crispy rice cereal and check marshmallow labels.
Nutrition
- Serving Size: 1 large square
- Calories: 245
- Sugar: 18
- Sodium: 180
- Fat: 12
- Saturated Fat: 7
- Carbohydrates: 34
- Protein: 2
Keywords: Halloween, Rice Krispie treats, candy eyes, spooky, easy, no-bake, kid-friendly, party treat


