My nephew Leo asked why I couldn’t just toss the pumpkin seeds straight from the carving bowl into the oven with some sugar and cinnamon. I started to explain why that wouldn’t work—the wet strands of pumpkin goo, the uneven coating, the certain sogginess. Then I stopped. The kid had a point. Why was I making this so complicated?
Honestly, I’d been overthinking pumpkin seeds for years. I had this whole ritual—boiling them first, drying them overnight, tossing them in a complicated spice blend that required toasting and grinding. It was a two-day affair every October. And you know what? Half the time they still came out chewy or burned on one side. Leo watched me one Sunday afternoon, seed goo dripping from his fingers, and just asked the simple question. I almost said no. I almost launched into my whole spiel about moisture content and even roasting. But I bit my tongue, grabbed a baking sheet, and let him show me what he meant.
The kitchen was a disaster. Pumpkin innards on the counter, seeds stuck to the sink, and Leo had cinnamon sugar absolutely everywhere—including on the dog. But twenty minutes later, we pulled out a tray of the most perfectly crunchy, sweet, slightly spicy pumpkin seeds I’d ever tasted. They were clumped together in little sugary clusters, the way the best granola gets. I stood there, spatula in hand, genuinely humbled by a ten-year-old’s instinct. He just shrugged and said, “Told you, Auntie.” That moment—being so completely wrong in the best possible way—is why these cinnamon sugar pumpkin seeds have become my go-to snack for every fall gathering.
Why You’ll Love This Recipe
These cinnamon sugar pumpkin seeds are the kind of snack that disappears before you can refill the bowl. I’ve brought them to football watch parties, Thanksgiving appetizer spreads, and casual game nights, and every single time, someone asks for the recipe. Here’s what makes them so special:
- Incredibly Simple: No boiling, no overnight drying, no complicated steps. Just rinse, toss, and roast. You can have these from pumpkin to plate in under 30 minutes.
- Perfectly Crunchy: The sugar caramelizes just enough to create little clusters of crunchy, sweet seeds. They’re not sticky or chewy—just perfectly crisp.
- Packed with Fall Flavor: Warm cinnamon and a hint of vanilla elevate plain pumpkin seeds into something that tastes like autumn in a bowl.
- Crowd-Pleasing Appeal: Even people who swear they don’t like pumpkin seeds end up grabbing handfuls. The sweet-salty combo is irresistible.
- Great for Gatherings: These are the ultimate make-ahead snack for hosting. They stay fresh for days, travel well, and look beautiful in a simple bowl on the coffee table.
What makes this recipe different from all the others? It’s the method. Most recipes overcomplicate things with boiling or soaking steps that actually make the seeds less crunchy. This streamlined approach—rinsing off the worst of the pulp, tossing with a simple coating, and roasting at the right temperature—gives you that perfect crunchy texture every single time. No fuss, no failed batches, no wasted time.
I love this recipe because it turns a seasonal afterthought into the star of the snack table. You know that moment when you’re hosting and you want something that feels special but takes zero effort? This is it. It’s comfort food for fall—crunchy, sweet, and just a little bit nostalgic.
What Ingredients You Will Need
This recipe uses simple pantry staples to transform humble pumpkin seeds into something truly special. The magic is in the balance of sweet, warm spices and that perfect crunchy coating. Here’s everything you’ll need:
For the Pumpkin Seeds
- 1 ½ cups fresh pumpkin seeds (straight from a carving pumpkin, about one medium pumpkin’s worth)
- 2 tablespoons unsalted butter, melted (adds richness and helps the sugar coating stick)
- 3 tablespoons granulated sugar (creates that crunchy caramelized coating)
- 1 tablespoon brown sugar, packed (adds a deeper, molasses-like sweetness)
- 1 ½ teaspoons ground cinnamon (the star spice—use a good quality cinnamon for best flavor)
- ¼ teaspoon salt (don’t skip this—it balances the sweetness and enhances flavor)
- ½ teaspoon vanilla extract (adds warmth and depth to the flavor profile)
Ingredient Tips & Substitutions:
- Fresh pumpkin seeds: You can use seeds from any variety of pumpkin. Sugar pumpkins tend to have smaller, more tender seeds, while carving pumpkins give you larger, crunchier seeds. Both work beautifully. If you’re using store-bought raw pumpkin seeds, just skip the rinsing step and proceed directly to coating.
- Butter: I prefer unsalted butter so I can control the salt level. Salted butter works too—just reduce the added salt to a tiny pinch. For a dairy-free version, coconut oil is a fantastic substitute and adds a subtle tropical note that pairs surprisingly well with cinnamon.
- Sugars: The combination of granulated and brown sugar gives the best texture and flavor. If you only have one type, use all granulated sugar for a cleaner sweet taste, or all brown sugar for a deeper, more caramel-like flavor.
- Cinnamon: Ceylon cinnamon is milder and more floral, while Cassia cinnamon is stronger and more pungent. I personally love using Saigon cinnamon for its bold, sweet warmth—it really makes the flavor pop.
- Vanilla extract: Pure vanilla extract is best, but imitation vanilla works fine in a pinch. You could also try a pinch of nutmeg or pumpkin pie spice for a different flavor profile.
I always recommend using fresh pumpkin seeds from a carving pumpkin if you can. The flavor is just better—fresher, more nutty, and they roast up so much more evenly. Plus, it’s a great way to use the whole pumpkin and reduce waste.
Equipment Needed
You don’t need anything fancy for this recipe, which is part of its charm. Here’s what you’ll need:
- Baking sheet: A standard half-sheet pan (18×13 inches) works perfectly. Line it with parchment paper for easy cleanup—the sugar can caramelize and stick to the pan.
- Large bowl: For rinsing and tossing the seeds. Any mixing bowl will do.
- Colander: For rinsing the seeds clean of pumpkin pulp.
- Paper towels or clean kitchen towel: For patting the seeds dry. Don’t skip this step—excess moisture prevents that crunchy texture.
- Spatula or wooden spoon: For stirring the seeds as they roast.
- Measuring cups and spoons: For accurate ingredient measurements.
Alternative Equipment: If you don’t have parchment paper, you can use a silicone baking mat or lightly grease the baking sheet with butter or cooking spray. A rimmed baking sheet is better than a flat one to prevent any seeds from rolling off.
Budget-Friendly Tip: Don’t run out and buy a fancy baking sheet. Any sturdy, rimmed pan you already own will work. I’ve made these on an old, slightly warped baking sheet more times than I can count, and they always turn out great.
Preparation Method
Let me walk you through this step by step. Once you’ve done it this way, you’ll never go back to the complicated methods.
- Preheat your oven to 350°F (175°C). Line a baking sheet with parchment paper. Getting the oven hot before you start ensures even roasting from the moment the seeds go in.
- Separate the seeds from the pumpkin. If you’re starting with a fresh carving pumpkin, scoop out all the seeds and pulp into a large bowl. Don’t worry about getting every bit of pulp off at this stage—you’ll rinse them next.
- Rinse the seeds in a colander under cool running water. Use your fingers to gently rub away the stringy pulp. Most of it will come off easily. You don’t need to get them perfectly clean—a little bit of pulp adds flavor and won’t affect the texture. Shake off excess water.
- Spread the rinsed seeds on a clean kitchen towel or paper towels. Pat them very dry. This is the most important step for achieving crunchy seeds. Any remaining moisture will steam the seeds instead of roasting them, leaving them chewy. Let them air dry for 5 minutes if you have time.
- In a medium bowl, whisk together the granulated sugar, brown sugar, cinnamon, and salt. Make sure there are no lumps in the brown sugar—break them up with your fingers if needed.
- Add the dried pumpkin seeds to the bowl with the dry ingredients. Pour the melted butter and vanilla extract over the top. Toss everything together with a spatula until every seed is evenly coated. The mixture will look a little clumpy and messy—that’s exactly what you want.
- Spread the coated seeds in a single layer on the prepared baking sheet. Try to spread them out as evenly as possible. Some clumps are fine—they’ll become those delicious crunchy clusters.
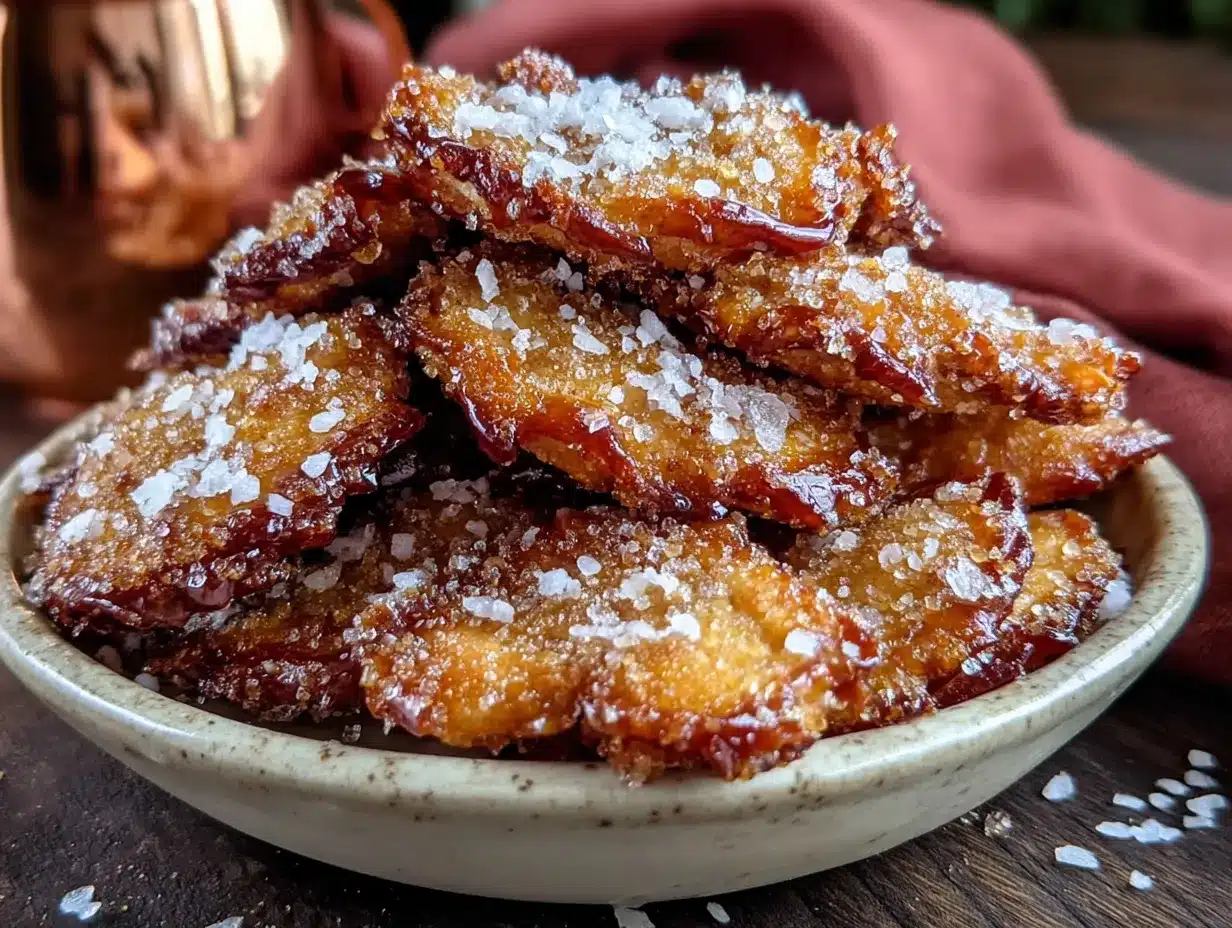
- Roast for 18-22 minutes, stirring halfway through. At the 10-minute mark, use a spatula to stir the seeds, breaking up any large clumps. Keep a close eye on them during the last 5 minutes—sugar can burn quickly. The seeds are done when they’re golden brown and fragrant, and the sugar has caramelized into a glossy coating.
- Let the seeds cool completely on the baking sheet. This is crucial—they continue to crisp up as they cool. Don’t try to move them to a bowl while they’re still warm, or they’ll stick together. Give them at least 15-20 minutes of undisturbed cooling time.
- Break apart any large clusters and transfer to a serving bowl. If any seeds are stuck to the parchment, they should release easily once fully cooled.
Visual Cues: At the halfway point, the seeds should look slightly wet and the sugar will be starting to melt. By the end, they should be a deep golden brown with a glossy, caramelized appearance. If you see any dark spots on individual seeds, pull the pan out immediately—those spots will turn bitter.
Troubleshooting Tip: If your seeds come out chewy instead of crunchy, they likely had too much moisture going in. Next time, dry them more thoroughly and consider roasting for an extra 2-3 minutes. If they taste burnt, reduce your oven temperature to 325°F next time and watch them closely.
Cooking Tips & Techniques
After many batches—some perfect, some, well, less than perfect—I’ve learned a few things that make all the difference.
The Drying Secret: I cannot overstate how important it is to dry those seeds thoroughly. One time I was in a hurry and just shook off the excess water before tossing them with the sugar mixture. The result? Sad, chewy seeds that tasted more like steamed pumpkin than roasted. Now I spread them on a towel and actually pat them dry, seed by seed if I have to. It takes an extra two minutes and transforms the final texture completely.
Watch the Sugar: Sugar burns fast. Like, blink-and-you’ll-miss-it fast. I learned this the hard way when I walked away to answer the phone and came back to a kitchen that smelled like a caramel factory fire. Set a timer for the halfway point, and stay close during those last few minutes. Your nose will tell you when they’re ready—that warm, sweet, toasty aroma is unmistakable.
Batch Size Matters: Don’t overcrowd the baking sheet. If you’re working with a large pumpkin that gives you more than 1 ½ cups of seeds, roast them in two batches. Crowding traps steam and prevents that crunchy caramelization. I made this mistake the first time I tried to double the recipe for a party—ended up with a tray of soggy, clumped seeds that never crisped up.
Cooling is Non-Negotiable: I know it’s tempting to sneak a warm seed straight from the pan. Go ahead—just one. But resist the urge to dump them all into a bowl while they’re still warm. They need that undisturbed cooling time to develop their signature crunch. Patience pays off here, I promise.
Timing Strategy for Hosting: These are perfect for make-ahead prep. Roast them the morning of your gathering, let them cool completely, and store them in an airtight container. They’ll stay perfectly crunchy for 3-4 days. Just don’t seal them while they’re still warm—trapped steam will soften them.
Variations & Adaptations
Once you’ve mastered the basic recipe, there are so many fun ways to switch it up. Here are some of my favorite variations:
- Spicy Sweet: Add ¼ teaspoon of cayenne pepper or chili powder to the sugar mixture. The heat sneaks up on you after the initial sweetness—it’s addictive. I brought a batch of these to a game night and they were gone in 20 minutes.
- Pumpkin Pie Spice: Replace the cinnamon with 2 teaspoons of pumpkin pie spice blend. It adds notes of nutmeg, ginger, and cloves that scream fall. This is my go-to for Thanksgiving snacking.
- Maple Brown Sugar: Swap the granulated sugar for 3 tablespoons of maple sugar and add an extra tablespoon of brown sugar. Drizzle in 1 tablespoon of pure maple syrup along with the butter. The maple flavor pairs beautifully with the pumpkin seeds.
- Chocolate Drizzle: Once the seeds have cooled completely, melt ¼ cup of dark chocolate chips and drizzle them over the top. Let the chocolate set before breaking into pieces. It’s like a candy bar and a healthy snack had a baby.
- Savory-Sweet: Reduce the sugar to 2 tablespoons total, add an extra ¼ teaspoon of salt, and toss in ½ teaspoon of smoked paprika. The smoky flavor with the sweet cinnamon is unexpected and wonderful.
Dietary Adaptations:
- Vegan: Substitute the butter with coconut oil or a vegan butter alternative. The texture stays exactly the same.
- Gluten-Free: This recipe is naturally gluten-free—just double-check your vanilla extract and spices to ensure they’re certified gluten-free if needed.
- Lower Sugar: Reduce the total sugar to 2 tablespoons and use a sugar-free brown sugar alternative. The coating will be less crunchy but still delicious.
Serving & Storage Suggestions
These cinnamon sugar pumpkin seeds are incredibly versatile when it comes to serving. Here’s how I like to present them:
Serving Temperature & Presentation: Serve them at room temperature in a wide, shallow bowl or on a small platter. I love piling them into a rustic wooden bowl and setting them out with other nibbles—spiced nuts, dried cranberries, and dark chocolate chunks. They look beautiful and inviting. For a party, I sometimes portion them into small paper cones or cups for easy grabbing.
What to Serve Alongside: These seeds are fantastic on a fall charcuterie board alongside sharp cheddar, apple slices, and a drizzle of honey. They also make a wonderful topping for yogurt parfaits, oatmeal, or even a simple green salad with apple cider vinaigrette. At my last potluck, someone sprinkled them over a bowl of butternut squash soup and declared it genius.
Storage Instructions: Store completely cooled seeds in an airtight container at room temperature. They’ll stay fresh and crunchy for up to 5 days—if they last that long. I’ve kept them for a full week with no loss of texture. Do not refrigerate them, as the moisture in the fridge can soften the coating.
Reheating Tips: If your seeds lose their crunch after a few days (unlikely, but possible), spread them on a baking sheet and pop them in a 300°F oven for 3-4 minutes. Let them cool completely before serving again. This refreshes the caramelized coating beautifully.
Flavor Development: Honestly, these seeds taste even better the next day. The flavors meld and deepen overnight, and the crunch somehow becomes even more pronounced. If you’re planning for a party, making them a day ahead is actually the smart move.
Nutritional Information & Benefits
While these are definitely a treat, pumpkin seeds bring some serious nutritional benefits to the table. Here’s a rough estimate per ¼-cup serving:
- Calories: Approximately 180-200
- Fat: 12-14g (mostly healthy unsaturated fats)
- Carbohydrates: 14-16g (including 10-12g sugar)
- Protein: 7-8g
- Fiber: 2-3g
Health Benefits: Pumpkin seeds are packed with magnesium, zinc, and healthy fats. Magnesium supports muscle function and sleep quality, while zinc is great for immune health—especially relevant during cold and flu season. The fiber and protein make these seeds surprisingly satisfying, so a small handful goes a long way.
Dietary Considerations: This recipe is naturally gluten-free, vegetarian, and can easily be made vegan. The main allergens are dairy (butter) and tree nuts (if you add any nut-based variations). For a nut-free version, simply avoid the optional nut additions.
I love that I can feel good about serving these at a party. They’re not just empty calories—they’re a wholesome snack dressed up in a little bit of sugar and spice. Everything in moderation, right?
Conclusion
These cinnamon sugar pumpkin seeds have become a non-negotiable part of my fall hosting routine. They’re the snack that everyone gathers around, the one that sparks conversations about pumpkin carving memories and favorite autumn traditions. And honestly, they remind me that sometimes the best recipes come from letting go of control and listening to the people around you—even if that person is a ten-year-old with sticky fingers and a surprisingly good idea.
I hope you give these a try, whether you’re hosting a big Thanksgiving crowd or just want a cozy snack for a quiet fall evening. Feel free to play with the spices, adjust the sweetness, or try one of the variations I shared. Cooking should be fun, not stressful.
I’d love to hear how yours turn out! Drop a comment below and let me know if you tried any twists on the recipe, or tag me in your photos on social media. Your feedback and creativity are what make this community so special. Happy roasting, friends!
Frequently Asked Questions
Can I use store-bought raw pumpkin seeds instead of fresh?
Absolutely! Store-bought raw pumpkin seeds (also called pepitas) work perfectly. Just skip the rinsing and drying steps, and proceed directly to coating and roasting. The texture will be slightly different—store-bought seeds are usually smaller and more tender—but they’ll still be delicious.
Why did my pumpkin seeds turn out chewy instead of crunchy?
Chewy seeds usually mean there was too much moisture going into the oven. Make sure you pat the seeds very dry after rinsing, and don’t skip the thorough drying step. Also, check that your oven is fully preheated before adding the seeds, and resist the urge to pull them out early—they need that full roasting time to crisp up.
Can I make these in an air fryer?
Yes! Air fryers work great for pumpkin seeds. Cook them at 325°F for 10-12 minutes, shaking the basket halfway through. Keep a close eye on them since air fryers cook faster than ovens. The result is incredibly crunchy with a beautifully caramelized coating.
How do I prevent the sugar from burning?
Sugar burns quickly at high temperatures. Stick to 350°F and watch the seeds closely during the last 5 minutes of roasting. If your oven runs hot, consider reducing the temperature to 325°F. Stirring at the halfway point also helps distribute heat evenly and prevent burning.
Can I double or triple this recipe for a large party?
Definitely! Just remember to roast the seeds in a single layer on separate baking sheets—don’t overcrowd. You may need to roast in batches or use multiple oven racks, rotating the pans halfway through. The cooking time stays roughly the same, but keep an eye on them since oven temperatures can vary with more pans inside.
PrintEasy Cinnamon Sugar Pumpkin Seeds – Best Snack Recipe
These cinnamon sugar pumpkin seeds are incredibly simple to make, perfectly crunchy, and packed with warm fall flavor. A streamlined method yields the best snack for gatherings, game nights, or cozy autumn evenings.
- Prep Time: 10 minutes
- Cook Time: 20 minutes
- Total Time: 30 minutes
- Yield: 4 servings 1x
- Category: Snack
- Cuisine: American
Ingredients
- 1 ½ cups fresh pumpkin seeds (from about one medium pumpkin)
- 2 tablespoons unsalted butter, melted
- 3 tablespoons granulated sugar
- 1 tablespoon brown sugar, packed
- 1 ½ teaspoons ground cinnamon
- ¼ teaspoon salt
- ½ teaspoon vanilla extract
Instructions
- Preheat your oven to 350°F (175°C). Line a baking sheet with parchment paper.
- Separate the seeds from the pumpkin. Scoop out all seeds and pulp into a large bowl.
- Rinse the seeds in a colander under cool running water, gently rubbing away the stringy pulp. Shake off excess water.
- Spread the rinsed seeds on a clean kitchen towel or paper towels and pat them very dry. Let them air dry for 5 minutes if possible.
- In a medium bowl, whisk together the granulated sugar, brown sugar, cinnamon, and salt until no lumps remain.
- Add the dried pumpkin seeds to the bowl with the dry ingredients. Pour the melted butter and vanilla extract over the top. Toss everything together until every seed is evenly coated.
- Spread the coated seeds in a single layer on the prepared baking sheet. Some clumps are fine.
- Roast for 18-22 minutes, stirring halfway through. At the 10-minute mark, stir the seeds and break up any large clumps. The seeds are done when golden brown and fragrant, with a glossy, caramelized coating.
- Let the seeds cool completely on the baking sheet (at least 15-20 minutes) to allow them to crisp up.
- Break apart any large clusters and transfer to a serving bowl.
Notes
Dry the seeds thoroughly for maximum crunch. Watch the sugar closely during the last 5 minutes to prevent burning. Let seeds cool completely before storing. For best results, make a day ahead—flavors deepen overnight.
Nutrition
- Serving Size: ¼ cup
- Calories: 190
- Sugar: 11
- Sodium: 150
- Fat: 13
- Saturated Fat: 4
- Carbohydrates: 15
- Fiber: 2
- Protein: 7
Keywords: cinnamon sugar pumpkin seeds, roasted pumpkin seeds, fall snack, easy pumpkin seeds, sweet pumpkin seeds


