I was standing in the frozen foods aisle of our local grocery store last Tuesday—desperate, honestly, with a toddler on my hip and a mental list that had gone completely blank—when the smell hit me. It wasn’t the freezer section. It was somewhere between the rotisserie chicken warmer and the bakery, that unmistakable scent of garlic and butter sizzling together, and suddenly I was seven years old at my Aunt Carol’s tiny kitchen table in Pennsylvania.
Aunt Carol wasn’t a fancy cook. Her stove had two burners that worked inconsistently, and she used the same dented skillet for everything. But every time we visited, she’d make this one-pan chicken and rice dish that filled her whole apartment with that exact smell—garlic, butter, something savory bubbling away. I remember sitting on a wobbly stool, watching her lift the lid to check the rice, steam fogging up her glasses. She’d wink at me and say, “Almost there, kiddo.” She passed away when I was twelve, and I never got the recipe.
I’ve been chasing that feeling ever since. Not just the taste—though that was perfect—but the way her kitchen felt: warm, safe, like everything was going to be okay. Maybe you’ve been there, standing in your own kitchen trying to recreate a memory you can almost touch but not quite hold. This Crowd-Pleasing Garlic Butter Chicken and Rice is my best attempt. And let me tell you, after about fifteen tries (and one memorable disaster where I used way too much garlic powder), I think I finally nailed it.
Why You’ll Love This Recipe
This isn’t just another chicken and rice recipe. After testing this dish for two different dinner parties and one very chaotic weeknight, I can tell you it delivers every single time. Here’s why you’ll want this in your regular rotation:
- 30 Minutes Start to Finish: Seriously. From the moment you start chopping garlic to the moment you’re scooping seconds, it’s half an hour. Perfect for those evenings when guests are arriving sooner than you planned.
- One Pan, Minimal Mess: You know that feeling when you’re hosting and the sink is already full? This recipe uses one skillet. That’s it. Your dishwasher will thank you.
- Made with Pantry Staples: Chicken, rice, butter, garlic, broth—chances are you’ve got most of this already. No special trips to three different stores.
- Guaranteed Crowd-Pleaser: I brought this to a potluck last month and watched three different people ask for the recipe before the main course was even finished. Kids love it. Adults love it. Even my picky uncle asked for seconds.
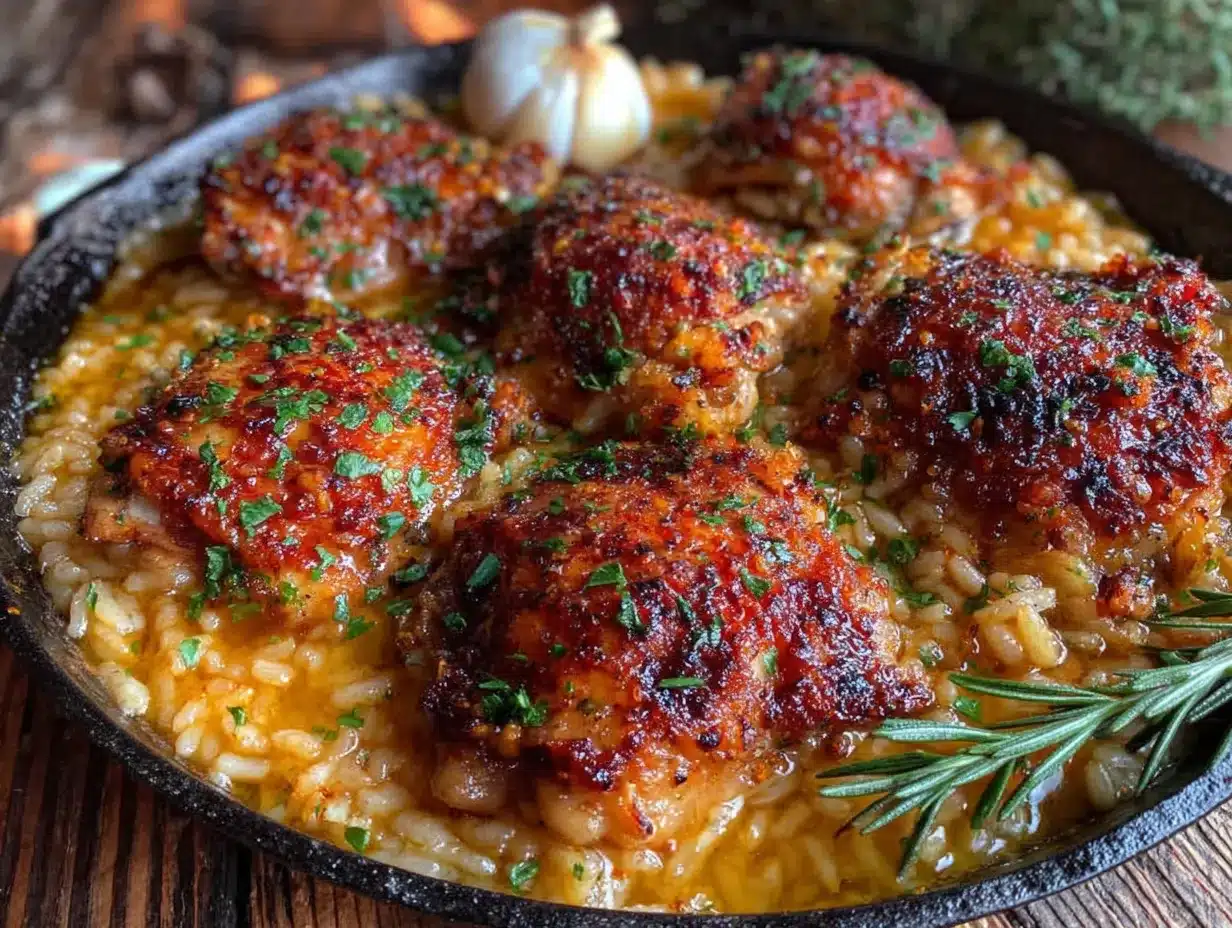
- Looks Impressive, Zero Stress: The golden-brown chicken sitting on a bed of perfectly cooked rice with garlic butter glistening on top? It looks like you spent hours. You didn’t. That’s our little secret.
What makes this version different from the dozens of other chicken and rice recipes out there? It’s the technique—browning the chicken first to build that deep flavor, then letting the rice cook in the same pan with all those browned bits and garlicky goodness. No soggy rice. No bland chicken. Just pure comfort food that makes you close your eyes after the first bite. It’s the kind of dish that feels like a hug, which is exactly what Aunt Carol’s kitchen felt like.
What Ingredients You Will Need
This recipe uses simple, honest ingredients to build layers of flavor without any fuss. Most of these are probably already sitting in your kitchen right now.
For the Chicken
- 4 boneless, skinless chicken breasts (about 1.5 lbs total) – Look for breasts that are similar in size so they cook evenly. If they’re really thick, butterfly them or pound them to about ¾-inch thickness.
- 1 teaspoon salt – I use fine sea salt. Table salt works too, just use a little less since it’s more concentrated.
- ½ teaspoon black pepper – Freshly ground if you have it, but pre-ground is totally fine.
- ½ teaspoon paprika – This is my secret for that beautiful golden color. Smoked paprika adds even more depth if you’ve got it.
- 2 tablespoons olive oil – For searing. You want an oil with a higher smoke point than butter here.
For the Garlic Butter Rice
- 4 tablespoons unsalted butter – Salted butter works too, just reduce the added salt slightly. I prefer unsalted so I can control the seasoning.
- 6 cloves garlic, minced – Yes, six. Don’t skimp. This is garlic butter chicken, after all. Use fresh garlic, not the jarred stuff—the flavor is noticeably better.
- 1 cup long-grain white rice – Basmati or jasmine work beautifully. Avoid short-grain rice here as it gets too sticky. Rinse the rice in a fine-mesh strainer until the water runs clear—this removes excess starch and prevents gummy rice.
- 2 cups chicken broth – Low-sodium is best so you can control the salt. I like Swanson or Kitchen Basics. Homemade is amazing if you have it.
- ½ teaspoon dried thyme – Adds that subtle earthy note that makes the dish feel complete.
- ¼ teaspoon red pepper flakes (optional) – For a tiny kick. Leave it out if you’re serving kids or spice-sensitive guests.
- ¼ cup freshly chopped parsley – For garnish and freshness. Flat-leaf or curly both work.
Optional Add-Ins
- ½ cup frozen peas – Stir these in during the last 5 minutes of cooking for a pop of color and sweetness.
- ¼ cup grated Parmesan cheese – Sprinkle on top before serving for extra richness. Trust me on this one.
Equipment Needed
You don’t need a fancy kitchen to pull this off. Here’s what you’ll need:
- Large skillet with a lid – A 12-inch skillet is ideal. Cast iron, stainless steel, or non-stick all work. The lid is crucial for steaming the rice, so make sure you have one that fits snugly. If you don’t have a lid, aluminum foil works in a pinch.
- Cutting board and sharp knife – For mincing garlic and chopping parsley. A dull knife makes mincing garlic genuinely frustrating.
- Measuring cups and spoons – Rice-to-liquid ratio matters here, so measure accurately. I learned that the hard way.
- Fine-mesh strainer – For rinsing the rice. You can skip this if you’re in a hurry, but your rice will be noticeably better if you don’t.
- Tongs – For flipping the chicken without piercing it and losing those precious juices.
- Spatula or wooden spoon – For stirring the rice and scraping up the browned bits from the bottom of the pan.
Budget-friendly tip: If you don’t have a large skillet, use a Dutch oven or a deep saucepan instead. Just make sure it’s wide enough to fit the chicken in a single layer.
Preparation Method
Let’s get cooking. This comes together fast, so have everything prepped before you start—that’s the real secret to stress-free hosting.
- Prep the chicken (5 minutes): Pat the chicken breasts dry with paper towels. This is important—wet chicken won’t brown properly. Season both sides with salt, pepper, and paprika. Let them sit at room temperature while you get the pan ready. Don’t skip the resting step; cold chicken lowers the pan temperature and leads to steaming instead of searing.
- Rinse the rice (2 minutes): Place the rice in a fine-mesh strainer and rinse under cold running water, stirring with your fingers, until the water runs clear. This removes excess starch and prevents the rice from turning into a gluey mess. Shake off excess water and set aside.
- Sear the chicken (8-10 minutes): Heat the olive oil in your large skillet over medium-high heat until it shimmers—you should see tiny ripples on the surface. Carefully place the chicken breasts in the pan in a single layer. Don’t crowd them; if they don’t fit, cook in batches. Let them cook undisturbed for 4-5 minutes until the bottom is deep golden brown. Flip and cook another 3-4 minutes. The chicken won’t be fully cooked through yet—that’s fine. Transfer to a plate and set aside. The internal temperature should be around 150°F (65°C) at this point.
- Build the garlic butter (3 minutes): Reduce the heat to medium. Add the butter to the same skillet. As it melts, use a wooden spoon to scrape up all those browned bits from the bottom of the pan—that’s pure flavor. Add the minced garlic and cook for 30-60 seconds until fragrant but not browned. Burnt garlic turns bitter, so watch it carefully. The smell at this point is absolutely intoxicating—this is the moment that takes me back every single time.
- Toast the rice (2 minutes): Add the rinsed rice to the skillet and stir to coat it in the garlic butter. Cook for about 2 minutes, stirring frequently, until the rice looks slightly translucent at the edges. This toasting step adds nutty flavor and helps the rice stay separate rather than clumping together.
- Add the liquid (1 minute): Pour in the chicken broth, add the dried thyme and red pepper flakes if using, and stir to combine. Bring to a simmer—you should see gentle bubbles across the surface, not a rolling boil.
- Return the chicken and cook (15-18 minutes): Nestle the chicken breasts back into the rice, along with any juices that accumulated on the plate. Cover the skillet with a tight-fitting lid, reduce the heat to low, and let it simmer gently for 15-18 minutes. Do not lift the lid during this time—the steam is what cooks the rice. Set a timer and walk away. I know it’s tempting to peek, but resist.
- Rest before serving (5 minutes): After 15-18 minutes, turn off the heat and let the skillet sit, still covered, for 5 minutes. This resting period allows the rice to absorb any remaining liquid and the chicken to finish cooking gently. After resting, remove the lid and fluff the rice with a fork. Check that the chicken has reached an internal temperature of 165°F (74°C). If not, cover and let it sit another 2-3 minutes.
- Garnish and serve (2 minutes): Sprinkle the chopped parsley over everything. If you’re using Parmesan, grate it over the top now. Serve directly from the skillet for a rustic, impressive presentation that keeps things warm at the table.
Cooking Tips & Techniques
After making this dish more times than I can count, I’ve collected a few hard-earned lessons. Let me save you from my mistakes.
Don’t skip the browning step. I know it’s tempting to just throw everything in the pan and call it a day, but that golden-brown crust on the chicken is where the magic lives. It adds flavor to the entire dish, not just the chicken. The browned bits left in the pan—called fond—are what give the rice that deep, savory taste. If you skip this step, you’ll end up with pale chicken and bland rice. Trust the process.
Watch your heat levels. Medium-high for searing, medium for the garlic butter, low for simmering. Getting these right is the difference between perfectly cooked rice and a burnt-bottom mess. I once had the heat too high during the simmering phase and ended up with burned rice on the bottom and raw rice on top. Not my finest moment. If you notice the liquid bubbling too vigorously, turn the heat down immediately.
Use room temperature chicken. Take the chicken out of the fridge 15-20 minutes before cooking. Cold chicken seizes up when it hits a hot pan and releases too much liquid, which means it steams instead of browns. Room temperature chicken cooks more evenly and gives you that beautiful golden crust.
Rinsing rice is non-negotiable. I know it adds an extra step, but that cloudy water you rinse away is excess starch. If you skip this, your rice will be gummy and sticky instead of fluffy and separate. It takes two minutes. Just do it.
Let the pan do the work. When you’re browning the chicken, leave it alone. Don’t poke at it, don’t slide it around, don’t lift it up to check every thirty seconds. Let it cook undisturbed for 4-5 minutes, and it will release naturally from the pan when it’s ready. If it sticks, it’s not ready yet.
Variations & Adaptations
This recipe is wonderfully flexible. Here are some ways to make it your own:
Dietary Adaptations: For a gluten-free version, this dish is naturally gluten-free as written—just double-check your chicken broth label. For dairy-free, substitute the butter with a high-quality vegan butter or use olive oil and add an extra clove of garlic. For a lower-carb option, swap the rice for cauliflower rice—cook it separately and serve the chicken and garlic butter sauce over the top.
Flavor Twists: Add a squeeze of lemon juice and some lemon zest along with the broth for a bright, citrusy version. Stir in a tablespoon of Dijon mustard before adding the broth for extra tang. Swap the thyme for rosemary or oregano for a different herbaceous note. I once added a pinch of saffron to the broth for a special dinner party, and it was absolutely gorgeous—golden rice with that subtle floral flavor.
Protein Swaps: Chicken thighs work beautifully here—they’re more forgiving and stay juicier. Use bone-in, skin-on thighs and adjust cooking time to about 25 minutes. You can also use boneless pork chops or even firm tofu (press it well first and sear until golden).
Vegetable Add-Ins: Stir in a cup of frozen peas and carrots during the last 5 minutes of cooking. Add sliced mushrooms along with the garlic for an earthy depth. Throw in a handful of fresh spinach right before serving and let it wilt into the rice. My personal favorite variation is adding roasted red peppers and artichoke hearts—it feels Mediterranean and fancy with almost zero extra effort.
Serving & Storage Suggestions
This dish is designed to be the star of the show, but here’s how to round it out and handle leftovers.
How to Serve: Serve the chicken and rice directly from the skillet for a rustic, family-style presentation. Garnish with extra parsley and a sprinkle of flaky sea salt right before bringing it to the table. The steam rising from the pan with that garlic butter aroma will have everyone reaching for their forks before you even sit down.
What to Serve Alongside: A simple green salad with lemon vinaigrette cuts through the richness beautifully. Steamed green beans or roasted asparagus add color and crunch. Crusty bread is essential for sopping up any garlic butter sauce left in the pan—trust me, you won’t want to waste a drop. For drinks, a crisp white wine like Sauvignon Blanc or a light Pinot Grigio pairs wonderfully. If you’re hosting a crowd, this dish also works well alongside a roasted vegetable platter and some good olives.
Storage Instructions: Store leftovers in an airtight container in the refrigerator for up to 4 days. The flavors actually meld and deepen overnight, making the leftovers almost better than the original. To reheat, add a splash of chicken broth or water to restore moisture and warm gently in a covered skillet over medium-low heat, or microwave in 30-second bursts. Avoid high heat, which dries out the chicken.
Freezing: This dish freezes surprisingly well. Let it cool completely, then transfer to freezer-safe containers. It will keep for up to 3 months. Thaw overnight in the refrigerator and reheat gently. The rice may be slightly softer after freezing, but the flavor remains excellent.
Nutritional Information & Benefits
Here’s the approximate nutritional breakdown for one serving (one chicken breast with about ¾ cup rice, based on 4 servings):
- Calories: 485
- Protein: 42g
- Carbohydrates: 38g
- Fat: 17g
- Saturated Fat: 8g
- Fiber: 1g
- Sodium: 680mg
This dish offers a solid balance of lean protein from the chicken and energy-sustaining carbohydrates from the rice. Garlic is packed with health benefits—it’s known for supporting immune function and heart health. The butter adds richness and helps your body absorb fat-soluble vitamins from any vegetables you serve alongside. If you’re watching your sodium, use low-sodium broth and reduce the added salt. For a lighter version, swap half the butter for olive oil and use brown rice instead of white rice (just increase the cooking time to about 40 minutes and add an extra ¼ cup of broth).
Conclusion
This Crowd-Pleasing Garlic Butter Chicken and Rice has become my go-to for hosting, potlucks, and those nights when I need a guaranteed win. It’s the dish I bring when I want to impress without stress, the one I make when I’m chasing that feeling of Aunt Carol’s warm kitchen. Every time I lift that lid and see the steam curl up with that garlic butter smell, I’m transported—and now I get to share that feeling with the people I love.
Here’s the thing about recipes like this: they’re meant to be adapted. Don’t be afraid to tweak the seasonings, swap in whatever vegetables you have, or double the garlic if you’re feeling bold (I always do). The best version of this dish is the one that makes you happy. So go ahead, make it your own, and don’t forget to serve it with good bread and even better company.
I’d love to hear how this turns out for you! Drop a comment below and let me know what variations you tried, or tag me in your photos if you share them online. Happy cooking, friends—you’ve got this.
Frequently Asked Questions
Can I use chicken thighs instead of chicken breasts?
Absolutely! Boneless, skinless chicken thighs work beautifully in this recipe. They’re more forgiving and stay juicy even if you cook them a few minutes too long. Adjust the cooking time to about 20-22 minutes for the simmering step, or until the thighs reach 165°F internally.
Why is my rice still crunchy after 18 minutes?
This usually happens for one of three reasons: the heat was too low during simmering, the lid wasn’t tight enough and steam escaped, or you lifted the lid to check on it. Make sure your lid fits snugly and resist the urge to peek. If the rice is still crunchy after the resting time, add 2-3 tablespoons of broth, cover, and cook on low for another 5 minutes.
Can I make this in an Instant Pot or slow cooker?
Yes! For the Instant Pot, use the sauté function to brown the chicken and cook the garlic butter, then add the rice and broth. Pressure cook on high for 6 minutes with a natural release. For a slow cooker, brown the chicken first, then add everything except the rice. Cook on low for 4-6 hours, then stir in cooked rice before serving. Note that the texture will be different—the Instant Pot version is closest to the stovetop method.
How do I prevent the rice from burning on the bottom?
Keep the heat on low during the simmering phase and make sure your skillet is heavy-bottomed. Thin pans conduct heat unevenly and are more likely to scorch. If you’re using a non-stick skillet, you’re less likely to have this issue. Also, resist stirring the rice once it’s covered—stirring releases starch that can settle at the bottom and burn.
Can I double this recipe for a larger crowd?
Definitely! For a crowd, use a large Dutch oven or a 14-inch skillet. Double all ingredients, but be careful not to overcrowd the pan when browning the chicken—cook it in batches if needed. You may need to increase the simmering time by 3-5 minutes since there’s more volume. For easy serving at a party, transfer to a large platter or keep it in the Dutch oven on a warming tray.
PrintEasy Garlic Butter Chicken and Rice: Best 30-Minute Dinner
This one-pan garlic butter chicken and rice is a 30-minute, crowd-pleasing dinner made with simple pantry staples. It features golden-brown chicken on a bed of perfectly cooked rice, all infused with garlic butter goodness.
- Prep Time: 10 minutes
- Cook Time: 20 minutes
- Total Time: 30 minutes
- Yield: 4 servings 1x
- Category: Main Course
- Cuisine: American
Ingredients
- 4 boneless, skinless chicken breasts (about 1.5 lbs total)
- 1 teaspoon salt
- ½ teaspoon black pepper
- ½ teaspoon paprika
- 2 tablespoons olive oil
- 4 tablespoons unsalted butter
- 6 cloves garlic, minced
- 1 cup long-grain white rice (basmati or jasmine), rinsed
- 2 cups low-sodium chicken broth
- ½ teaspoon dried thyme
- ¼ teaspoon red pepper flakes (optional)
- ¼ cup freshly chopped parsley
- ½ cup frozen peas (optional)
- ¼ cup grated Parmesan cheese (optional)
Instructions
- Prep the chicken: Pat chicken breasts dry with paper towels. Season both sides with salt, pepper, and paprika. Let sit at room temperature while preparing the pan.
- Rinse the rice: Place rice in a fine-mesh strainer and rinse under cold water until water runs clear. Shake off excess water and set aside.
- Sear the chicken: Heat olive oil in a large skillet over medium-high heat until shimmering. Place chicken in a single layer and cook undisturbed for 4-5 minutes until deep golden brown. Flip and cook another 3-4 minutes. Transfer to a plate (internal temperature should be around 150°F).
- Build the garlic butter: Reduce heat to medium. Add butter to the same skillet, scraping up browned bits. Add minced garlic and cook for 30-60 seconds until fragrant.
- Toast the rice: Add rinsed rice to the skillet and stir to coat in garlic butter. Cook for about 2 minutes until rice looks slightly translucent.
- Add the liquid: Pour in chicken broth, add dried thyme and red pepper flakes (if using), and stir. Bring to a simmer.
- Return the chicken and cook: Nestle chicken back into the rice along with any accumulated juices. Cover with a tight-fitting lid, reduce heat to low, and simmer for 15-18 minutes. Do not lift the lid.
- Rest before serving: Turn off heat and let the skillet sit, covered, for 5 minutes. Remove lid and fluff rice with a fork. Check that chicken has reached 165°F internally.
- Garnish and serve: Sprinkle with chopped parsley and Parmesan (if using). Serve directly from the skillet.
Notes
Don’t skip browning the chicken—it builds flavor. Use room temperature chicken for even cooking. Rinsing rice is essential to prevent gumminess. Keep heat low during simmering to avoid burning. For leftovers, add a splash of broth when reheating.
Nutrition
- Serving Size: 1 chicken breast wit
- Calories: 485
- Sodium: 680
- Fat: 17
- Saturated Fat: 8
- Carbohydrates: 38
- Fiber: 1
- Protein: 42
Keywords: garlic butter chicken, chicken and rice, one-pan dinner, 30-minute meal, easy dinner, crowd-pleasing, comfort food


