“Why can’t we just use the almond slivers for the fingernails?” my nephew asked, watching me lay out a complicated array of piping tips and melted chocolate. I started to explain why that wouldn’t work — then stopped. Honestly, I had no good reason. I was just so used to doing it the “proper” way that I hadn’t even considered his simple, brilliant shortcut.
There I was, trying to teach a ten-year-old how to make spooky witch finger cookies, and he ended up teaching me. The almond slivers were perfect. They looked exactly like tiny, grimy fingernails without any of the fuss. I felt a little sheepish, I’ll admit. But that moment changed how I make these cookies forever.
These Easy Witch Finger Cookies are now a staple in our October baking rotation. They’re creepy enough to impress at a Halloween party but simple enough that the kids can actually do most of the work. You know that feeling when a recipe just *works* — when the kids are laughing, the kitchen is a mess, and the cookies actually turn out looking like something from a horror movie? That’s this recipe. Let me tell you, watching a bunch of little green fingers cooling on a baking sheet never gets old.
Why You’ll Love This Recipe
I’ve tested this recipe more times than I care to count, and it’s finally just right. These cookies aren’t just about the scare factor — they actually taste amazing. Here’s why this one is a keeper:
- Super Simple Ingredients : You probably have most of this in your pantry right now. No weird specialty items needed.
- Kid-Approved and Kid-Friendly : Little hands can shape the dough, press in the almond slivers, and add the “wrinkles.” It’s messy, but that’s half the fun.
- Quick to Make : From start to finish, you’re looking at about 45 minutes. The dough comes together fast, and the chilling time is minimal.
- Perfect for Halloween Parties : These are the first thing to disappear at any spooky gathering. They’re a guaranteed conversation starter.
- Actually Delicious : Let’s be real — some Halloween treats look great but taste like cardboard. These are buttery, slightly sweet, and have a wonderful shortbread texture.
What makes Easy Witch Finger Cookies different from other recipes? It’s the texture. I use a combination of butter and a touch of almond extract that gives them this melt-in-your-mouth quality. Plus, that trick with the almond slivers? It’s a game-changer. No piping, no mess, just perfect little fingernails every single time.
This is the kind of recipe that makes you feel like a Halloween hero. The kids think you’re a baking genius, and you know the secret — it’s almost impossible to mess up.
What Ingredients You Will Need
This recipe uses simple, everyday ingredients to create something truly spooky. Most of these are pantry staples, which makes it perfect for a last-minute Halloween baking session.
- Unsalted butter, softened (1 cup / 2 sticks) — Make sure it’s truly soft, not melted. This gives the cookies that tender, crumbly texture. I always use unsalted so I can control the salt level.
- Powdered sugar (1/2 cup / 60g) — This is key for that delicate shortbread texture. Granulated sugar would make them too crunchy.
- Large egg (1) — You’ll use the yolk in the dough and the white for brushing. It helps the cookies hold their shape and gives them a nice sheen.
- Vanilla extract (1 teaspoon) — Pure vanilla makes a difference here, but imitation works in a pinch.
- Almond extract (1/2 teaspoon) — This is the secret ingredient. It adds a subtle, almost marzipan-like flavor that makes these cookies unforgettable. Don’t skip it!
- All-purpose flour (2 1/4 cups / 280g) — Spoon and level it for the best results. Scooping directly from the bag can pack in too much flour and make the cookies dry.
- Salt (1/4 teaspoon) — Just a pinch to balance the sweetness.
- Green food coloring (gel or liquid) — Gel is better because it gives you a vibrant color without thinning the dough. You want a nice, witchy green.
- Almond slivers (about 30-36) — These are your fingernails! I recommend Blue Diamond brand because they’re consistently shaped and not too brittle.
- Red jam or jelly (a small amount, like strawberry or raspberry) — For that “bloody” cuticle effect. Optional, but it really sells the look.
For the green color, a little goes a long way. Start with a few drops and add more until you get a shade that looks suitably creepy. You can also use a combination of yellow and blue gel colors to create your own green.
Equipment Needed
You don’t need a lot of fancy tools for these cookies, which is another reason I love them. Here’s what you’ll need:
- Electric mixer (hand or stand) — You can cream the butter by hand, but a mixer makes it so much easier. I use my trusty KitchenAid for this.
- Large mixing bowl
- Baking sheets (2) — Line them with parchment paper or a silicone baking mat. No greasing needed.
- Parchment paper or silicone baking mat — This prevents sticking and makes cleanup a breeze.
- Small bowl — For the egg wash.
- Pastry brush — For brushing the cookies with egg white.
- Sharp knife or bench scraper — For making those creepy knuckle marks. A butter knife works in a pinch.
- Wire cooling rack — Essential for getting that perfect, crisp texture.
If you don’t have a pastry brush, you can just use your fingers to smear on the egg white. It’s not as neat, but it works. And if you don’t have a wire rack, let the cookies cool on the baking sheet for a few minutes, then carefully transfer them to a plate.
Preparation Method
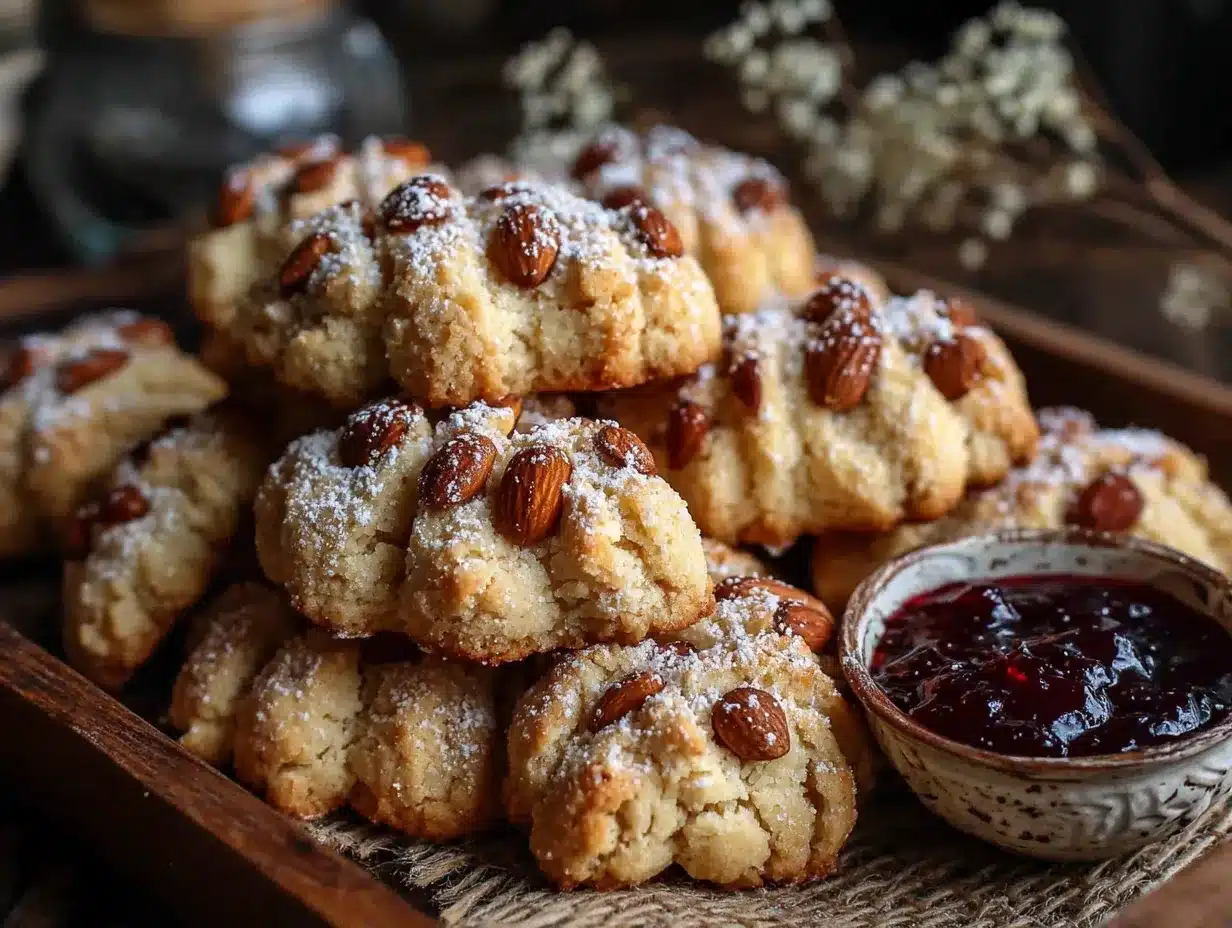
Alright, let’s get our hands dirty. This is the fun part. Make sure you have about 45 minutes of time and a little patience. The results are totally worth it.
- Cream the butter and sugar. In your large mixing bowl, beat the softened butter and powdered sugar together on medium speed until it’s light, fluffy, and pale. This takes about 2-3 minutes. Scrape down the sides of the bowl once or twice. You want it to look like a soft, creamy cloud.
- Add the wet ingredients. Beat in the egg yolk (save the white for later!), vanilla extract, and almond extract. Mix until everything is combined. The mixture might look a little curdled — that’s totally fine. Don’t panic.
- Add the dry ingredients and color. In a separate bowl, whisk together the flour and salt. Gradually add this to the wet mixture, mixing on low speed. Just as the flour starts to disappear, add your green food coloring. Mix until the dough comes together and the color is evenly distributed. You want a nice, deep witchy green.
- Chill the dough. This is a crucial step. Wrap the dough in plastic wrap and flatten it into a disc. Pop it in the fridge for at least 30 minutes. This makes the dough much easier to handle and shape. If you skip this, the cookies will spread too much and lose their finger shape.
- Preheat and prep. While the dough chills, preheat your oven to 325°F (160°C). Line your baking sheets with parchment paper or silicone mats.
- Shape the fingers. Take the chilled dough and scoop out about a tablespoon-sized piece. Roll it into a log shape, about 3-4 inches long. Then, taper one end to make it look like a fingertip. Place it on the baking sheet. Repeat with the remaining dough. Leave about 2 inches between each “finger” — they will spread a little.
- Add the fingernails and details. This is where the magic happens. Gently press an almond sliver into the tapered end of each finger for the nail. Use the back of a knife to make 2-3 small indentations on the “knuckles.” You can also lightly score lines across the finger for extra wrinkles. Don’t press too hard — you just want to make an impression.
- Brush and bake. In a small bowl, whisk the reserved egg white with a teaspoon of water. Brush this mixture over each cookie. This gives them a lovely, slightly shiny finish. Bake for 12-15 minutes, or until the cookies are set and the bottoms are just barely golden. The tops should still look pale.
- Cool and add the “blood.” Let the cookies cool on the baking sheet for 5 minutes, then transfer them to a wire rack to cool completely. Once they’re cool, use a toothpick to dab a tiny bit of red jam at the base of the almond sliver (the cuticle area). It looks just like a bloody fingernail!
A quick note: the cookies will be soft when they come out of the oven. They firm up as they cool. Don’t be tempted to overbake them, or they’ll be dry.
Cooking Tips & Techniques
I’ve made these cookies more times than I can count, and I’ve learned a thing or two the hard way. Here are my best tips to make sure yours turn out perfect:
Don’t overwork the dough. When you’re adding the flour, mix just until it comes together. Overmixing develops the gluten and makes the cookies tough. You want them tender and crumbly, like a good shortbread.
Chill the shaped fingers. If your kitchen is warm, the shaped cookies can get a little soft. Pop the baking sheet in the fridge for 10 minutes before baking. This helps them hold their shape perfectly. I learned this lesson after my first batch turned into little green blobs. Not spooky — just sad.
Use the right almond slivers. Look for slivers that are flat and wide, not the skinny little sticks. They look much more like real fingernails. If your slivers are too long, just snap them in half before pressing them in.
Make the “wrinkles” before baking. It’s much easier to make the knuckle marks when the dough is raw and cool. If you try to do it after baking, the cookies will just crumble. Trust me on this one.
Work in batches. Don’t try to shape all 30 fingers at once if you’re a beginner. Shape a few, put them on the sheet, and then shape a few more. It keeps the dough from warming up too much in your hands.
For extra creepiness, use a toothpick to add a few tiny “hairs” on the sides of the fingers. It’s a small detail, but it makes them look even more realistic and disgusting. Kids love it.
Variations & Adaptations
One of the best things about this recipe is how easy it is to change it up. Here are some ways to make it your own:
- Gluten-Free Version: Swap the all-purpose flour for a 1:1 gluten-free baking flour blend. I’ve used King Arthur Measure for Measure with great results. The texture will be a little more delicate, but they still taste fantastic.
- Vegan Adaptation: Use vegan butter (like Earth Balance) and a flax egg (1 tablespoon ground flaxseed mixed with 3 tablespoons water). The texture will be slightly different, but they’ll still be delicious and creepy.
- Chocolate Witch Fingers: Replace 1/4 cup of the flour with unsweetened cocoa powder. You’ll get dark, chocolatey fingers that look even more sinister. Use dark chocolate almond slivers for the nails.
- Spooky Color Variations: Instead of green, try purple, orange, or even a pale, sickly gray. You can also make a batch of multi-colored fingers for a truly unsettling platter.
- Zombie Fingers: Skip the green food coloring and leave the dough pale. Add a few drops of red food coloring to the tips to make them look like they’ve been digging in the dirt. Use sliced almonds for the nails.
- Extra Crunchy Nails: Instead of almond slivers, use a whole almond or a pistachio for each nail. It gives a different texture and looks a little more grotesque.
I once tried a version with a pinch of cayenne pepper added to the dough. It gave them a little spicy kick that was totally unexpected. The kids weren’t fans, but the adults at the party loved them. Just a thought if you’re feeling adventurous!
Serving & Storage Suggestions
These cookies are best served at room temperature. They’re perfect for a Halloween party platter, arranged on a dark plate or a wooden board. For maximum creepiness, arrange them so they look like a hand reaching out of the ground. You can use a little extra dough to shape a “palm” and attach the fingers before baking.
They pair wonderfully with a glass of cold milk or a warm cup of apple cider. For a grown-up party, they’re great with a dark stout or a pumpkin beer. The buttery sweetness balances the bitterness beautifully.
Storage: Store the cooled cookies in an airtight container at room temperature. They’ll stay fresh for up to 5 days. The almond slivers might soften a little over time, but the flavor will still be great.
Freezing: You can freeze the unbaked, shaped cookies. Place them on a baking sheet and freeze until solid, then transfer them to a freezer bag. When you’re ready to bake, just add 2-3 minutes to the baking time. You can also freeze the baked cookies for up to 3 months. Thaw them at room temperature before serving.
Reheating: These cookies are best enjoyed at room temperature. If you want to warm them up a bit, pop them in a 300°F oven for 3-4 minutes. Don’t use the microwave — it will make them soggy.
One thing I love about these cookies is that the flavor actually improves after a day or two. The almond extract mellows out and blends with the butter. They’re still delicious on day one, but day two is when they really shine.
Nutritional Information & Benefits
Let’s be honest — these are a treat, not a health food. But that doesn’t mean they can’t have a place in a balanced diet. Here’s the estimated nutritional breakdown for one cookie (based on 30 cookies):
- Calories: 110
- Fat: 7g
- Saturated Fat: 4g
- Carbohydrates: 11g
- Sugar: 4g
- Protein: 1.5g
- Fiber: 0.3g
The almond slivers provide a small amount of vitamin E and healthy fats. The butter, in moderation, contains vitamin A. And hey, the green food coloring might have some antioxidants? I’m reaching here, I know.
These cookies are not gluten-free unless you use a substitute flour. They contain dairy (butter) and eggs. The almond extract is safe for most people, but if you have a tree nut allergy, you can use more vanilla extract instead.
My personal philosophy is that Halloween is one day a year. A few of these cookies aren’t going to derail anyone’s healthy eating habits. They’re about fun, memories, and a little bit of spooky joy. And honestly, that’s good for the soul.
Conclusion
These Easy Witch Finger Cookies are more than just a Halloween treat — they’re a tradition in the making. They’re the kind of recipe that brings people together, that makes kids giggle and adults groan. They’re simple enough for a weeknight baking session but impressive enough for the biggest Halloween bash.
I love this recipe because it’s forgiving. It doesn’t demand perfection. In fact, the more imperfect and lumpy your fingers are, the more realistic they look. That’s a rare thing in baking — a recipe that celebrates your mistakes.
So go ahead, get the kids involved. Let them get their hands green. Make a mess. Laugh at the creepy results. And then enjoy a cookie (or three) with a glass of milk. You’ve earned it.
I’d love to hear how yours turn out! Drop a comment below and tell me about your Halloween baking adventures. Did you try a crazy variation? Did your kids come up with an even better shortcut? Share your stories — I read every single one.
Happy Halloween, and happy baking!
Frequently Asked Questions
Can I make these cookies ahead of time?
Absolutely! You can make the dough up to 3 days in advance and keep it in the fridge. You can also freeze the shaped, unbaked cookies for up to 3 months. Just bake them straight from the freezer, adding a couple of minutes to the baking time.
My dough is too sticky to handle. What should I do?
If the dough feels too sticky, pop it back in the fridge for another 15-20 minutes. It should firm up nicely. If it’s still sticky after chilling, you can dust your hands with a little flour while shaping the fingers.
Can I use a different color for the cookies?
Of course! Green is the classic witch color, but you can use any color you like. Purple, orange, or even a sickly gray all work great. Just use gel food coloring for the best results.
My cookies spread too much and lost their finger shape. What went wrong?
This usually happens if the dough wasn’t chilled enough before baking, or if your butter was too soft. Make sure the dough is well-chilled, and if your kitchen is warm, chill the shaped cookies for 10 minutes before they go in the oven.
Can I make these cookies without almond extract?
Yes, you can. The almond extract adds a nice flavor, but you can substitute it with more vanilla extract or even a little lemon zest. The cookies will still be delicious — they’ll just have a different flavor profile.
PrintEasy Witch Finger Cookies for a Spooky Halloween Fun

These buttery, almond-flavored shortbread cookies are shaped like creepy witch fingers with almond sliver fingernails. They’re simple enough for kids to help make and perfect for Halloween parties.
- Prep Time: 15 minutes
- Cook Time: 15 minutes
- Total Time: 45 minutes
- Yield: 30 cookies 1x
- Category: Dessert
- Cuisine: American
Ingredients
- 1 cup (2 sticks) unsalted butter, softened
- 1/2 cup (60g) powdered sugar
- 1 large egg (yolk for dough, white for brushing)
- 1 teaspoon vanilla extract
- 1/2 teaspoon almond extract
- 2 1/4 cups (280g) all-purpose flour
- 1/4 teaspoon salt
- Green food coloring (gel or liquid)
- 30–36 almond slivers
- Red jam or jelly (optional, for ‘bloody’ cuticles)
Instructions
- Cream the butter and sugar: In a large mixing bowl, beat the softened butter and powdered sugar together on medium speed until light, fluffy, and pale (about 2-3 minutes). Scrape down the sides of the bowl once or twice.
- Add the wet ingredients: Beat in the egg yolk (save the white for later), vanilla extract, and almond extract. Mix until combined. The mixture may look a little curdled—that’s fine.
- Add the dry ingredients and color: In a separate bowl, whisk together the flour and salt. Gradually add this to the wet mixture, mixing on low speed. Just as the flour starts to disappear, add your green food coloring. Mix until the dough comes together and the color is evenly distributed.
- Chill the dough: Wrap the dough in plastic wrap and flatten it into a disc. Refrigerate for at least 30 minutes.
- Preheat and prep: Preheat your oven to 325°F (160°C). Line baking sheets with parchment paper or silicone baking mats.
- Shape the fingers: Scoop out about a tablespoon-sized piece of dough. Roll it into a log shape, about 3-4 inches long. Taper one end to make it look like a fingertip. Place on the baking sheet. Repeat with remaining dough, leaving about 2 inches between each ‘finger’.
- Add the fingernails and details: Gently press an almond sliver into the tapered end of each finger for the nail. Use the back of a knife to make 2-3 small indentations on the ‘knuckles’. Lightly score lines across the finger for extra wrinkles.
- Brush and bake: In a small bowl, whisk the reserved egg white with a teaspoon of water. Brush this mixture over each cookie. Bake for 12-15 minutes, or until the cookies are set and the bottoms are just barely golden. The tops should still look pale.
- Cool and add the ‘blood’: Let the cookies cool on the baking sheet for 5 minutes, then transfer to a wire rack to cool completely. Once cool, use a toothpick to dab a tiny bit of red jam at the base of the almond sliver (the cuticle area).
Notes
Don’t overwork the dough to keep cookies tender. If your kitchen is warm, chill the shaped cookies for 10 minutes before baking to prevent spreading. Use flat, wide almond slivers for the best fingernail effect. The flavor improves after a day or two.
Nutrition
- Serving Size: 1 cookie
- Calories: 110
- Sugar: 4
- Sodium: 30
- Fat: 7
- Saturated Fat: 4
- Carbohydrates: 11
- Fiber: 0.3
- Protein: 1.5
Keywords: Halloween cookies, witch finger cookies, spooky cookies, shortbread cookies, easy Halloween treats, kid-friendly baking


