I was at the hardware store, of all places, picking up a new shower head. The guy behind the counter, an older fella named Jerry who I’d only ever exchanged pleasantries with about the weather, was carefully wrapping my purchase in brown paper. Without looking up, he said, “You know, the secret to a good pie crust isn’t the butter. It’s the water.” I just stared at him. He went on to explain, in the most matter-of-fact way, that you need ice-cold water with a little bit of apple cider vinegar in it. He said his grandmother, who ran a diner in Ohio for forty years, swore by it. I was so caught off guard, I almost forgot to pay. But you know what? I walked out of there with a new shower head and the single best piece of pie advice I have ever gotten. That conversation completely changed how I make my Homemade Pumpkin Pie with Flaky Crust.
Honestly, I had spent years wrestling with dough that would shrink, or turn out tough, or just taste… fine. Not great. I’d tried all the tips from the fancy cooking blogs, and I was still getting mediocre results. Then, a random conversation at a hardware store cracked the code for me. It was a humbling reminder that the best cooking wisdom often comes from the most unexpected places. That little trick with the vinegar? It’s a game-changer. It relaxes the gluten just enough to make the crust incredibly tender and flaky, without any weird taste.
So, this isn’t just another pumpkin pie recipe. This is the one I make for every Thanksgiving, every Friendsgiving, and honestly, any Tuesday in the fall when I need a slice of comfort. It’s the pie that gets the “oohs” and “ahhs” before anyone even takes a bite, thanks to that gorgeous, golden, impossibly flaky crust. And the filling? It’s perfectly spiced, silky smooth, and not too sweet. Maybe you’ve been on a similar quest for the perfect pie. I get it. Let me save you the years of trial and error. This is the one.
Why You’ll Love This Recipe
This isn’t just my opinion, either. I’ve put this recipe through the wringer over the last five years, testing it for a crowd of picky eaters at a family reunion and serving it to a friend who runs a small catering business. It passed every test with flying colors. Here’s why this Homemade Pumpkin Pie with Flaky Crust is different from every other recipe you’ve seen.
- Foolproof Flaky Crust: The ice water and vinegar trick (courtesy of Jerry’s grandma!) ensures a tender, flaky crust that even beginners can nail. No special skills needed.
- Perfectly Spiced Filling: We’re using a blend of cinnamon, ginger, nutmeg, and a touch of cloves. It’s warm, aromatic, and tastes like autumn in a slice.
- Silky Smooth Texture: No one likes a cracked, grainy pumpkin pie. This recipe uses a few simple techniques to guarantee a velvety, smooth filling every single time.
- Make-Ahead Friendly: You can make the dough, blind-bake the crust, or even fully bake the pie a day ahead. It actually tastes better the next day! Perfect for stress-free holiday hosting.
- Simple, Real Ingredients: No canned filling, no shortening, no weird stabilizers. Just butter, cream, eggs, and pure pumpkin puree. Simple ingredients that taste incredible.
This recipe is the kind that makes you close your eyes after the first bite. It’s comfort food reimagined—a classic done right, with a flaky crust that gives you that little crunch before you hit the smooth, spiced filling. It’s perfect for impressing guests without stress, or turning a simple Tuesday into something memorable.
What Ingredients You Will Need
This recipe uses simple, wholesome ingredients to deliver that classic, bold flavor and satisfying texture. Most of these are pantry staples, especially during the fall baking season. Let’s break down what you need and why.
For the Flaky Pie Crust
- All-Purpose Flour: The base of our crust. I use King Arthur Flour for its consistent protein content, which gives a reliable structure.
- Salt: Don’t skip it! Salt seasons the crust and balances the sweetness of the filling.
- Unsalted Butter: This is non-negotiable for flavor and flakiness. It must be very cold. I like to cut it into small cubes and pop it in the freezer for 15 minutes before starting.
- Ice Water: This is crucial. The cold water prevents the butter from melting into the flour, which is what creates those flaky layers. You’ll need about ½ cup, but have extra on hand.
- Apple Cider Vinegar: The secret ingredient! Just one tablespoon relaxes the gluten in the dough, making it incredibly tender without affecting the flavor. You can use white vinegar in a pinch, but apple cider is my go-to.
For the Pumpkin Filling
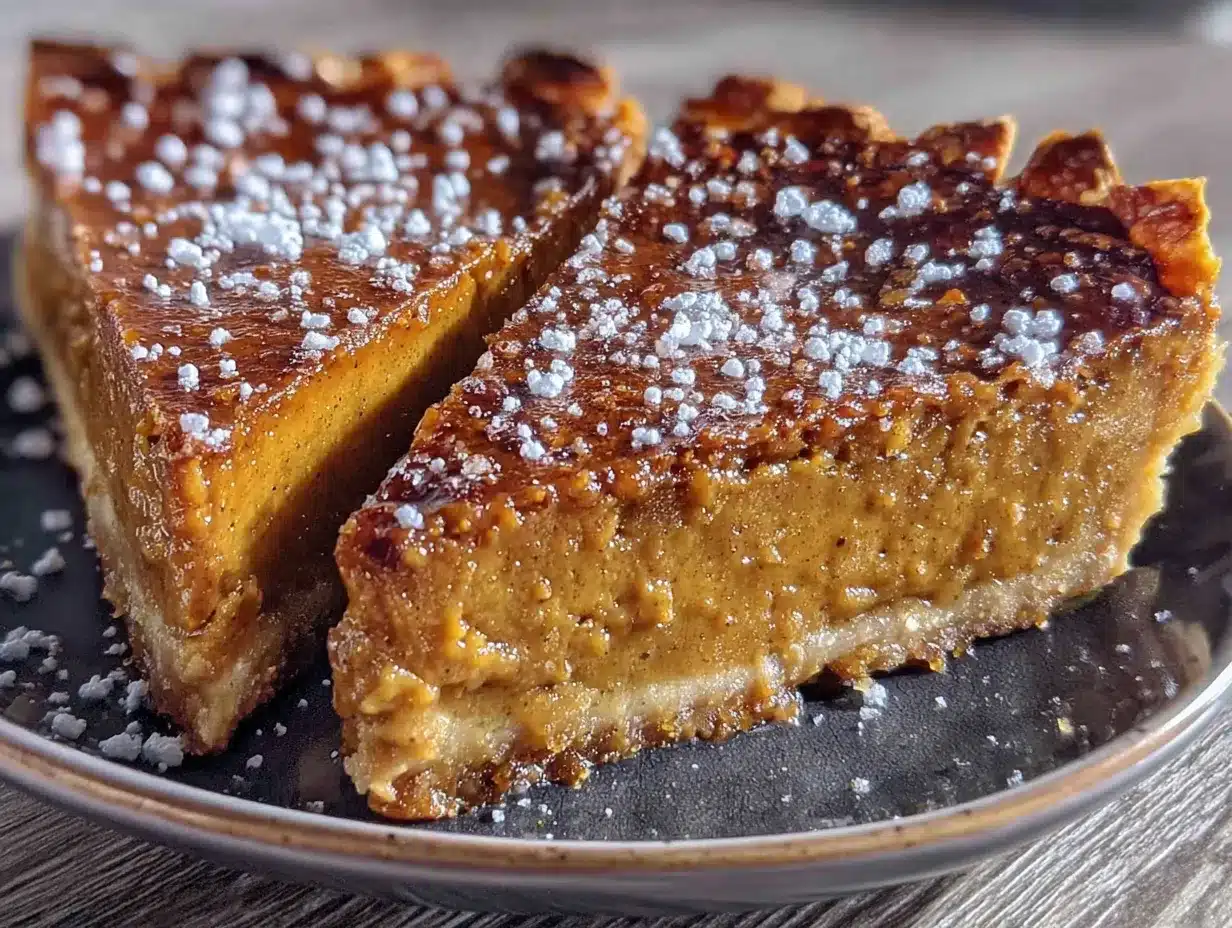
- Pumpkin Puree: Use one 15-ounce can of pure pumpkin puree, not pumpkin pie filling. Libby’s is a reliable brand. If you’re feeling ambitious, you can roast and puree your own sugar pumpkin, but canned is perfectly fine and consistent.
- Heavy Cream: This gives the filling its signature richness and silky texture. (adds richness) For a lighter option, you can substitute with half-and-half, but the texture won’t be quite as luxurious.
- Large Eggs: They bind the filling together and help it set. Make sure they are at room temperature so they incorporate smoothly into the mixture.
- Light Brown Sugar: Packed brown sugar adds a deep, molasses-like sweetness that complements the pumpkin and spices perfectly.
- Granulated Sugar: A little bit of white sugar balances the brown sugar and adds a clean sweetness.
- Spices: This is where the magic happens. You’ll need ground cinnamon, ground ginger, ground nutmeg, and a tiny pinch of ground cloves. For the best flavor, I recommend using fresh spices that are less than a year old. (I personally prefer Morton & Bassett or Simply Organic for their potency).
- Vanilla Extract: A splash of pure vanilla extract rounds out all the flavors and adds warmth.
Equipment Needed
You don’t need a professional pastry kitchen to make a great pie, but having the right tools makes the job much easier. Here’s what you’ll need.
- A 9-inch Pie Plate: A standard glass or ceramic pie plate works best. I prefer a deep-dish ceramic plate for a nice, thick slice. A metal tin will work, but it conducts heat faster, so keep an eye on the crust.
- Rolling Pin: A standard wooden rolling pin is perfect. If you don’t have one, a clean wine bottle can work in a pinch—I’ve been there!
- Pastry Cutter or Food Processor: To cut the cold butter into the flour. A pastry cutter is cheap and gives you great control. A food processor is faster, but be careful not to over-process. You can also use two forks or your fingertips (work quickly so the butter doesn’t warm up).
- Parchment Paper & Pie Weights: Essential for blind-baking the crust. Parchment paper prevents the crust from sticking, and pie weights (or dried beans!) hold the crust in place so it doesn’t puff up or shrink.
- Large Mixing Bowls: You’ll need one for the crust and one for the filling.
- Whisk: A good whisk is key for a smooth, lump-free filling.
Preparation Method
Let’s get to the fun part! Follow these steps carefully, and you’ll have a stunning, delicious pie. The key is to be patient and trust the process.
Step 1: Make the Flaky Pie Dough (Can be done 2 days ahead)
- In a large bowl, whisk together 2 ½ cups (300g) all-purpose flour and 1 teaspoon salt.
- Add 1 cup (2 sticks or 226g) of very cold, cubed unsalted butter. Using a pastry cutter or your fingertips, cut the butter into the flour until the mixture resembles coarse meal with some pea-sized butter pieces remaining. This is crucial for flakiness!
- In a small bowl, combine ½ cup (120ml) ice water and 1 tablespoon apple cider vinegar. Drizzle this mixture over the flour-butter mixture, one tablespoon at a time, tossing with a fork until the dough just begins to come together. You may not need all the water.
- Turn the dough out onto a lightly floured surface. Gently knead it a few times to bring it together into a disc. Do not overwork it. Wrap it tightly in plastic wrap and refrigerate for at least 1 hour, or up to 2 days. This rest is essential for relaxing the gluten and firming up the butter.
Step 2: Blind Bake the Crust
- Preheat your oven to 425°F (220°C).
- On a lightly floured surface, roll out the chilled dough to a 12-inch circle, about ⅛-inch thick. Gently transfer it to your 9-inch pie plate. Trim the edges, leaving about a ½-inch overhang. Fold the overhang under and crimp the edges as desired. (I like a simple scalloped edge using my thumb and forefinger).
- Prick the bottom of the crust all over with a fork. This prevents air bubbles from forming.
- Line the crust with a sheet of parchment paper and fill it with pie weights or dried beans. Bake for 15 minutes. The edges should just be starting to turn golden.
- Carefully remove the parchment and weights. Return the crust to the oven for another 5-7 minutes, until the bottom looks dry and is lightly golden. Set aside to cool slightly while you make the filling. Reduce the oven temperature to 375°F (190°C).
Step 3: Make the Pumpkin Filling
- In a large bowl, whisk together 1 (15-ounce) can (425g) pumpkin puree, 1 cup (200g) packed light brown sugar, and ¼ cup (50g) granulated sugar until smooth.
- Add 4 large room-temperature eggs, one at a time, whisking well after each addition.
- Whisk in 1 ½ cups (360ml) heavy cream and 2 teaspoons vanilla extract until fully combined.
- In a small bowl, mix together 2 teaspoons ground cinnamon, 1 teaspoon ground ginger, ½ teaspoon ground nutmeg, and ¼ teaspoon ground cloves. Add this spice mixture to the wet ingredients and whisk until everything is beautifully combined and smooth. The mixture will be thin—that’s okay!
Step 4: Bake the Pie
- Place the pre-baked crust on a baking sheet (this catches any spills and makes it easy to handle). Pour the filling into the warm crust.
- Bake at 375°F (190°C) for 50-60 minutes. The edges of the filling should be set, but the center will still have a slight jiggle when you gently shake the pan. Don’t over-bake it, or the filling can crack.
- Cool the pie completely on a wire rack for at least 2 hours. The filling will continue to set as it cools. Then, refrigerate for at least 4 hours, or overnight, before serving. This is the hardest part—the waiting!
Cooking Tips & Techniques
I’ve made my fair share of pie mistakes, so you don’t have to. Here are my best tips for success.
- Keep Everything Cold: The cardinal rule of flaky pastry. If at any point your dough feels sticky or warm, pop it back in the fridge for 15 minutes. I even chill my rolling pin sometimes!
- Don’t Overwork the Dough: This is the most common mistake. Overworking develops the gluten, which leads to a tough, chewy crust. Mix until it just comes together, and handle it as little as possible.
- The “Jiggle” Test: For a silky, creamy filling, you want to take the pie out of the oven when the center still has a slight wobble, like Jell-O. It will finish setting as it cools. A fully firm center in the oven means a cracked, dry pie later.
- Use a Pie Shield: If the edges of your crust are browning too quickly, loosely tent them with aluminum foil or use a silicone pie shield. I forgot to do this once, and the crust was practically charcoal. Learn from my mistake!
- Let It Rest: I know it’s tempting to slice into a warm pie, but a fully chilled pie cuts cleaner. For the cleanest slices, use a sharp, wet knife, wiping it clean between cuts.
Variations & Adaptations
This recipe is a fantastic base, so feel free to make it your own. Here are a few variations I’ve tried and loved.
- Gluten-Free Option: Substitute the all-purpose flour with a high-quality 1-to-1 gluten-free baking flour blend (like Bob’s Red Mill). The crust will be more crumbly, but still delicious. Add an extra tablespoon of ice water if the dough seems dry.
- Dairy-Free & Vegan: For the crust, use very cold solid coconut oil or a plant-based butter stick. For the filling, replace the heavy cream with full-fat canned coconut milk. The texture will be slightly different, but still rich and creamy.
- Spice It Up: Add a pinch of black pepper or cardamom to the spice mix for a more complex, warming flavor. I did this on a whim one year, and it was a huge hit with my spice-loving friends.
- Bourbon Pumpkin Pie: Replace the vanilla extract with 2 tablespoons of good quality bourbon. It adds a lovely warmth and depth that pairs beautifully with the pumpkin and spices.
- Maple Pumpkin Pie: Swap the granulated sugar for ½ cup of pure maple syrup. You may need to reduce the heavy cream by 2 tablespoons to account for the extra liquid. It gives the pie a subtle, woodsy sweetness.
Serving & Storage Suggestions
This pie is a star on its own, but a few thoughtful pairings can make it truly unforgettable.
Serving: Serve this Homemade Pumpkin Pie with Flaky Crust chilled or at room temperature. A dollop of lightly sweetened, softly whipped cream is the classic, perfect topping. For a richer experience, try a scoop of vanilla bean ice cream or a drizzle of salted caramel sauce. It’s the perfect ending to a heavy holiday meal.
Storage: This pie stores beautifully. Cover it loosely with plastic wrap or aluminum foil and keep it in the refrigerator for up to 4 days. The flavors actually meld and deepen over the first day or two, making the leftovers somehow even better than the first slice.
Freezing: You can freeze the fully baked and cooled pie for up to 3 months. Wrap it tightly in a layer of plastic wrap, then a layer of foil. To serve, thaw it overnight in the refrigerator. Do not freeze an unbaked pie, as the filling can become watery.
Nutritional Information & Benefits
While this is a treat, it does have a few redeeming qualities! Pumpkin is packed with Vitamin A and fiber. This recipe is made from scratch, meaning you control the quality of every ingredient—no preservatives or artificial flavors here.
Please note that the following is an estimate per slice (based on 8 slices) and will vary based on specific ingredients used.
| Nutrient | Amount (per slice) |
|---|---|
| Calories | ~450 |
| Fat | ~28g |
| Carbohydrates | ~48g |
| Protein | ~7g |
| Fiber | ~3g |
| Sugar | ~28g |
This recipe contains dairy, gluten, and eggs.
Conclusion
So there you have it. The Homemade Pumpkin Pie with Flaky Crust that started with a tip from a hardware store guy named Jerry. It’s a reminder that the best things in life often come from the most unexpected places. This pie is more than just a dessert; it’s a little piece of autumn, a bit of comfort, and a whole lot of love baked into a flaky crust.
I really hope you give this recipe a try. Don’t be afraid to make it your own—add a little extra cinnamon, or skip the cloves if you’re not a fan. The kitchen is your playground. And when you take that first bite and hear the crunch of that perfect crust, I have a feeling you’ll be as hooked as I am.
I’d love to hear how it turns out for you! Drop a comment below and let me know if Jerry’s grandmother’s secret worked its magic in your kitchen, too. Happy baking!
Frequently Asked Questions
Can I use store-bought crust for this recipe?
Absolutely! While the homemade crust is a showstopper, you can absolutely use a high-quality store-bought crust to save time. The filling recipe is the star, and it works perfectly in a pre-made shell. Just be sure to blind-bake it first.
Why did my pumpkin pie crack on top?
This usually happens from over-baking. The filling continues to cook and set as it cools, so you want to take it out of the oven when the center is still a little jiggly. Sudden temperature changes can also cause cracking, so let it cool slowly on a wire rack.
Can I make this pie a day ahead?
Yes, and I actually recommend it! Making it a day ahead allows the flavors to meld and deepen. The texture also sets up perfectly in the refrigerator overnight. Just cover it loosely and keep it chilled until you’re ready to serve.
Is there a substitute for apple cider vinegar in the crust?
Yes, you can use white vinegar or even lemon juice in the same amount. All of these are acids that help relax the gluten. You won’t taste any of them in the final baked crust.
Can I use fresh pumpkin instead of canned?
You can, but it requires a bit more work. You’ll need to roast a sugar pumpkin (not a carving pumpkin), scoop out the flesh, and puree it until very smooth. You then need to drain the puree in a cheesecloth-lined sieve overnight to remove excess water, or your pie will be watery. Canned pumpkin is much more consistent and reliable.
PrintHomemade Pumpkin Pie with Easy Flaky Crust
This homemade pumpkin pie features an incredibly flaky, tender crust thanks to a secret tip from a hardware store clerk: ice water with a splash of apple cider vinegar. The filling is perfectly spiced, silky smooth, and not too sweet, making it the ultimate comfort dessert for fall.
- Prep Time: 30 minutes
- Cook Time: 1 hour 10 minutes
- Total Time: 1 hour 40 minutes (plus chilling and cooling time)
- Yield: 8 servings 1x
- Category: Dessert
- Cuisine: American
Ingredients
- 2 ½ cups (300g) all-purpose flour
- 1 teaspoon salt
- 1 cup (2 sticks or 226g) unsalted butter, very cold and cubed
- ½ cup (120ml) ice water
- 1 tablespoon apple cider vinegar
- 1 (15-ounce) can (425g) pumpkin puree
- 1 cup (200g) packed light brown sugar
- ¼ cup (50g) granulated sugar
- 4 large eggs, room temperature
- 1 ½ cups (360ml) heavy cream
- 2 teaspoons vanilla extract
- 2 teaspoons ground cinnamon
- 1 teaspoon ground ginger
- ½ teaspoon ground nutmeg
- ¼ teaspoon ground cloves
Instructions
- Make the flaky pie dough: In a large bowl, whisk together flour and salt. Add cold cubed butter and cut into flour using a pastry cutter or fingertips until mixture resembles coarse meal with some pea-sized butter pieces. In a small bowl, combine ice water and apple cider vinegar. Drizzle over flour-butter mixture, tossing with a fork until dough just comes together. Turn out onto a lightly floured surface, gently knead a few times to form a disc. Wrap in plastic wrap and refrigerate for at leas…
- Blind bake the crust: Preheat oven to 425°F (220°C). On a lightly floured surface, roll out chilled dough to a 12-inch circle, about ⅛-inch thick. Transfer to a 9-inch pie plate. Trim edges, leaving a ½-inch overhang, fold under and crimp edges. Prick bottom with a fork. Line with parchment paper and fill with pie weights or dried beans. Bake for 15 minutes until edges are lightly golden. Remove parchment and weights, bake for another 5-7 minutes until bottom is dry and lightly golden. Set aside…
- Make the pumpkin filling: In a large bowl, whisk together pumpkin puree, brown sugar, and granulated sugar until smooth. Add eggs one at a time, whisking well after each. Whisk in heavy cream and vanilla extract until combined. In a small bowl, mix cinnamon, ginger, nutmeg, and cloves. Add spice mixture to wet ingredients and whisk until smooth.
- Bake the pie: Place pre-baked crust on a baking sheet. Pour filling into warm crust. Bake at 375°F (190°C) for 50-60 minutes, until edges are set but center still has a slight jiggle. Cool completely on a wire rack for at least 2 hours, then refrigerate for at least 4 hours or overnight before serving.
Notes
Keep all ingredients cold for flaky crust. Do not overwork the dough. Use the ‘jiggle test’ to avoid over-baking. For clean slices, chill pie completely and use a sharp, wet knife. Pie can be made a day ahead and actually tastes better the next day.
Nutrition
- Serving Size: 1 slice (1/8 of pie)
- Calories: 450
- Sugar: 28
- Fat: 28
- Carbohydrates: 48
- Fiber: 3
- Protein: 7
Keywords: pumpkin pie, flaky crust, homemade pie, Thanksgiving dessert, fall baking, pumpkin dessert, pie recipe


