It was 11:47 PM on a random Tuesday in October, and I had a monster craving for pumpkin cheesecake. Not the kind you bake in a water bath and stress over cracks—no, I wanted that creamy, spiced, cold-from-the-fridge satisfaction. But here’s the thing: I didn’t have cream cheese that had softened for hours, I didn’t have a springform pan, and honestly, I didn’t have the energy to preheat an oven. What I did have was a block of cold cream cheese, a can of pumpkin puree I’d bought on a whim, some gingersnap cookies that were getting stale, and this ridiculous idea that maybe—just maybe—I could make it work without turning on a single appliance. I mean, let’s be real: the best kitchen experiments happen when you’re too tired to overthink it.
I crushed those gingersnaps in a zip-top bag with a rolling pin—probably woke up my neighbor, sorry, Mark—and mixed the filling right there in a cereal bowl. The texture was so soft and luscious, I knew I was onto something. I rolled them into little balls, popped them in the freezer, and waited. Twenty minutes later, I took one bite, and honestly, I closed my eyes. It was everything I wanted: that tangy cream cheese richness, the warm pumpkin spice, the crunchy cookie coating. No oven, no fancy tools, no stress.
That late-night, slightly impulsive experiment turned into the recipe I now bring to every single gathering. Friends beg me for it, family expects it at Thanksgiving, and I’ve even had a coworker offer to pay me for the recipe. (I gave it to her for free, obviously.) There’s something about these little no-bake pumpkin cheesecake bites that makes people light up—maybe it’s the perfect portion size, or the fact that they taste like you spent hours in the kitchen when you really didn’t. You know that feeling when you find a recipe that makes you look like a hero with almost zero effort? That’s this one. And it all started with a late-night craving and a bag of stale cookies.
Why You’ll Love This Recipe
Let me tell you why these no-bake pumpkin cheesecake bites have become my secret weapon for every dinner party, potluck, and holiday gathering. I’ve tested this recipe more times than I can count—tweaking the spice ratio, trying different coatings, even testing it with dairy-free cream cheese (which works, by the way). So trust me when I say this version is the absolute best. Here’s what makes it special:
- Only 15 Minutes of Hands-On Time: Seriously. From start to finish, you’re looking at about a quarter of an hour of actual work. The rest is just chilling in the fridge or freezer. Perfect for those moments when you realize a party is tomorrow and you have nothing to bring.
- Simple Pantry Ingredients: No fancy grocery runs needed. Cream cheese, pumpkin puree, powdered sugar, and some cookies for the coating. You probably have most of this in your kitchen right now.
- Perfect for Hosting: These little bites are the ultimate party food. They’re bite-sized, no plates or forks required, and they look gorgeous on a platter. Guests can grab one (or three) while mingling, and nobody has to deal with a messy slice of cake.
- Crowd-Pleaser Guaranteed: I’ve served these at Thanksgiving, Christmas parties, birthday dinners, and casual get-togethers. They disappear every single time. Kids love them, adults love them, and even people who say they’re “not dessert people” reach for seconds.
- No-Bake Means No Stress: No water baths, no cracked tops, no worrying about oven temperatures. This is the kind of recipe that builds your confidence in the kitchen because it’s practically impossible to mess up.
What makes this recipe different from all the other pumpkin cheesecake recipes out there? It’s the texture, honestly. The filling is incredibly creamy and smooth—thanks to a trick I learned from my years of recipe testing, where you let the cream cheese come to room temperature but then chill the mixture before rolling. It creates this perfect, mousse-like consistency that’s rich but not heavy. Plus, the gingersnap coating adds this wonderful crunch and spice that complements the creamy filling. It’s not just another pumpkin dessert—it’s the one that makes people ask for the recipe before they’ve even finished chewing.
And here’s the emotional truth: this recipe makes you feel like a host who has it all together. When you walk into a party with a platter of these beautiful, perfectly portioned bites, people assume you spent hours in the kitchen. You get to enjoy that glow of admiration without actually having to stress. It’s the kind of recipe that makes hosting fun again, instead of a frantic race against the clock.
What Ingredients You Will Need
This recipe uses simple, wholesome ingredients that work together to create something truly special. The beauty of these no-bake pumpkin cheesecake bites is that every ingredient has a purpose, and there’s nothing fussy or hard to find. Let me walk you through what you’ll need and why each one matters.
For the Filling
- 8 ounces cream cheese, softened to room temperature: This is the foundation of your cheesecake filling. I recommend using full-fat cream cheese for the best texture and flavor—Philadelphia is my go-to brand because it’s consistently creamy and reliable. Make sure it’s truly at room temperature (about 30 minutes on the counter) or you’ll end up with lumps. Trust me, I learned this the hard way during a rushed batch for a Friendsgiving dinner.
- 1/2 cup pumpkin puree: Not pumpkin pie filling! Make sure you grab 100% pure pumpkin puree. Libby’s is my preferred brand because it’s consistently thick and not watery. If your pumpkin puree seems a bit loose, you can drain it on a paper towel for 10 minutes to remove excess moisture—this prevents your filling from being too soft to roll.
- 1/3 cup powdered sugar: This sweetens the filling without adding grittiness. Powdered sugar dissolves instantly into the cream cheese, giving you that silky-smooth texture. You could use granulated sugar, but it won’t incorporate as smoothly and might leave a slightly grainy feel.
- 1/4 cup brown sugar, packed: Here’s where the magic happens. Brown sugar adds a deeper, almost molasses-like sweetness that pairs beautifully with pumpkin and warm spices. It’s what gives these bites that cozy, fall flavor that makes people close their eyes when they take a bite.
- 1 teaspoon vanilla extract: Pure vanilla extract, please. Imitation vanilla works in a pinch, but pure vanilla adds a richness that elevates the whole dessert. I always use Nielsen-Massey Madagascar vanilla—it’s pricier, but a little goes a long way and the flavor is unmatched.
- 1 teaspoon pumpkin pie spice: You can use store-bought or make your own. If you’re making your own, combine 1/2 teaspoon cinnamon, 1/4 teaspoon ginger, 1/8 teaspoon nutmeg, 1/8 teaspoon allspice, and a tiny pinch of cloves. I actually prefer making my own because I can adjust the ratios—I like a little extra cinnamon in mine.
- 1/4 teaspoon salt: Don’t skip this! Salt enhances all the other flavors and balances the sweetness. A tiny pinch of flaky sea salt on top before serving is also amazing if you’re feeling fancy.
For the Coating
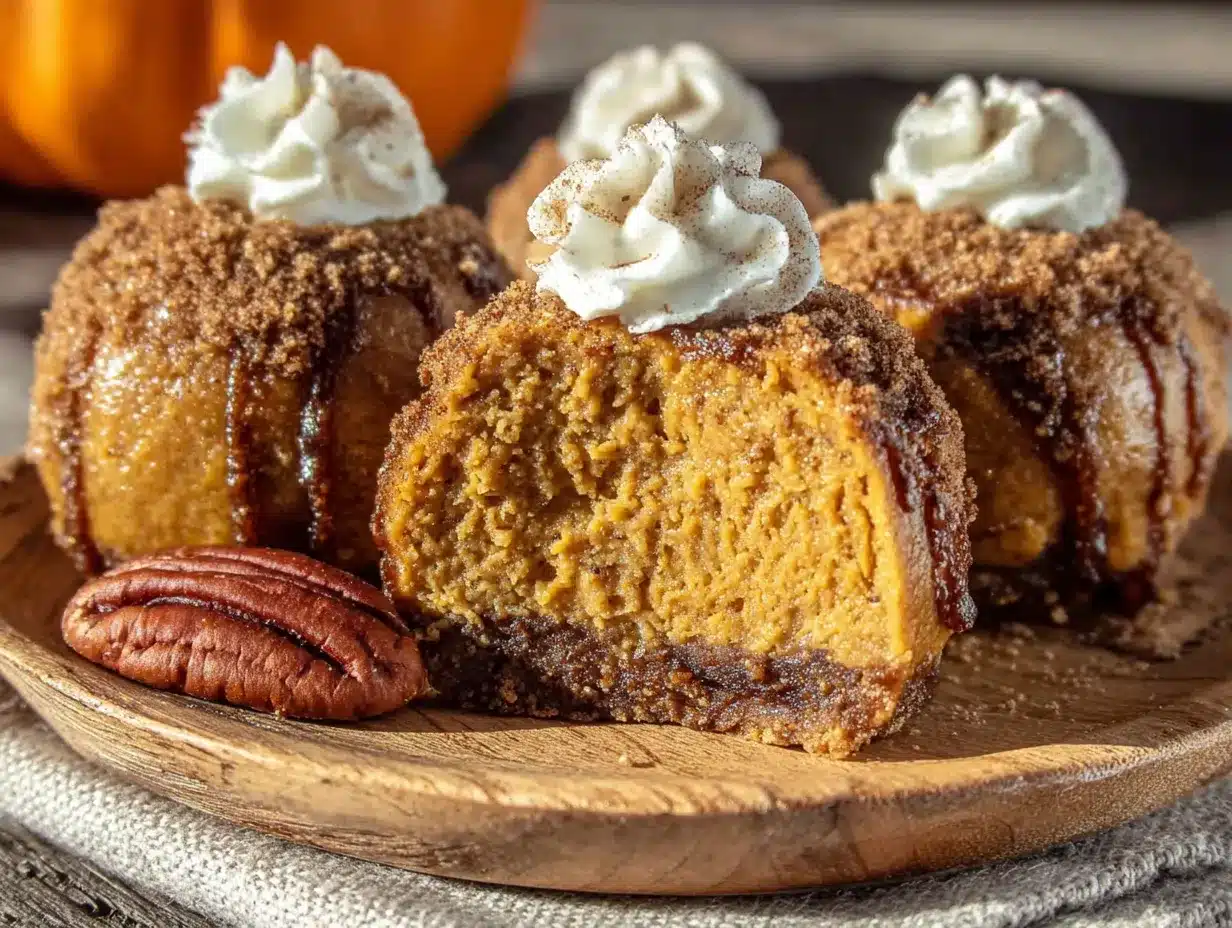
- 1 1/2 cups crushed gingersnap cookies: This is my favorite coating because the ginger and molasses flavors in the cookies complement the pumpkin filling perfectly. You’ll need about 20-25 cookies, depending on their size. Pulse them in a food processor until they’re fine crumbs, or put them in a zip-top bag and crush them with a rolling pin—which is oddly satisfying, by the way. If you can’t find gingersnaps, graham crackers or vanilla wafers work great too.
- Optional: 2 tablespoons melted butter: If you want your coating to have a slightly firmer, more compact texture, mix the crushed cookies with a little melted butter. This is completely optional—I often skip it when I’m in a hurry, and the bites still turn out perfectly.
For Garnish (Optional but Recommended)
- Whipped cream: A tiny dollop on top makes these look extra fancy. You can use homemade or store-bought—I won’t judge.
- Extra pumpkin pie spice or cinnamon: A light dusting on top adds visual appeal and a little extra flavor.
- Mini chocolate chips or white chocolate shavings: For a sweeter twist, roll some of the bites in mini chocolate chips instead of cookie crumbs. I did this for a Halloween party once, and they were a huge hit.
One thing I love about this recipe is how forgiving it is with substitutions. If you’re dairy-free, use a good-quality dairy-free cream cheese—I’ve had great results with Kite Hill brand. For a gluten-free version, simply use gluten-free gingersnaps or gluten-free graham crackers. And if you want to cut down on sugar, you can reduce the brown sugar to 2 tablespoons and use a sugar substitute like monk fruit sweetener in the powdered sugar. Just keep in mind that the texture might be slightly different.
Equipment Needed
One of the best things about this recipe is that you probably already have everything you need. No fancy gadgets required—just basic kitchen tools that any home cook would own. Here’s what you’ll need:
- Mixing bowls: You’ll need one medium bowl for the filling and one small bowl for the coating. I use my favorite ceramic mixing bowls—they’re sturdy and don’t slide around on the counter.
- Electric hand mixer or stand mixer: While you could mix this by hand with a wooden spoon, an electric mixer makes the filling much smoother and fluffier. I’ve done it both ways, and the electric mixer gives you that light, mousse-like texture that makes these bites so irresistible. If you’re using a stand mixer, use the paddle attachment.
- Rubber spatula: For scraping down the sides of the bowl and making sure everything is fully incorporated. A good silicone spatula is worth its weight in gold—I have three of them in different sizes.
- Measuring cups and spoons: Accurate measurements matter, especially with the spices. I use a set of stainless steel measuring spoons that have lasted me years.
- Food processor or zip-top bag and rolling pin: For crushing the cookies. A food processor gives you the most consistent crumbs, but honestly, the bag-and-rolling-pin method works perfectly fine and is oddly therapeutic. I’ve done it both ways depending on whether I want to wash dishes or vent some frustration.
- Small cookie scoop or tablespoon: For portioning the filling evenly. A #60 cookie scoop (about 1 tablespoon) is perfect for getting uniform bites that look professional. If you don’t have one, just use a regular tablespoon and your hands.
- Baking sheet or large plate: To hold the bites while they chill. Line it with parchment paper for easy cleanup.
- Parchment paper or wax paper: Lining your baking sheet prevents sticking and makes cleanup a breeze. I always keep a roll of parchment paper in my kitchen—it’s one of those things you don’t realize you need until you have it.
- Plastic wrap or airtight container: For storing the finished bites. A glass container with a tight-fitting lid works perfectly.
If you don’t have a food processor, don’t worry—a zip-top bag and a heavy pan or rolling pin work just as well for crushing cookies. And if you don’t have an electric mixer, you can absolutely mix the filling by hand; just make sure your cream cheese is very soft, and be prepared to do some arm work. I’ve made these in a tiny apartment kitchen with minimal equipment, and they turned out just as delicious.
Preparation Method
Alright, let’s get to the fun part—making these no-bake pumpkin cheesecake bites. I’ve broken this down into clear, manageable steps so you can follow along easily. The whole process takes about 15 minutes of active work, plus chilling time. Trust me, the payoff is worth every second.
Step 1: Prepare Your Coating (5 minutes)
Start by crushing your gingersnap cookies. If you’re using a food processor, pulse the cookies until they become fine crumbs—about 15-20 short pulses. You want a texture similar to sand, with no large chunks. If you’re using the bag method, place the cookies in a sturdy zip-top bag, seal it (remove as much air as possible), and crush them with a rolling pin or the bottom of a heavy pan. This takes a little more elbow grease, but it’s strangely satisfying. I usually put on some music and make it a mini workout.
Once your crumbs are ready, pour them into a shallow bowl. If you’re using the optional melted butter, stir it into the crumbs until evenly moistened. Set the bowl aside for now—you’ll use it later for coating the bites.
Step 2: Make the Filling (7 minutes)
In a medium mixing bowl, beat the softened cream cheese with an electric mixer on medium speed until it’s smooth and creamy—about 1 minute. Scrape down the sides of the bowl with your rubber spatula. This is important because cream cheese loves to hide in the corners.
Add the pumpkin puree, powdered sugar, brown sugar, vanilla extract, pumpkin pie spice, and salt. Beat on low speed at first to avoid a powdered sugar explosion (learned this one the messy way), then increase to medium speed and beat for another 2-3 minutes until everything is fully combined and the mixture is light and fluffy. Stop and scrape the bowl at least once during this process.
Here’s a tip I picked up from years of recipe testing: after mixing, cover the bowl and refrigerate the filling for about 15-20 minutes. This firms it up slightly, making it much easier to roll into balls. If you’re in a rush, you can skip this step, but the filling will be stickier and a bit messier to work with. I usually pop it in the fridge while I clean up the kitchen or set out my serving platter.
Step 3: Roll the Bites (5 minutes)
Once the filling has chilled slightly, it’s time to roll. Using a small cookie scoop or a tablespoon, scoop out portions of the filling. Roll each portion between your palms to form a smooth ball—about 1 inch in diameter. If the filling starts to stick to your hands, lightly dampen your palms with a little water or dust them with a tiny bit of powdered sugar.
As you roll each ball, drop it into the bowl of crushed gingersnap crumbs. Gently roll the ball around until it’s completely coated. You want a nice, even layer of crumbs covering the entire surface. Place the coated bites on a parchment-lined baking sheet or plate, spacing them about 1 inch apart.
I usually make about 20-24 bites from this recipe, depending on how large I roll them. If you’re making these for a party, uniform size is nice for presentation, but honestly, slightly irregular bites have a charming homemade feel that guests love.
Step 4: Chill and Set (At least 1 hour)
This is the hardest part—waiting. Place the baking sheet with the rolled bites in the refrigerator and let them chill for at least 1 hour. This allows the filling to firm up and the flavors to meld together. If you’re in a hurry, you can pop them in the freezer for 20-30 minutes instead, but the texture won’t be quite as creamy.
For the best results, I recommend chilling them for 2-3 hours or even overnight. The bites actually taste better the next day—the spices have time to deepen, and the texture becomes perfectly creamy and firm. This makes them an ideal make-ahead dessert for parties and gatherings.
Step 5: Garnish and Serve (5 minutes)
Before serving, you can add optional garnishes. A tiny dollop of whipped cream on top of each bite makes them look extra special. A light dusting of pumpkin pie spice or cinnamon adds a beautiful finish and an extra layer of flavor. If you’re feeling creative, you can drizzle a little caramel sauce over the top or add a mini chocolate chip on each bite.
Arrange them on a pretty platter or serving tray. I like to use a white or dark-colored plate to make the golden-brown coating stand out. For parties, I sometimes place them in mini paper cupcake liners—it makes them look like professional truffles and keeps guests’ hands clean.
Serve them cold, straight from the refrigerator. They’re best enjoyed within 15-20 minutes of being taken out, as they start to soften slightly at room temperature. But honestly, I’ve never had leftovers last long enough for that to be an issue!
Cooking Tips & Techniques
After making these no-bake pumpkin cheesecake bites dozens of times—for parties, holidays, and even just because—I’ve picked up quite a few tricks that make the process smoother and the results better. Let me share what I’ve learned, including some hard-won lessons from my own kitchen failures.
Room Temperature Cream Cheese Is Non-Negotiable: I know, I know, you’re in a hurry. But trust me on this one—cold cream cheese will give you lumpy filling no matter how long you beat it. Take it out of the fridge at least 30 minutes before you start. If you forget, here’s a quick fix: unwrap the cream cheese, cut it into small cubes, and microwave it on low power for 10-15 seconds. Not hot, just slightly softened. I’ve saved many a last-minute dessert with this trick.
Don’t Overmix the Filling: Once everything is combined, stop mixing. Overmixing incorporates too much air, which can make the filling too fluffy and unstable. You want it creamy and smooth, not airy. I learned this the hard way when I made a batch for a Thanksgiving potluck and the bites were so light they almost floated off the plate. They still tasted good, but they were a mess to handle.
Chill Your Hands for Easier Rolling: If the filling starts sticking to your hands while rolling, run your hands under cold water for a few seconds, then dry them off. The cold temperature helps the cream cheese firm up slightly, making it less sticky. This is a game-changer when you’re making a large batch.
Use a Cookie Scoop for Uniform Bites: A #60 cookie scoop (about 1 tablespoon) gives you perfectly uniform bites every time. Not only does this look more professional on a platter, but it also ensures even chilling. I bought a set of cookie scoops years ago for baking cookies, and now I use them for everything from meatballs to melon balls to these cheesecake bites.
Double the Coating if Needed: If you run out of cookie crumbs before all the bites are coated, don’t panic. Just crush a few more cookies. Better to have extra crumbs than to be short. I always make a little extra coating just in case—it stores well in an airtight container for future use.
Make Them Ahead for Better Flavor: These bites truly taste better the next day. The pumpkin and spice flavors meld together overnight, creating a deeper, more complex taste. If you’re hosting a party, make them a day in advance and keep them refrigerated. Your future self will thank you.
One Mistake I Made That You Should Avoid: The first time I made these, I used pumpkin pie filling instead of pure pumpkin puree. Big mistake. The filling was way too sweet and had a weird, gelatinous texture from the added thickeners. Always check your can—it should say “100% pure pumpkin” on the label. Pumpkin pie filling has added sugar and spices, which throws off the balance completely.
Variations & Adaptations
One of the things I love most about this recipe is how versatile it is. Over the years, I’ve experimented with all sorts of variations, and they’ve all been delicious in their own way. Here are some of my favorites that you can try depending on your mood, dietary needs, or what you have on hand.
Gluten-Free Version: This is the most common adaptation I make, since several of my friends have gluten sensitivities. Simply swap the gingersnap cookies for gluten-free gingersnaps or gluten-free graham crackers. I’ve found that the gluten-free gingersnaps from Pamela’s Products work beautifully—they have the same spicy flavor and crunchy texture. The filling itself is naturally gluten-free, so this is an easy swap.
Dairy-Free Version: For a dairy-free option, use a high-quality dairy-free cream cheese. I’ve tested this with Kite Hill brand, and it works wonderfully—the texture is slightly different (a bit softer), but the flavor is fantastic. Just make sure to chill the filling a little longer before rolling, as dairy-free cream cheese tends to be softer than regular. For the coating, most gingersnaps are naturally dairy-free, but double-check the label to be safe.
Chocolate-Dipped Bites: This is my go-to variation when I want something extra indulgent. After the bites have chilled and set, melt some dark chocolate (about 1/2 cup of chocolate chips) and dip the tops of each bite into the chocolate. Place them back on the parchment-lined sheet and chill until the chocolate sets. The combination of pumpkin spice and dark chocolate is absolutely divine. I made these for a Christmas party once, and they were the first thing to disappear.
Pumpkin Chai Bites: For a twist on the spice profile, add 1/2 teaspoon of chai spice blend to the filling instead of pumpkin pie spice. You can buy chai spice or make your own with cinnamon, cardamom, ginger, cloves, and black pepper. The warm, aromatic flavors of chai pair beautifully with pumpkin and cream cheese. This is a fun variation for fall gatherings when you want something a little different.
Nutty Coating: Instead of (or in addition to) cookie crumbs, roll the bites in finely chopped pecans, walnuts, or pistachios. The nutty crunch adds a wonderful texture contrast and a touch of elegance. I love using toasted pecans for a deeper flavor—just spread them on a baking sheet and toast at 350°F for 5-7 minutes, then let them cool before chopping.
Keto/Low-Carb Version: For a low-carb version, substitute the powdered sugar with a powdered monk fruit sweetener (like Lakanto), use a sugar-free brown sugar substitute, and skip the cookie coating. Instead, roll the bites in a mixture of finely chopped nuts and a little cinnamon. The filling will be slightly less sweet, but the creamy texture and pumpkin spice flavor are still amazing.
Serving & Storage Suggestions
These no-bake pumpkin cheesecake bites are incredibly versatile when it comes to serving and storing. Whether you’re planning a fancy dinner party or a casual get-together, here’s everything you need to know to serve them at their best.
Serving Temperature: These bites are best served cold, straight from the refrigerator. The cold temperature keeps the filling firm and creamy, and the coating stays nice and crunchy. If you leave them out at room temperature for more than 20-30 minutes, they’ll start to soften and lose their shape. For parties, I like to keep the platter on a bed of ice or return it to the fridge between servings.
Presentation Ideas: For a beautiful presentation, arrange the bites on a white or dark-colored platter in concentric circles or a grid pattern. Garnish with fresh mint leaves, a dusting of cinnamon, or a few whole gingersnap cookies around the edges. If you’re feeling extra fancy, place each bite in a mini paper cupcake liner—it makes them look like professional truffles and keeps guests’ hands clean. For holiday parties, I sometimes arrange them on a tiered serving stand for a dramatic effect.
What to Serve Alongside: These bites pair beautifully with a variety of beverages and other desserts. For a fall gathering, serve them with spiced apple cider, hot mulled wine, or a pumpkin spice latte. They also go wonderfully with a cup of strong coffee or espresso—the bitterness balances the sweetness perfectly. If you’re serving a full dessert spread, these bites complement other no-bake treats like chocolate truffles, fruit tarts, or mini cheesecakes.
Storage Instructions: Store the bites in an airtight container in the refrigerator for up to 5 days. Layer them between sheets of parchment paper to prevent them from sticking together. They actually taste better on day two or three, as the flavors have time to meld and deepen. I’ve never had a batch last longer than 4 days in my house, but they should be perfectly fine for up to a week.
Freezer Instructions: These bites freeze beautifully, making them perfect for make-ahead entertaining. To freeze, arrange the bites in a single layer on a baking sheet and freeze until solid (about 1 hour). Then transfer them to a freezer-safe container or zip-top bag, separating layers with parchment paper. They’ll keep in the freezer for up to 3 months. When you’re ready to serve, thaw them in the refrigerator for about 2-3 hours. Don’t thaw them at room temperature, or they’ll become too soft.
Reheating (Not Recommended): These are meant to be served cold, so there’s no need to reheat them. If you’ve frozen them, just let them thaw in the fridge. The only exception is if you’ve made the chocolate-dipped variation—those are actually delicious when slightly softened, but still best served cold.
How Flavors Develop Over Time: Here’s something interesting I’ve noticed: these bites taste completely different on day one versus day three. On day one, the pumpkin and spice flavors are bright and distinct. By day three, they’ve mellowed and melded together into a more complex, unified flavor. The texture also becomes creamier as the filling continues to set. Honestly, I think they’re at their peak on day two—firm enough to hold their shape perfectly, but with flavors that have had time to deepen.
Nutritional Information & Benefits
While these no-bake pumpkin cheesecake bites are definitely a treat, they do offer some surprising nutritional benefits—especially compared to traditional baked cheesecake. Here’s what you need to know, based on a serving size of 2 bites (about 50 grams total).
| Nutrient | Amount Per Serving (2 bites) |
|---|---|
| Calories | 180 |
| Total Fat | 11g |
| Saturated Fat | 6g |
| Cholesterol | 30mg |
| Sodium | 160mg |
| Total Carbohydrates | 19g |
| Dietary Fiber | 1g |
| Sugars | 13g |
| Protein | 3g |
| Vitamin A | 45% DV |
| Calcium | 4% DV |
| Iron | 6% DV |
Health Benefits of Key Ingredients: Pumpkin is the star here, and it’s packed with nutritional benefits. It’s loaded with vitamin A (one serving provides nearly half your daily needs), which supports eye health and immune function. Pumpkin is also rich in antioxidants like beta-carotene, which help protect your cells from damage. The cream cheese provides calcium and protein, while the ginger in the gingersnap coating has anti-inflammatory properties. Of course, these are still a dessert, but it’s nice to know there’s some nutritional value hidden in that creamy, delicious bite.
Dietary Considerations: This recipe is vegetarian-friendly. For gluten-free, dairy-free, or low-carb options, check the variations section above. The main allergens in this recipe are dairy (cream cheese) and gluten (gingersnap cookies). If you’re serving these at a gathering, I recommend labeling them clearly so guests with allergies can make informed choices.
My Personal Wellness Perspective: Look, I’m not a nutritionist, and I’m not going to pretend these are health food. But I do believe in balance. These bites are portion-controlled (unlike a giant slice of cheesecake), they use real ingredients (no artificial flavors or preservatives), and they satisfy that craving for something sweet and creamy without sending you into a sugar coma. For me, that’s a win. Plus, when you’re hosting, having a dessert option that feels indulgent but isn’t overly heavy is a nice way to end a meal.
Conclusion
These no-bake pumpkin cheesecake bites have truly become my signature party dish, and I hope they become yours too. They’re everything I want in a dessert: incredibly easy to make, beautiful to look at, and absolutely delicious to eat. The creamy pumpkin filling, the crunchy gingersnap coating, the perfect bite-sized portion—it’s a combination that just works. And the best part? You get all the credit for making something that looks and tastes like it came from a fancy bakery, but only you know how little effort it actually took.
I love how customizable this recipe is. Whether you’re making them gluten-free for a friend, adding a chocolate drizzle for extra indulgence, or rolling them in crushed pecans for a nutty twist, there’s a version for every occasion and every palate. And since they’re no-bake, they’re perfect for those times when you want to impress without turning on the oven—which, let’s be honest, is most of the time during the busy holiday season.
So go ahead and give these a try. Make them for your next dinner party, your Thanksgiving dessert table, or just because it’s Tuesday and you deserve something special. Play around with the variations, make them your own, and don’t forget to share them with the people you love. That’s what cooking is really about, isn’t it? Creating something delicious and sharing it with the people who matter most.
I’d love to hear how yours turn out! Drop a comment below and let me know what variations you tried, or tag me in your photos on social media. Happy hosting, and happy eating!
Frequently Asked Questions
Can I make these no-bake pumpkin cheesecake bites ahead of time?
Absolutely! In fact, I recommend it. These bites actually taste better after a day or two in the fridge, as the flavors have time to meld together. You can make them up to 5 days in advance and store them in an airtight container in the refrigerator. They’re the perfect make-ahead dessert for parties and holiday gatherings.
Can I freeze these pumpkin cheesecake bites?
Yes, they freeze beautifully! Arrange them in a single layer on a baking sheet and freeze until solid (about 1 hour), then transfer to a freezer-safe container with parchment paper between layers. They’ll keep for up to 3 months. Thaw in the refrigerator for 2-3 hours before serving—don’t thaw at room temperature, or they’ll become too soft.
Why is my filling too soft to roll into balls?
This usually happens for one of two reasons: either your cream cheese wasn’t fully softened (leading to overmixing as you try to incorporate it), or your pumpkin puree was too watery. To fix this, try chilling the filling in the refrigerator for 20-30 minutes before rolling. If it’s still too soft, you can add a tablespoon of powdered sugar to help firm it up. Next time, make sure to drain any excess moisture from your pumpkin puree by patting it with a paper towel.
Can I use pumpkin pie filling instead of pumpkin puree?
I don’t recommend it. Pumpkin pie filling has added sugar, spices, and thickeners that will throw off the balance of this recipe. The filling will be way too sweet and might have a weird, gelatinous texture. Always use 100% pure pumpkin puree for the best results. The can should clearly say “pumpkin puree” or “100% pure pumpkin” on the label.
What can I use instead of gingersnap cookies for the coating?
There are so many great options! Graham crackers are the most common substitute—they have a milder flavor that lets the pumpkin shine. Vanilla wafers work well too, especially if you want a sweeter, more neutral coating. For a nutty twist, try finely chopped pecans, walnuts, or pistachios. You can also use crushed shortbread cookies, biscoff cookies, or even crushed pretzels for a sweet-salty combination.
Pin This Recipe!
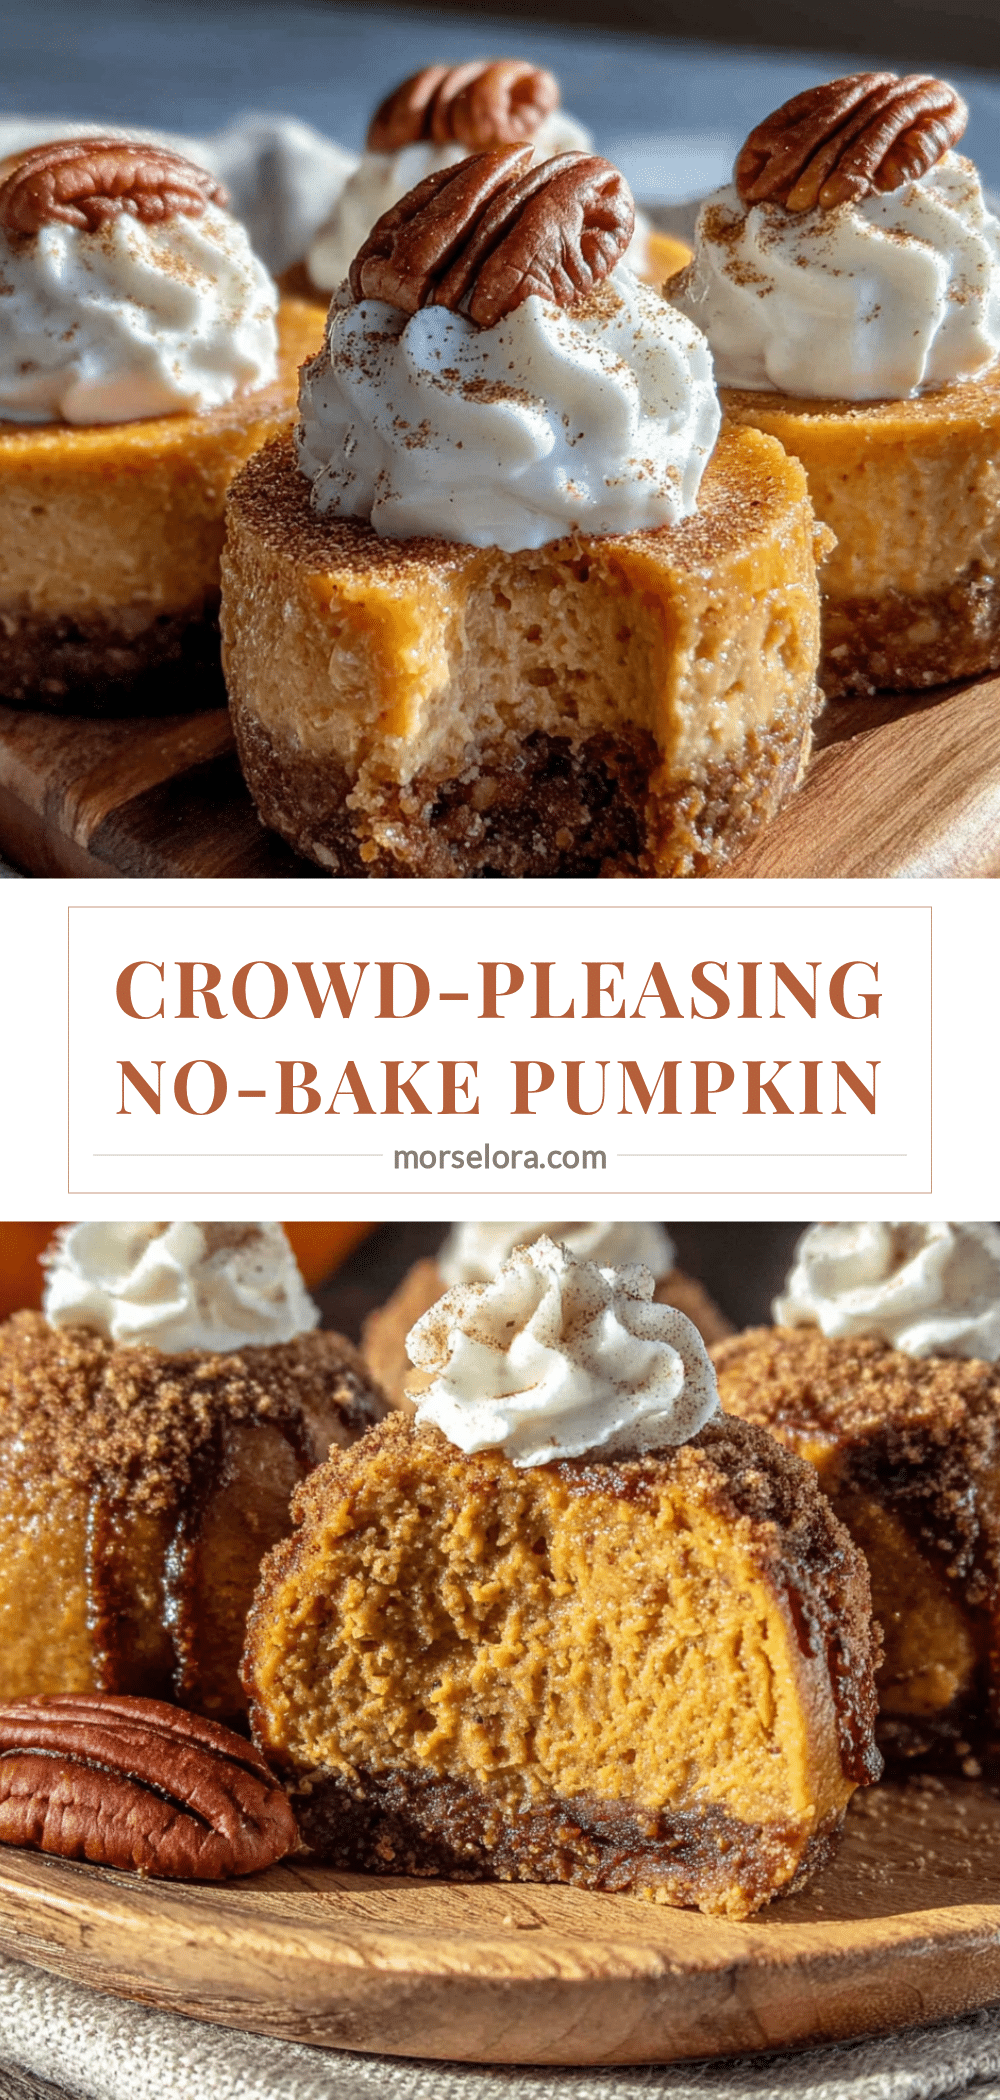
No-Bake Pumpkin Cheesecake Bites
Creamy, spiced, cold-from-the-fridge pumpkin cheesecake bites made in just 15 minutes with no oven required. Perfect for parties and holiday gatherings.
- Prep Time: 15 minutes
- Cook Time: 0 minutes
- Total Time: 1 hour 15 minutes (includes chilling)
- Yield: 20-24 bites 1x
- Category: Dessert
- Cuisine: American
Ingredients
- 8 ounces cream cheese, softened to room temperature
- 1/2 cup pumpkin puree (100% pure pumpkin)
- 1/3 cup powdered sugar
- 1/4 cup brown sugar, packed
- 1 teaspoon vanilla extract
- 1 teaspoon pumpkin pie spice
- 1/4 teaspoon salt
- 1 1/2 cups crushed gingersnap cookies (about 20–25 cookies)
- 2 tablespoons melted butter (optional, for coating)
- Whipped cream (optional, for garnish)
- Extra pumpkin pie spice or cinnamon (optional, for garnish)
- Mini chocolate chips or white chocolate shavings (optional, for garnish)
Instructions
- Prepare the coating: Crush gingersnap cookies into fine crumbs using a food processor or a zip-top bag and rolling pin. Pour into a shallow bowl. If using, stir in melted butter until evenly moistened. Set aside.
- Make the filling: In a medium bowl, beat softened cream cheese with an electric mixer on medium speed until smooth and creamy, about 1 minute. Scrape down the sides.
- Add pumpkin puree, powdered sugar, brown sugar, vanilla extract, pumpkin pie spice, and salt. Beat on low speed to combine, then increase to medium and beat for 2-3 minutes until light and fluffy. Scrape the bowl once.
- Chill the filling: Cover the bowl and refrigerate for 15-20 minutes to firm up slightly for easier rolling.
- Roll the bites: Using a small cookie scoop or tablespoon, portion the filling and roll into 1-inch balls. If sticky, lightly dampen hands with water or dust with powdered sugar.
- Coat the bites: Roll each ball in the gingersnap crumbs until completely coated. Place on a parchment-lined baking sheet or plate, spacing about 1 inch apart.
- Chill and set: Refrigerate for at least 1 hour (or up to overnight) to firm up. For quicker setting, freeze for 20-30 minutes.
- Garnish and serve: Before serving, top with whipped cream, a dusting of pumpkin pie spice, or other optional garnishes. Serve cold.
Notes
For best results, use full-fat cream cheese and 100% pure pumpkin puree (not pumpkin pie filling). Chilling the filling before rolling makes it easier to handle. These bites taste even better the next day as flavors meld. For dairy-free, use dairy-free cream cheese; for gluten-free, use gluten-free gingersnaps. Store in an airtight container in the refrigerator for up to 5 days or freeze for up to 3 months.
Nutrition
- Serving Size: 2 bites
- Calories: 180
- Sugar: 13
- Sodium: 160
- Fat: 11
- Saturated Fat: 6
- Carbohydrates: 19
- Fiber: 1
- Protein: 3
Keywords: no-bake pumpkin cheesecake bites, pumpkin cheesecake bites, no-bake dessert, pumpkin dessert, fall dessert, easy dessert, party dessert


