The woman at the craft store checkout watched me load my basket with black food coloring, orange sprinkles, and a bag of shiny candy eyes. She didn’t say anything at first. Just gave me this knowing little smile. Then she leaned forward and said, “You’re making those cupcakes, aren’t you? The ones that look all dark and dramatic?” I laughed and admitted I was attempting black velvet cupcakes for the first time. She nodded like she’d seen a hundred people before me with the same slightly panicked look. “Just remember,” she said, tapping the counter, “the color comes together in the oven. Trust the batter.”
That conversation stuck with me. Not because it was profound exactly, but because it reminded me that cooking and baking are really just a series of small exchanges. Someone shares a tip. You try it. Maybe it works, maybe it doesn’t. But eventually, you figure out your own way. These quick black velvet Halloween cupcakes became my way. I wanted something that looked spooky and impressive but didn’t take all night. Something I could whip up on a Tuesday after work when the kids suddenly announced they needed treats for the school party the next morning. You know that feeling when you’re staring at your pantry and praying for a miracle?
Honestly, my first batch was a mess. The batter looked more gray than black, and I may have overmixed it in a panic. But I kept tweaking and testing until I got it right. Now this recipe is my go-to for Halloween, birthday parties, or any time I need a little drama on a dessert plate. The cream cheese frosting is the real star though. It’s tangy and smooth, and that white against the dark cake is just gorgeous. Let me tell you, there’s something deeply satisfying about pulling a tray of these out of the oven. They look like little edible works of art.
Why You’ll Love This Recipe
I tested this recipe on a Wednesday night after a long day of work. I was tired, the kitchen was messy, and I honestly didn’t have high hopes. But these cupcakes came together in under 20 minutes of active prep time. That’s the kind of weeknight magic we all need.
- Quick & Easy: From start to finish, you’re looking at about 35 minutes. Mix the batter, bake, cool, frost. No complicated techniques or fancy equipment required.
- Simple Ingredients: You probably have most of these in your pantry already. Cocoa powder, flour, sugar, eggs, oil. The only special thing is the black food coloring, and you can find that at any grocery store.
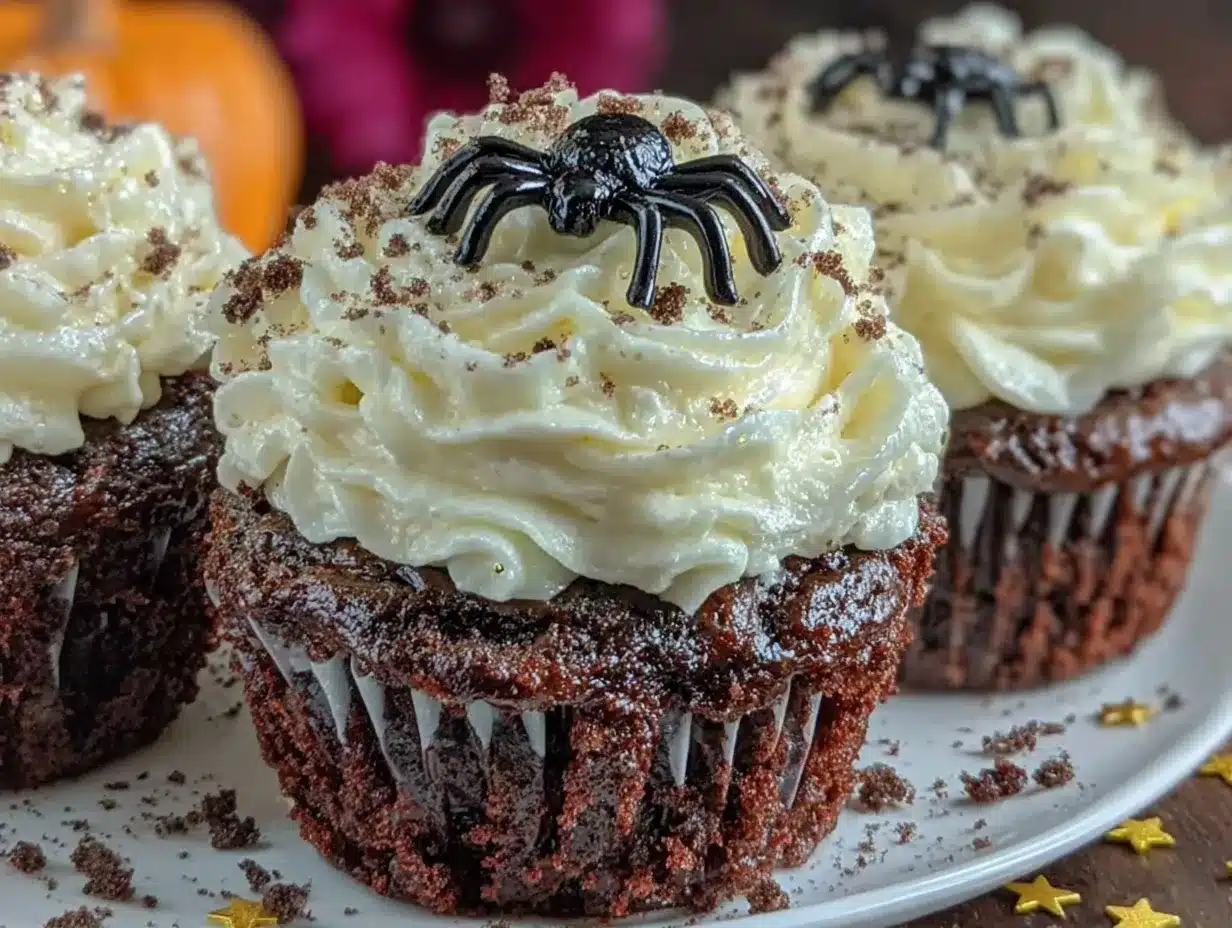
- Perfect for Halloween: These cupcakes look incredible on a dessert table. The dark velvet crumb with bright white frosting creates that classic spooky contrast. Add some candy spiders or orange sprinkles, and you’ve got a showstopper.
- Crowd-Pleaser: I brought these to a neighborhood potluck last October, and they disappeared faster than the store-bought cookies. Kids love the color, adults love the flavor. It’s a win-win.
- Unbelievably Delicious: The cake is moist and tender with a hint of cocoa. The cream cheese frosting is tangy and not too sweet. Together, they’re pure comfort food.
What makes this recipe different from other black velvet cupcakes? For one thing, I use a combination of cocoa powder and black food coloring to get that deep, dark color without any weird aftertaste. Some recipes rely entirely on food coloring, and you can taste it. Not here. The cream cheese frosting is also perfectly balanced. I’ve tried versions that were too sweet or too runny. This one holds its shape and tastes amazing.
This recipe isn’t just good. It’s the kind that makes you close your eyes after the first bite. It’s comfort food reimagined for the spooky season. Faster, simpler, but with the same soul-soothing satisfaction. Perfect for impressing guests without stress, or turning a regular weeknight into something memorable.
What Ingredients You Will Need
This recipe uses simple, everyday ingredients to create something truly special. Most of these are pantry staples, which makes this recipe perfect for those last-minute baking emergencies.
For the Cupcakes
- All-purpose flour, 1 ½ cups (190g) – gives the cupcakes structure. I use Gold Medal or King Arthur for consistent results.
- Granulated sugar, 1 cup (200g) – adds sweetness and helps with browning.
- Unsweetened cocoa powder, ¼ cup (20g) – use a good quality brand like Hershey’s or Ghirardelli. This gives the cupcakes their subtle chocolate flavor.
- Baking soda, 1 teaspoon – helps the cupcakes rise and creates a tender crumb.
- Salt, ½ teaspoon – balances the sweetness and enhances the cocoa flavor.
- Vegetable oil, ½ cup (120ml) – keeps the cupcakes moist. Canola or any neutral oil works fine.
- Buttermilk, ½ cup (120ml) – adds tanginess and reacts with the baking soda for a light texture. If you don’t have buttermilk, add 1 tablespoon of lemon juice or vinegar to regular milk and let it sit for 5 minutes.
- Eggs, 2 large, room temperature – binds everything together. Bring them to room temperature quickly by placing them in a bowl of warm water for 5 minutes.
- White vinegar, 1 teaspoon – this is the secret ingredient. It reacts with the baking soda to make the cupcakes extra fluffy.
- Vanilla extract, 1 teaspoon – adds warmth and depth of flavor.
- Black gel food coloring, 2-3 teaspoons – I recommend Americolor or Wilton brand. Liquid food coloring won’t give you the same deep black color. Start with 2 teaspoons and add more if needed.
For the Cream Cheese Frosting
- Cream cheese, 8 oz (226g), softened – use full-fat cream cheese for the best texture and flavor. Philadelphia is my go-to brand.
- Unsalted butter, ½ cup (113g), softened – adds stability and richness to the frosting.
- Powdered sugar, 3 cups (360g) – sift it first to avoid lumps.
- Vanilla extract, 1 teaspoon – enhances the flavor.
- Pinch of salt – balances the sweetness.
For Decoration (Optional)
- Orange sprinkles – for a pop of Halloween color.
- Candy eyeballs – these are always a hit with kids.
- Chocolate spiders – easy to make with melted chocolate and a piping bag.
- Black and orange sanding sugar – adds sparkle and crunch.
Equipment Needed
You don’t need a professional bakery setup for these cupcakes. Here’s what you’ll need:
- Muffin tin – a standard 12-cup muffin tin works perfectly. I’ve had good luck with both non-stick and metal tins.
- Paper cupcake liners – use black or orange ones for extra Halloween flair. Or go with white for maximum contrast against the dark cake.
- Mixing bowls – one large bowl for dry ingredients, one medium for wet ingredients.
- Whisk – for mixing dry ingredients.
- Electric hand mixer or stand mixer – for the frosting. You can do it by hand with a whisk and some elbow grease, but it takes longer.
- Rubber spatula – for scraping down the bowl and folding ingredients.
- Cooling rack – essential for letting the cupcakes cool completely before frosting.
- Piping bag with star tip – for that bakery-style frosting look. If you don’t have one, a zip-top bag with the corner snipped off works fine.
- Measuring cups and spoons – accuracy matters in baking.
- Kitchen scale (optional) – for the most precise measurements.
If you’re using a new muffin tin for the first time, I recommend greasing the cups lightly even with paper liners. Some non-stick coatings can be tricky. And don’t forget to let your cream cheese and butter soften on the counter for about 30 minutes before you start. Cold ingredients make lumpy frosting.
Preparation Method
Let me walk you through this step by step. I’ve made these cupcakes more times than I can count, so I’ve picked up a few tricks along the way.
Step 1: Preheat and Prep
Preheat your oven to 350°F (175°C). Line your muffin tin with 12 paper liners. This is a small thing, but it makes a big difference. Set the liners in place before you start mixing so you’re not scrambling later.
Step 2: Mix Dry Ingredients
In a large bowl, whisk together the flour, sugar, cocoa powder, baking soda, and salt. Make sure there are no lumps of cocoa powder. I’ve learned this the hard way. Spend an extra 30 seconds whisking to get it smooth.
Step 3: Combine Wet Ingredients
In a separate medium bowl, whisk together the oil, buttermilk, eggs, vinegar, and vanilla extract. Whisk until everything is well combined and slightly frothy. This should take about a minute.
Step 4: Add Food Coloring
Add 2 teaspoons of black gel food coloring to the wet ingredients and whisk until it’s fully incorporated. The mixture will look dark and slightly eerie. That’s exactly what you want. If you want an even darker color, add another teaspoon now.
Step 5: Combine Wet and Dry
Pour the wet ingredients into the dry ingredients. Use a rubber spatula to fold everything together gently. Mix just until you no longer see streaks of flour. Do not overmix. Overmixing develops gluten and makes the cupcakes tough. A few small lumps are perfectly fine.
Step 6: Fill the Liners
Divide the batter evenly among the 12 liners. I use a cookie scoop for this. Fill each liner about ⅔ full. The batter will be thin, which is normal. Don’t worry if it looks like it’s not holding together. It will in the oven.
Step 7: Bake
Bake for 15 to 18 minutes. Start checking at 15 minutes. Insert a toothpick into the center of a cupcake. If it comes out clean or with a few moist crumbs, they’re done. If it’s wet with batter, give them another 2 minutes. The tops should spring back when lightly touched.
Step 8: Cool
Let the cupcakes cool in the pan for 5 minutes. Then transfer them to a wire rack to cool completely. This is crucial. If you frost them while they’re still warm, the frosting will melt into a sad puddle. I’ve made that mistake. Trust me, patience pays off here.
Step 9: Make the Frosting
While the cupcakes are cooling, make the cream cheese frosting. In a large bowl, beat the softened cream cheese and butter together with an electric mixer until smooth and creamy. This takes about 2 minutes on medium speed. Scrape down the sides of the bowl with a spatula.
Add the powdered sugar one cup at a time, beating on low speed after each addition. Once all the sugar is incorporated, add the vanilla and salt. Increase the speed to medium-high and beat for 2 to 3 minutes until the frosting is light, fluffy, and spreadable. Don’t overbeat, or the frosting can become too soft.
Step 10: Frost and Decorate
Once the cupcakes are completely cool, it’s time to frost. Spoon the frosting into a piping bag fitted with a star tip. Pipe a generous swirl onto each cupcake. Or simply spread the frosting with a knife if you prefer a more rustic look. Add sprinkles, candy eyes, or any other decorations right away before the frosting sets.
Cooking Tips & Techniques
I’ve messed up enough batches to know what works and what doesn’t. Here are my best tips for perfect black velvet cupcakes every time.
Use gel food coloring, not liquid. Liquid food coloring will make your batter too thin and won’t give you that deep black color. Gel coloring is concentrated and gives you a rich, dark hue with just a few teaspoons. I learned this after making a batch of gray cupcakes that looked more like storm clouds than velvet.
Don’t overmix the batter. I know it’s tempting to keep stirring until it’s perfectly smooth, but stop as soon as the flour disappears. Overmixing makes the cupcakes dense and rubbery. A few tiny lumps are fine.
Room temperature ingredients matter. Cold eggs and cold buttermilk won’t emulsify properly with the oil. Take them out of the fridge 30 minutes before you start. If you’re in a hurry, place the eggs in a bowl of warm water for 5 minutes.
Check your oven temperature. Ovens can be off by 25 degrees or more. I use an oven thermometer to make sure I’m baking at the right temperature. It’s a cheap tool that saves a lot of heartache.
Let the cupcakes cool completely. I cannot stress this enough. Warm cupcakes + cream cheese frosting = melted disaster. Give them at least 30 minutes on a cooling rack. If you’re really in a rush, pop them in the fridge for 15 minutes.
Make the frosting ahead of time. You can make the cream cheese frosting up to 3 days in advance. Store it in an airtight container in the fridge. Let it come to room temperature and give it a quick whip before using.
Use a cookie scoop for even batter. This ensures all your cupcakes are the same size and bake evenly. No more tiny cupcakes or overflowing ones.
Variations & Adaptations
One of the best things about this recipe is how flexible it is. Here are some ways to make it your own.
Gluten-Free Version: Substitute the all-purpose flour with a 1:1 gluten-free baking flour blend. I’ve used Bob’s Red Mill with great results. The texture will be slightly denser, but still delicious. Add an extra tablespoon of buttermilk to help with moisture.
Dairy-Free Version: Use a dairy-free cream cheese alternative like Kite Hill or Tofutti. Replace the butter in the frosting with a plant-based butter stick (not margarine from a tub). Use almond milk with a tablespoon of lemon juice instead of buttermilk.
Spicy Pumpkin Variation: For a fall twist, replace the buttermilk with ½ cup of pumpkin puree mixed with 2 tablespoons of milk. Add 1 teaspoon of pumpkin pie spice to the dry ingredients. The pumpkin adds moisture and a subtle earthy sweetness that pairs beautifully with the cocoa.
Mint Chocolate Version: Add ½ teaspoon of peppermint extract to the batter along with the vanilla. For the frosting, mix in ¼ teaspoon of peppermint extract. Top with crushed candy canes or chocolate shavings. This is perfect for Christmas or winter parties.
Mini Cupcakes: Use a mini muffin tin and reduce the baking time to 8-10 minutes. These are perfect for parties or school events. You’ll get about 36 mini cupcakes from this recipe.
Cake Version: Pour the batter into two 8-inch round cake pans greased and floured. Bake for 20-25 minutes. Double the frosting recipe for a layered cake. This makes an impressive Halloween birthday cake.
Serving & Storage Suggestions
These cupcakes are best served at room temperature. The cake is soft and tender, and the frosting is perfectly creamy. If you’ve refrigerated them, let them sit on the counter for 15 minutes before serving.
For a Halloween party, arrange the cupcakes on a black platter or cake stand. Add some fake cobwebs around the base for a spooky effect. You can also place a few candy pumpkins or plastic spiders on the plate for extra flair.
These cupcakes pair beautifully with a cold glass of milk or a warm cup of coffee. For an adult gathering, try them with a dark stout beer or a glass of red wine. The bitterness of the stout complements the chocolate notes in the cake.
Storage: Store frosted cupcakes in an airtight container in the refrigerator for up to 5 days. The cream cheese frosting needs to be kept cold. Let them come to room temperature before eating for the best texture.
Freezing: You can freeze unfrosted cupcakes for up to 3 months. Wrap each one tightly in plastic wrap, then place them in a freezer bag. Thaw at room temperature for about an hour before frosting. Frosted cupcakes can also be frozen, but the texture of the cream cheese frosting may change slightly.
Make-Ahead Tip: Bake the cupcakes and make the frosting up to 2 days ahead. Store the cupcakes in an airtight container at room temperature and the frosting in the fridge. Frost them the day you plan to serve. This makes party prep so much easier.
Nutritional Information & Benefits
I’m not a nutritionist, but I do pay attention to what goes into my food. Here’s a rough estimate per cupcake (based on 12 servings):
| Nutrient | Amount |
|---|---|
| Calories | 380 |
| Total Fat | 22g |
| Saturated Fat | 10g |
| Cholesterol | 65mg |
| Sodium | 280mg |
| Total Carbohydrates | 44g |
| Dietary Fiber | 1g |
| Sugars | 34g |
| Protein | 4g |
The cocoa powder in these cupcakes is actually good for you. It’s rich in antioxidants called flavonoids that can help reduce inflammation and improve heart health. Cream cheese provides calcium and a small amount of protein. Of course, these are still a treat, not a health food. But it’s nice to know there’s a little something beneficial in there.
For anyone watching their sugar intake, you can reduce the sugar in the frosting by using 2 ½ cups of powdered sugar instead of 3. The frosting will be slightly less sweet but still delicious. If you have dietary concerns, always check with your healthcare provider.
Conclusion
These quick black velvet Halloween cupcakes have become a tradition in my house. They’re the recipe I turn to when I need something impressive without the stress. The dark, dramatic cake against the bright white cream cheese frosting is just stunning. And the flavor? Moist, tender, with just a hint of cocoa. It’s everything you want in a cupcake.
I love that this recipe is forgiving enough for beginners but impressive enough for experienced bakers. You can dress them up with fancy decorations or keep them simple. They work for Halloween parties, birthday celebrations, or just because you want something special on a Tuesday night.
Try these cupcakes and make them your own. Add your favorite sprinkles. Experiment with different frosting flavors. Swap the decorations to match any holiday. That’s the beauty of a good base recipe. It’s a starting point for your own creativity.
I’d love to hear how yours turn out. Drop a comment below and let me know what decorations you used or if you tried any variations. Share a photo of your cupcakes on Pinterest and tag me. Happy baking, and have a spooktacular Halloween!
Frequently Asked Questions
Can I use liquid food coloring instead of gel?
You can, but the color won’t be as dark. Liquid food coloring is more diluted, so you’d need a lot more to achieve a black color. This can make the batter too thin and affect the texture. Gel food coloring gives you a richer color with less liquid.
Why did my cupcakes turn out gray instead of black?
This usually happens when you don’t use enough food coloring or when you use liquid coloring instead of gel. Make sure you’re using at least 2 teaspoons of black gel food coloring. Also, the cocoa powder in the batter helps deepen the color, so don’t skip it.
Can I make these cupcakes without an electric mixer?
Absolutely. You can mix the batter by hand with a whisk. The frosting will require some elbow grease, but it’s doable. Just beat the cream cheese and butter together until smooth, then gradually add the powdered sugar. It might take a few extra minutes, but it will work.
How do I get my cream cheese frosting to be thick and not runny?
Make sure your cream cheese and butter are softened but not melted. If they’re too warm, the frosting will be runny. Also, use full-fat cream cheese, not the reduced-fat version. If your frosting is still too soft, refrigerate it for 15-20 minutes before piping.
Can I use this recipe for a layer cake?
Yes! This recipe makes enough batter for two 8-inch round cake layers. Bake for 20-25 minutes at 350°F. You’ll need to double the frosting recipe for a two-layer cake. The black velvet cake with white cream cheese frosting looks incredible as a layer cake.
PrintQuick Black Velvet Cupcakes with Easy Cream Cheese Frosting
These quick black velvet Halloween cupcakes are moist, tender, and deeply dark, topped with a tangy cream cheese frosting. Perfect for spooky celebrations or any time you need a dramatic dessert.
- Prep Time: 20 minutes
- Cook Time: 15-18 minutes
- Total Time: 35 minutes
- Yield: 12 cupcakes 1x
- Category: Dessert
- Cuisine: American
Ingredients
- 1 ½ cups (190g) all-purpose flour
- 1 cup (200g) granulated sugar
- ¼ cup (20g) unsweetened cocoa powder
- 1 teaspoon baking soda
- ½ teaspoon salt
- ½ cup (120ml) vegetable oil
- ½ cup (120ml) buttermilk
- 2 large eggs, room temperature
- 1 teaspoon white vinegar
- 1 teaspoon vanilla extract
- 2–3 teaspoons black gel food coloring
- 8 oz (226g) cream cheese, softened
- ½ cup (113g) unsalted butter, softened
- 3 cups (360g) powdered sugar, sifted
- 1 teaspoon vanilla extract
- Pinch of salt
- Orange sprinkles (optional)
- Candy eyeballs (optional)
- Chocolate spiders (optional)
- Black and orange sanding sugar (optional)
Instructions
- Preheat oven to 350°F (175°C). Line a 12-cup muffin tin with paper liners.
- In a large bowl, whisk together flour, sugar, cocoa powder, baking soda, and salt until no lumps remain.
- In a separate medium bowl, whisk together oil, buttermilk, eggs, vinegar, and vanilla extract until well combined and slightly frothy.
- Add 2 teaspoons of black gel food coloring to the wet ingredients and whisk until fully incorporated. Add more if desired for a darker color.
- Pour the wet ingredients into the dry ingredients. Fold gently with a rubber spatula until just combined. Do not overmix; a few small lumps are fine.
- Divide the batter evenly among the 12 liners, filling each about ⅔ full.
- Bake for 15-18 minutes, until a toothpick inserted into the center comes out clean or with a few moist crumbs. Cool in the pan for 5 minutes, then transfer to a wire rack to cool completely.
- While cupcakes cool, make the frosting: In a large bowl, beat softened cream cheese and butter with an electric mixer until smooth and creamy, about 2 minutes on medium speed.
- Add powdered sugar one cup at a time, beating on low speed after each addition. Add vanilla and salt, then beat on medium-high for 2-3 minutes until light and fluffy.
- Once cupcakes are completely cool, frost with a piping bag fitted with a star tip or spread with a knife. Decorate with sprinkles, candy eyes, or other decorations immediately.
Notes
Use gel food coloring, not liquid, for a deep black color. Do not overmix the batter. Ensure all ingredients are at room temperature for best results. Let cupcakes cool completely before frosting to prevent melting. Frosting can be made up to 3 days ahead and stored in the fridge.
Nutrition
- Serving Size: 1 cupcake
- Calories: 380
- Sugar: 34
- Sodium: 280
- Fat: 22
- Saturated Fat: 10
- Carbohydrates: 44
- Fiber: 1
- Protein: 4
Keywords: black velvet cupcakes, Halloween cupcakes, cream cheese frosting, easy cupcakes, black food coloring, spooky desserts


