There used to be a tiny café on the corner of Elm and 4th called The Gilded Spoon that made the most beautiful fruit platters I have ever seen. When they closed suddenly three years ago — the owner moved back to Portugal to care for her mother — I felt a genuine pang of loss. Their signature platter wasn’t just fruit cut up on a plate. It was art. Every single time, it looked like something from a magazine spread, but it tasted like real, honest fruit at its peak. After maybe ten tries — and some truly lopsided watermelon disasters — I finally got it. This pumpkin-shaped fruit platter is my tribute to that café and the woman who taught me that food can be beautiful without being fussy. Honestly, it takes fifteen minutes flat, and you don’t need a single special tool. Let me tell you, the first time I made this for my niece’s Halloween party, she thought it was magic. And maybe it is, a little.
You know that feeling when you want to bring something impressive to a gathering but you’re already running late? I mean, we’ve all been there. This platter is the answer. It looks like you spent an hour carving a pumpkin, but really, you just arranged fruit in a clever pattern. The secret is all in the shape — a round base, a stem on top, and a few strategic slices. I’ve brought this to potlucks, birthday parties, and even a casual Tuesday night dinner where I just wanted to make the kids smile. It never fails to get a reaction. And the best part? You can use whatever fruit you have on hand. No fancy grocery trips needed.
This recipe stayed with me because it proves that you don’t need to be a professional chef to make something beautiful. It’s about seeing the potential in simple ingredients and taking a few extra seconds to arrange them with care. Maybe you’ve been there — staring at a pile of fruit, wondering how to make it look special without spending hours. This is your answer. Let’s make some fruit magic.
Why You’ll Love This Recipe
This isn’t just another fruit platter. After testing this method for two different Halloween parties and a fall-themed brunch, I can tell you exactly why this one works. I’ve tweaked the arrangement, tested different fruit combinations, and even had my neighbor — a former pastry chef — weigh in on the best way to get that perfect pumpkin shape. Here is why this platter stands out:
- Quick & Easy: This comes together in under 15 minutes, making it perfect for last-minute gatherings, busy weeknights, or when you need a healthy snack fast. No carving required.
- Simple Ingredients: You likely already have everything you need in your kitchen. Any round fruit for the base, a banana or apple slice for the stem, and some green grapes or kiwi for the leaves.
- Perfect for Fall Gatherings: Great for Halloween parties, Thanksgiving appetizers, fall potlucks, or even a fun after-school snack for the kids.
- Crowd-Pleaser: Kids love the shape, adults appreciate the creativity, and everyone enjoys the fresh fruit. It always gets rave reviews.
- Unbelievably Delicious: The combination of sweet and tart fruits, arranged in a fun shape, makes healthy eating feel like a treat. It’s next-level snack time.
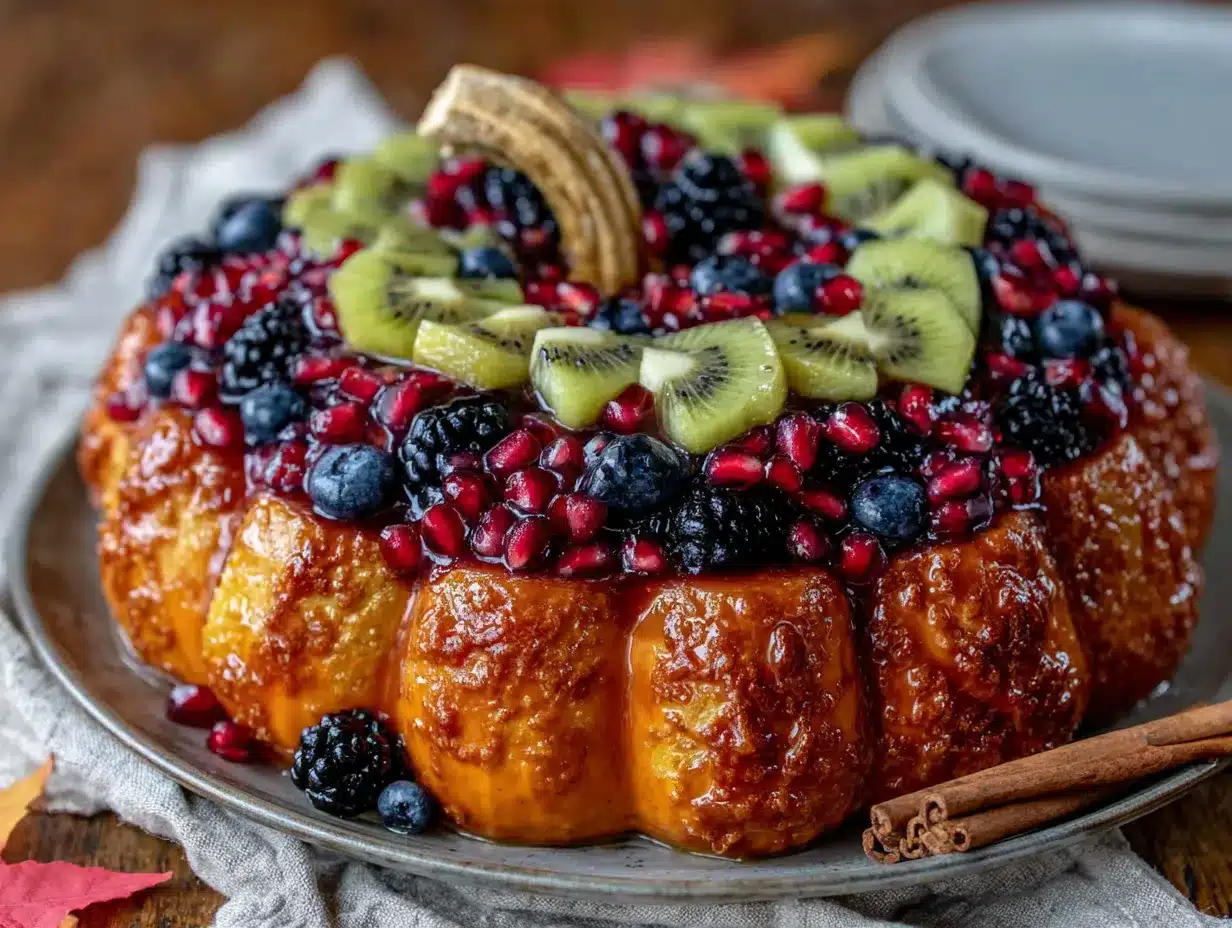
What makes this recipe different from every other fruit platter out there is the technique. It’s not about precise cuts or expensive tools. It’s about using the natural roundness of fruits like cantaloupe or honeydew as your canvas. The “pumpkin” shape comes from a simple arrangement — a round base, a few wedges to create the ridges, and a clever stem. This isn’t just another version of a fruit platter. It is my best version, tested and perfected so you can nail it on your first try.
This platter is the kind that makes you close your eyes after the first bite. It’s healthy eating reimagined — faster, simpler, but with the same wow factor as something that took an hour. Perfect for impressing guests without stress, or turning a simple snack into something memorable for your family.
What Ingredients You Will Need
This recipe uses simple, whole fruits to create a vibrant and fun presentation. The beauty of this platter is its flexibility — you can use whatever fruit you have on hand, as long as you have a round base fruit to create the pumpkin shape. Here is what you will need:
For the Pumpkin Base
- 1 large cantaloupe or honeydew melon (or a large orange or small pumpkin-shaped squash, if you want an edible bowl) — this forms the round base of your pumpkin. Look for one that is firm and evenly round for the best shape.
- 1 banana (for the stem, or use a slice of apple or pear) — the banana stem adds a natural, realistic touch.
For the Pumpkin “Ridges” and Filling
- 1 cup orange segments (from about 2-3 oranges, or use canned mandarin oranges, drained) — these create the classic pumpkin color and add a sweet, citrusy pop.
- 1 cup pineapple chunks (fresh or canned, drained) — adds a tropical sweetness and a different texture.
- 1 cup green grapes (for leaves and contrast) — the green color mimics pumpkin leaves beautifully.
- 1/2 cup blueberries or blackberries (for the pumpkin “face” or eyes, optional) — adds a fun, spooky touch for Halloween.
- 1/2 cup strawberries, sliced (optional, for extra color) — adds a pop of red and a juicy sweetness.
For Decoration (Optional but Fun)
- Fresh mint leaves (for a pop of green and a fresh scent) — makes the platter look professional.
- Pomegranate seeds (for a jewel-like finish) — adds a tart crunch and beautiful color.
- Edible flowers (for a fancy touch) — perfect for a special occasion.
Ingredient Selection Tips: I recommend using a cantaloupe from a local farmer’s market if you can — they tend to be sweeter and more fragrant. For the oranges, look for navel oranges in season for the best flavor. If you are making this for a Halloween party, use a small, round pumpkin or butternut squash as the bowl itself — just scoop out the inside and fill it with fruit! It’s a showstopper.
Substitution Guidance: Feel free to swap in any fruit you have on hand. Use apple slices instead of pineapple, or mango chunks instead of oranges. For a low-sugar option, use a mix of berries and cucumber slices. For a tropical twist, add kiwi slices and papaya chunks. The key is to have a variety of colors and textures to create the pumpkin look.
Equipment Needed
You don’t need any fancy gadgets for this recipe. Here is what you will need:
- A large round platter or cutting board (at least 12 inches in diameter) — a wooden board or a white platter works best to show off the colors.
- A sharp chef’s knife — for cutting the melon and other fruit. A good knife makes all the difference.
- A small paring knife — for detailed cuts, like shaping the stem or making the pumpkin face.
- A melon baller (optional) — great for scooping out perfect spheres from the melon, but not necessary.
- A cutting board — a large, sturdy board for prepping the fruit.
- Paper towels — to pat the fruit dry so it doesn’t slide around on the platter.
Personal Experience: I’ve made this platter with just a butter knife before, and honestly, it was a mess. A sharp chef’s knife is non-negotiable for clean cuts. If you don’t have a melon baller, just cut the melon into cubes or wedges — it works just fine. I also love using a slate board for a rustic fall look. It photographs beautifully for Pinterest.
Budget-Friendly Options: Don’t have a large platter? Use a baking sheet lined with parchment paper or a large pizza pan. It works like a charm and is easy to clean.
Preparation Method
Follow these steps to create your pumpkin-shaped fruit platter in just 15 minutes. I’ve included time estimates and sensory cues so you know exactly what to look for at each stage.
- Prepare the Base (3 minutes): Wash and dry your cantaloupe or honeydew melon. Using a sharp chef’s knife, carefully cut the melon in half horizontally (through the equator, not from top to bottom). Scoop out the seeds and discard them. Place the melon cut-side down on your platter. It should sit flat and look like a round dome. Sensory cue: The melon should feel firm and heavy for its size, and it should smell sweet and fragrant at the cut surface.
- Create the Pumpkin Shape (3 minutes): Now, you will create the “ridges” of the pumpkin. Using a small paring knife, gently score vertical lines from the top of the melon dome down to the bottom, about 1 inch apart. Don’t cut too deep — just score the surface to create a visual guide. Then, using your knife, carefully cut shallow wedges between the scored lines to create the classic pumpkin ridges. Tip: If you are nervous about cutting, just use the scored lines as a guide and arrange orange segments along them instead.
- Add the Stem (2 minutes): Take your banana and cut off the top 2 inches, including the stem. This will be your pumpkin stem. If you are using an apple slice, cut a small rectangle about 2 inches long and 1/2 inch wide. Gently press the stem into the top center of the melon dome. If it doesn’t stay, use a toothpick to secure it. Sensory cue: The stem should look like a natural extension of the pumpkin — slightly curved and brown at the tip.
- Arrange the “Ridges” (4 minutes): Now, you will fill in the ridges with orange segments and pineapple chunks. Starting at the top of the melon, arrange the orange segments in a line following the scored ridges. Place the pineapple chunks between the orange segments to add texture and color. Work your way down the melon, covering the entire surface. Tip: Overlap the fruit slightly to create a seamless look. The orange segments should mimic the color of a real pumpkin.
- Add the Leaves and Details (2 minutes): Arrange the green grapes around the base of the stem to look like pumpkin leaves. You can also place a few grape “vines” by using long, thin slices of green apple or cucumber. If you are making a Halloween-themed platter, use blueberries or blackberries to create a spooky face — two triangles for eyes and a jagged line for a mouth. Sensory cue: The grapes should look fresh and plump, with a slight bloom on the skin.
- Fill the Platter (1 minute): Fill any empty spaces around the melon base with the remaining fruit — strawberries, blueberries, pomegranate seeds, or any other fruit you have. This creates a beautiful, abundant look. Tuck fresh mint leaves here and there for a pop of green and a fresh scent. Tip: Don’t overcrowd the platter. Leave a little negative space so the pumpkin shape stands out.
- Final Touches (1 minute): Step back and look at your platter. Adjust any fruit that looks out of place. Add a few extra mint leaves or pomegranate seeds for a finished look. Serve immediately or cover with plastic wrap and refrigerate until ready to serve. Warning: If you are making this ahead, don’t add the banana stem until just before serving — it will brown quickly.
Personal Efficiency Tip: I always prep all my fruit before I start arranging. It saves time and keeps the process smooth. Also, use a paper towel to pat the melon dry before you start — this helps the fruit stick better and prevents sliding.
Cooking Tips & Techniques
Over the years, I have learned a few tricks that make this platter come together perfectly every time. Here are my top tips:
- Choose the Right Melon: Look for a cantaloupe or honeydew that is perfectly round and symmetrical. An oval melon won’t look like a pumpkin. Give it a gentle press at the stem end — it should give slightly, indicating ripeness.
- Keep the Fruit Dry: Wet fruit will slide right off the melon. After washing, pat everything dry with paper towels. This is the number one mistake I see people make, and it ruins the presentation.
- Use a Template: If you are nervous about scoring the ridges, use a rubber band as a guide. Wrap a clean rubber band around the melon vertically, then use it as a guide to score the lines. Remove the rubber band and you have perfect, even ridges.
- Don’t Overthink the Face: If you are making a Halloween version, keep the face simple. Two triangles for eyes and a zigzag mouth is all you need. I once tried to make a detailed face and ended up with a melon that looked confused. Simple is better.
- Timing is Everything: This platter is best served within an hour of making it. If you need to prep ahead, cut all the fruit and store it in separate containers in the fridge. Assemble just before serving. The banana stem will brown, so add it last.
- My Biggest Failure: The first time I made this, I used a very ripe cantaloupe that was too soft. It collapsed under the weight of the fruit and looked like a sad, lumpy blob. Learn from my mistake — use a firm, slightly under-ripe melon for the best structure.
Variations & Adaptations
This recipe is incredibly versatile. Here are some of my favorite variations:
- Halloween Spooky Platter: Use a small pumpkin or butternut squash as the bowl. Scoop out the inside and fill it with fruit. Use blackberries or dark grapes to create a spooky face on the melon. Add gummy worms crawling out of the “pumpkin” for a fun kids’ party touch.
- Thanksgiving Harvest Platter: Use a honeydew melon for a paler “pumpkin” look. Fill the ridges with pomegranate seeds, dried cranberries, and sliced apples. Add cinnamon sticks and star anise for a festive fall scent. Serve with a side of yogurt dip.
- Low-Carb/Keto Version: Skip the melon and use a large, round slice of watermelon as the base. Fill the “pumpkin” with berries, cucumber slices, and cheese cubes. Use a celery stick for the stem. This is perfect for a keto-friendly gathering.
- Tropical Summer Platter: Use a pineapple as the base (cut the top off and scoop out the inside). Fill with mango chunks, kiwi slices, papaya, and coconut flakes. Use a slice of starfruit for the stem. This is bright, sunny, and perfect for a summer party.
- Personal Variation I Love: For a fun twist, I sometimes make mini pumpkin platters using small oranges or apples as individual servings. Cut the top off a large orange, scoop out the flesh, and fill the hollowed orange with berries and grapes. Use a small piece of pretzel stick for the stem. These are perfect for kids’ lunchboxes.
Serving & Storage Suggestions
This platter is best served fresh, but here is how to handle it for different occasions:
- Serving Temperature: Serve chilled or at room temperature. If you have been storing it in the fridge, let it sit out for 10-15 minutes before serving to take the chill off. The flavors are more vibrant at room temperature.
- Presentation: Place the platter in the center of the table. Surround it with small bowls of yogurt dip, honey, or a sprinkle of cinnamon for dipping. For a brunch, serve it alongside a cheese board or pastries.
- Complementary Dishes: This platter pairs beautifully with a warm pumpkin spice latte, apple cider, or a crisp white wine for an adult gathering. For a kids’ party, serve it with fruit juice or sparkling water.
- Storage: If you have leftovers, cover the platter tightly with plastic wrap and store in the refrigerator for up to 24 hours. The melon base will stay firm, but the cut fruit may start to weep. Pat it dry before serving again.
- Reheating: This is a cold dish — no reheating needed! If the fruit has become too soft, just refresh it with a few new pieces of fruit before serving again.
- Flavor Development: The fruit flavors actually meld together beautifully after a few hours in the fridge. The orange and pineapple juices seep into the melon, creating a subtly sweet and tangy flavor. It’s even better the next day — if it lasts that long.
Nutritional Information & Benefits
This fruit platter is a powerhouse of vitamins and antioxidants. Here is a rough estimate per serving (based on 8 servings):
- Calories: Approximately 120-150 calories per serving
- Carbohydrates: 30-35g (natural sugars from fruit)
- Fiber: 4-5g
- Vitamin C: Over 100% of the daily recommended intake (thanks to the oranges and cantaloupe)
- Vitamin A: High amounts from the cantaloupe and mangoes
- Potassium: Good source from bananas and oranges
Health Benefits: Cantaloupe is rich in beta-carotene, which supports eye health and immune function. Oranges are packed with vitamin C, a powerful antioxidant. Berries provide flavonoids that support heart health. This platter is naturally gluten-free, dairy-free, and vegan — perfect for almost any dietary need. Allergen Note: This recipe is free from the top 9 allergens. However, if you are serving it to someone with a severe fruit allergy, be mindful of cross-contamination from other fruits.
Personal Wellness Perspective: I love that this platter makes healthy eating feel like a celebration. It’s proof that you don’t need processed snacks to create something fun and delicious. When my kids help me make this, they eat more fruit than they ever would from a bowl. It’s a win-win.
Conclusion
This quick pumpkin-shaped fruit platter is more than just a pretty snack. It is a reminder that you can create something beautiful and impressive in just 15 minutes, using simple ingredients you already have. It is perfect for busy weeknights, last-minute gatherings, or when you just want to make the kids smile. I love this recipe because it brings people together — there is something about the pumpkin shape that makes everyone grin. I encourage you to make this your own. Use your favorite fruits, experiment with different shapes, and don’t be afraid to get a little creative. Maybe add a face, or some edible flowers, or a sprinkle of cinnamon. The possibilities are endless.
I would love to hear how your pumpkin platter turns out! Leave a comment below and tell me what fruit combination you used. Did you make it for Halloween or a fall dinner? Share a photo on Pinterest and tag me — I can’t wait to see your creations. Remember, cooking doesn’t have to be complicated to be wonderful. Sometimes, the simplest things bring the most joy. Now go make some fruit magic!
Frequently Asked Questions
Can I make this platter the night before a party?
Yes, you can prep the fruit the night before and store it in separate containers in the fridge. Assemble the platter no more than 2-3 hours before serving for the best presentation. The melon base will stay firm, but the cut fruit may start to release juices if left too long.
What is the best fruit to use for the pumpkin stem?
A banana stem is my top choice because it looks the most realistic. If you don’t have a banana, use a slice of green apple, a piece of celery, or even a small pretzel stick. Just make sure it is sturdy enough to stand upright.
How do I keep the fruit from sliding off the melon?
Pat the melon and all the fruit completely dry with paper towels before assembling. Wet fruit will slide right off. You can also use a little bit of honey or agave syrup as “glue” to help the fruit stick to the melon, but it’s not necessary if the fruit is dry.
Can I use a different fruit as the base instead of melon?
Absolutely! A large, round orange or a small pumpkin-shaped squash works beautifully. If using a squash, bake it first until tender, then scoop out the inside and fill it with fruit. For a fun twist, use a hollowed-out pineapple for a tropical version.
Is this recipe suitable for a classroom or school party?
Yes, this is a great nut-free, healthy option for school parties. Just be sure to check for any fruit allergies in the class. You can also make mini versions using individual oranges or apples for each child — they are easy to handle and less messy.
Pin This Recipe!
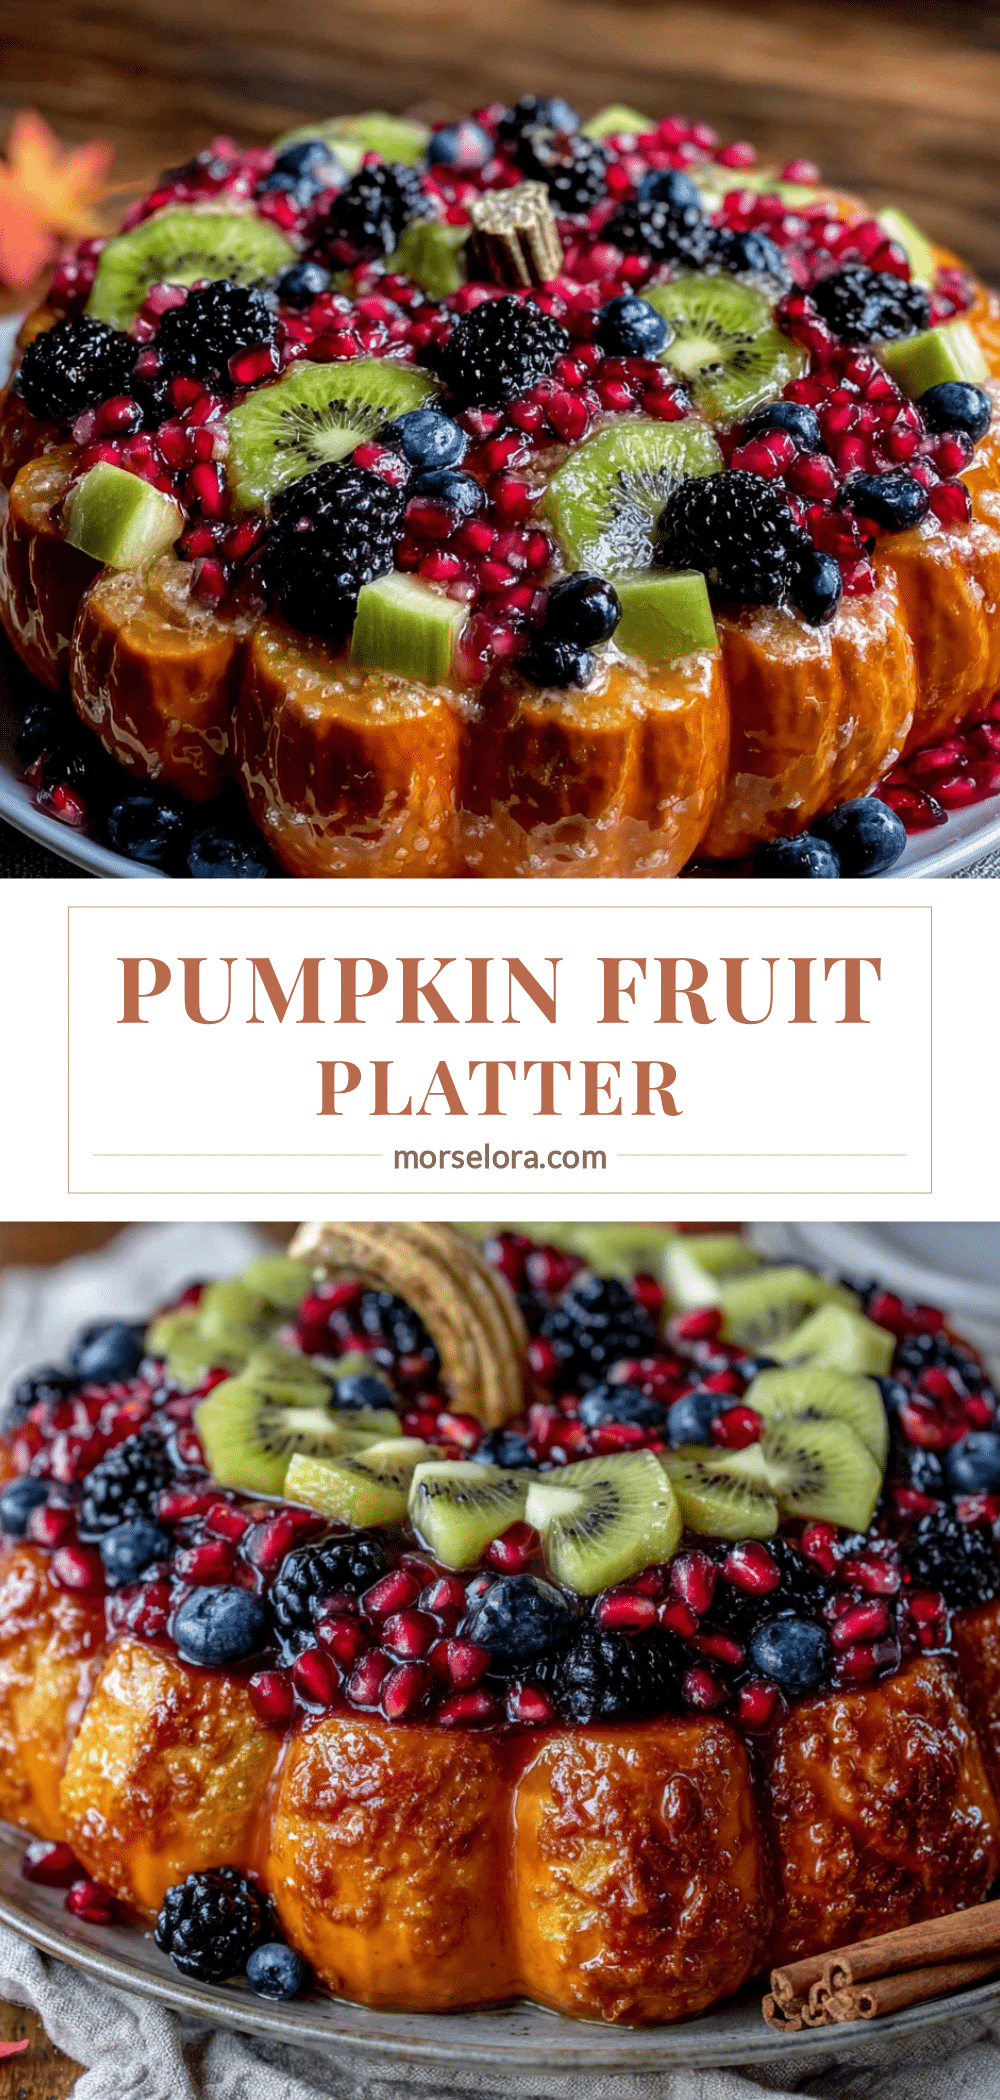
Quick Pumpkin-Shaped Fruit Platter: Easy 15-Minute Snack
This quick pumpkin-shaped fruit platter is a beautiful and impressive snack that comes together in just 15 minutes using simple ingredients. Perfect for fall gatherings, Halloween parties, or a fun after-school snack, it’s a crowd-pleaser that makes healthy eating feel like a treat.
- Prep Time: 15 minutes
- Cook Time: 0 minutes
- Total Time: 15 minutes
- Yield: 8 servings 1x
- Category: Appetizer
- Cuisine: American
Ingredients
- 1 large cantaloupe or honeydew melon (or a large orange or small pumpkin-shaped squash)
- 1 banana (for the stem, or use a slice of apple or pear)
- 1 cup orange segments (from about 2–3 oranges, or use canned mandarin oranges, drained)
- 1 cup pineapple chunks (fresh or canned, drained)
- 1 cup green grapes (for leaves and contrast)
- 1/2 cup blueberries or blackberries (for the pumpkin face, optional)
- 1/2 cup strawberries, sliced (optional, for extra color)
- Fresh mint leaves (for decoration, optional)
- Pomegranate seeds (for decoration, optional)
- Edible flowers (for decoration, optional)
Instructions
- Prepare the Base (3 minutes): Wash and dry your cantaloupe or honeydew melon. Using a sharp chef’s knife, carefully cut the melon in half horizontally (through the equator, not from top to bottom). Scoop out the seeds and discard them. Place the melon cut-side down on your platter. It should sit flat and look like a round dome.
- Create the Pumpkin Shape (3 minutes): Using a small paring knife, gently score vertical lines from the top of the melon dome down to the bottom, about 1 inch apart. Don’t cut too deep — just score the surface to create a visual guide. Then, using your knife, carefully cut shallow wedges between the scored lines to create the classic pumpkin ridges.
- Add the Stem (2 minutes): Take your banana and cut off the top 2 inches, including the stem. This will be your pumpkin stem. If you are using an apple slice, cut a small rectangle about 2 inches long and 1/2 inch wide. Gently press the stem into the top center of the melon dome. If it doesn’t stay, use a toothpick to secure it.
- Arrange the Ridges (4 minutes): Starting at the top of the melon, arrange the orange segments in a line following the scored ridges. Place the pineapple chunks between the orange segments to add texture and color. Work your way down the melon, covering the entire surface. Overlap the fruit slightly to create a seamless look.
- Add the Leaves and Details (2 minutes): Arrange the green grapes around the base of the stem to look like pumpkin leaves. You can also place a few grape vines by using long, thin slices of green apple or cucumber. If you are making a Halloween-themed platter, use blueberries or blackberries to create a spooky face — two triangles for eyes and a jagged line for a mouth.
- Fill the Platter (1 minute): Fill any empty spaces around the melon base with the remaining fruit — strawberries, blueberries, pomegranate seeds, or any other fruit you have. Tuck fresh mint leaves here and there for a pop of green and a fresh scent.
- Final Touches (1 minute): Step back and look at your platter. Adjust any fruit that looks out of place. Add a few extra mint leaves or pomegranate seeds for a finished look. Serve immediately or cover with plastic wrap and refrigerate until ready to serve. If making ahead, add the banana stem just before serving.
Notes
Choose a firm, slightly under-ripe melon for the best structure. Pat all fruit dry before assembling to prevent sliding. For a Halloween version, use blackberries to create a spooky face. The platter is best served within an hour of making; if prepping ahead, store cut fruit separately and assemble just before serving. The banana stem will brown, so add it last.
Nutrition
- Serving Size: 1 serving (about 1 c
- Calories: 135
- Sugar: 26
- Sodium: 20
- Fat: 0.5
- Carbohydrates: 33
- Fiber: 4.5
- Protein: 2
Keywords: pumpkin-shaped fruit platter, Halloween fruit platter, fall fruit platter, easy fruit platter, 15-minute snack, healthy snack, fruit art


